How to take backup of Amazon S3 cloud data?
Ensure all-time availability of AWS S3 data by creating backup of your S3 storage buckets with a professional tool. The cloud backup software provides a secure platform to connect your Amazon S3 account & save data to user defined location. Safeguard your data with the following steps:
Step 1: Download and install Recoveryfix Amazon S3 Backup tool on your system.
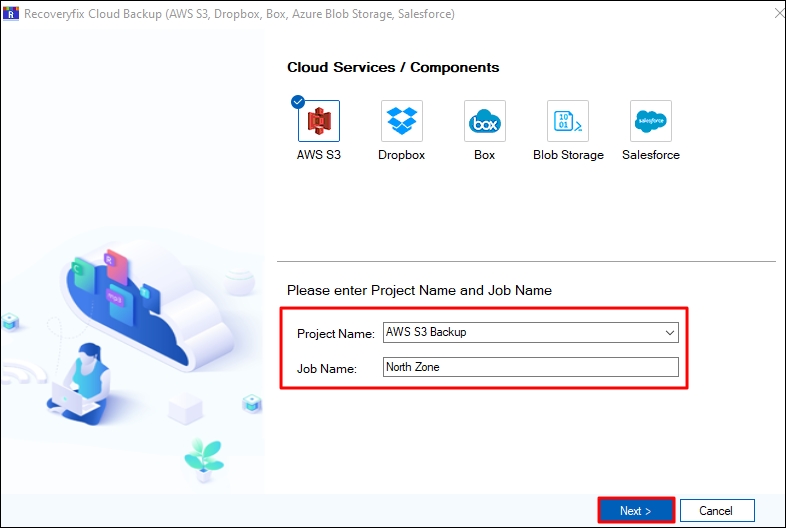
Step 2: Launch the tool and click on the Amazon S3 module from the home screen.

Step 3: Provide a Project Name or select an existing project from the dropdown, input a Job Name, and then click Next.
Step 4: Enter the AWS S3 connection details. Provide Access Key, Secret Key, and End Point of your AWS S3 account. Click Next to proceed with the backup

Step 5: The tool will ask “Do you want to save credential?”, click yes to save the login details. This skips the task of manually adding the login credentials every time.
Step 6: Buckets present in your Amazon S3 account will be displayed on the screen. Choose the buckets for backup and click Next to continue.

Step 7: The tool allows you to preview the content of the selected buckets. You can view the data stored within the AWS S3 buckets according to their original hierarchy. Expand the bucket and subfolders to preview the items stored within them on the right pane. Then click Next.

Step 8: After the bucket selection is done. Apply the various data filters in the tool to customize your Amazon S3 backup. After setting filters click Next and proceed further.
The filters provided in the tool include:
- Date filters: Allows you to define a date range. Only the files created between this defined date range will be saved.
- File filters: Allow to include or exclude a specific file type by providing file extensions.
- Operation timeout: Set an operation timeout to avoid freezing of process in the middle.
- Version filters: This filter lets you download either all versions of a file or include only the most recent versions.

Step 9: Click Browse and define a path from your system to save the backup file. Then, click Next.

Step 10: Choose Execute Immediate to initiate the backup instantly or select Schedule to run the process later.

Step 11: You can choose to Schedule the backup for daily, weekly, and monthly basis.

Step 12: Click on the Project name from the left pane to view the real-time progress of the data backup. The job Status for the current ongoing job will be marked as Running.

Step 13: Once the backup is completed, the job Status will change to Ready.

Step 14: You get multiple buttons for executing different operations. These are:
- Add Job: To add a new job to the list of jobs.
- Remove Job: To remove the selected job.
- Start Job: Will restart a completed job.
- Pause: Pause a job currently in a Running state.
- Stop Job: Stop any running job.
- Refresh: Click to get the most recent status of the backup process.

Step 15: A detailed report of the backup process can be viewed with the following steps:
- Click the button Backup Report at the top right corner of the tool.
- Select the job.
- Click on View Details to view complete information about the AWS backup.

Step 16: The backup report contains details like Source Path, Destination Path, Backup Size, Total File Count and more regarding the backup. To save the report to your local system, click on Save Report to CSV.

Step 17: Specify a location to save the CSV file in your system.

Step 18: “CSV file saved successfully” message will be shown when the file is saved. Click OK to close the message window.
