An ultimate guide to convert distribution group to shared mailbox

Updated On - September 18, 2024
Summary: Are you looking for a reliable way to convert your distribution group to a shared mailbox? If so, then we are here to help you with our comprehensive guide to do the same. Furthermore, you can explore Recoveryfix Migration for Microsoft 365 to perform the operation more efficiently.

Distribution group is one of the best ways of email communication to convey messages to the masses simultaneously, regardless of email users. It conveys the same message via email to its connected members within an instant. However, it lacks collaboration among its connected members, which leads administrators to shift towards an alternative where they can collaborate with their team members in a better way.
Here, a shared mailbox can be the best resort for administrators. It offers users better communication and collaboration than the distribution list. Hence, the blog will provide a stepwise guide to different approaches to convert distribution group to shared mailbox in Microsoft 365.
How to convert distribution group to shared mailbox manually?
After deep research, we have come up with two simple yet effective ways to convert a distribution group to a shared mailbox. Utilize them and find the most suitable one by yourself.
Note: Before performing the process, users must log in with a global administrator account and need to be members of that distribution list.
Solution 1. Utilizing Exchange Admin Center of Microsoft 365
We have simplified the process into three segments. Follow the provided sections carefully to execute the distribution group to share mailbox conversion process without any difficulties.
Note: It is important to change your current distribution list group’s address to another one so that it can be freed for shared mailbox conversion. A distribution list group’s address is used and can’t be converted into a shared mailbox.
1. Create a shared mailbox.
- Go to Office.com and log in with your account credentials.
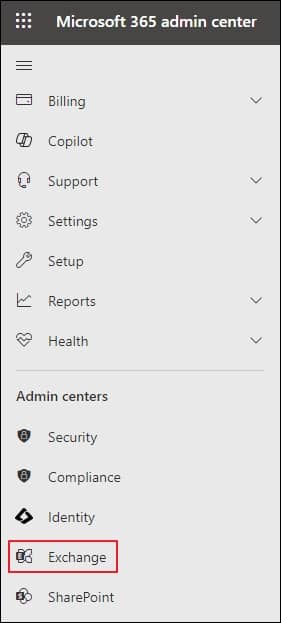
- Click on Admin option from the left pane, then tap on Exchange under the Admin Centers.
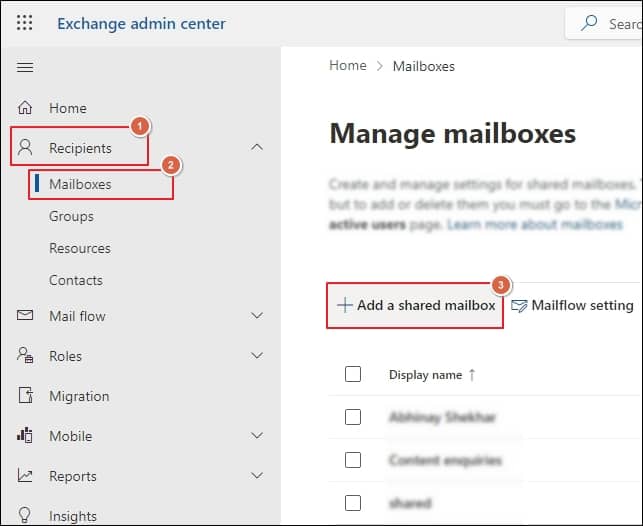
- Expand Recipients, then select Mailboxes and click on Add a shared mailbox option.
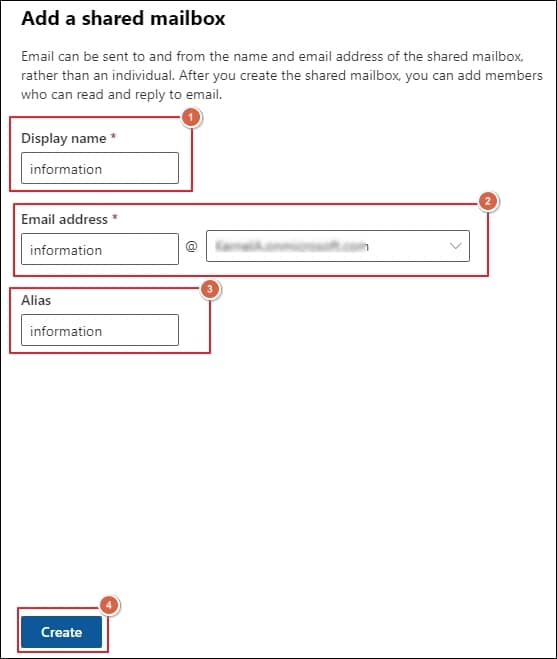
- Enter Display name, Email address, and Alias in their respective columns and proceed to Create option.
2. Add users to the newly created shared mailbox.
- Go to Distribution list by clicking on Groups option.
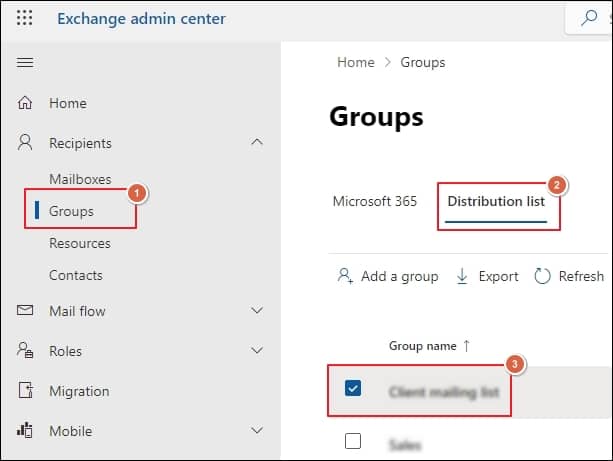
- Click on distribution list that you wish to convert.
- Access the Members tab, then tap on View all and manage owners option.
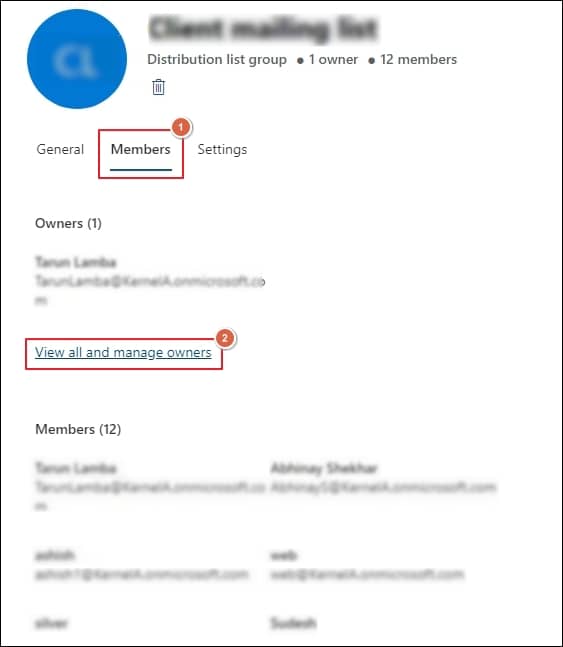
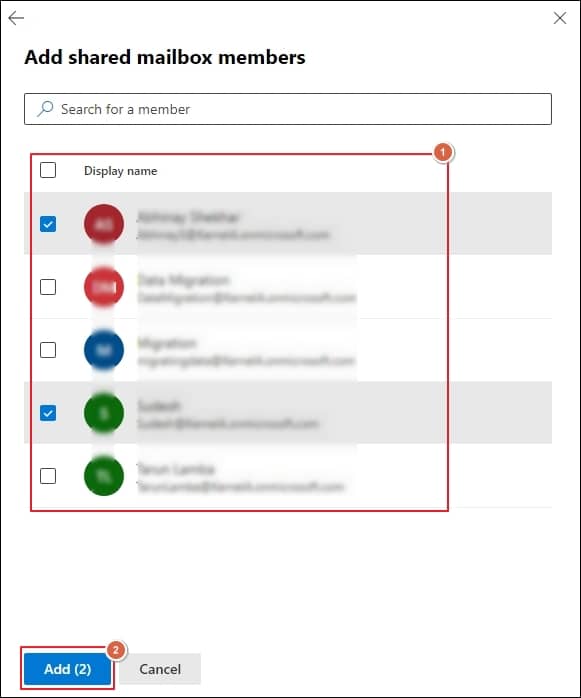
- Once you get the distribution group’s member list, click Add members to add them to the newly created shared mailbox.

- Click on Add option once it is done.
3. Assign the required permissions.
- Click on Mailboxes option under Recipients section.
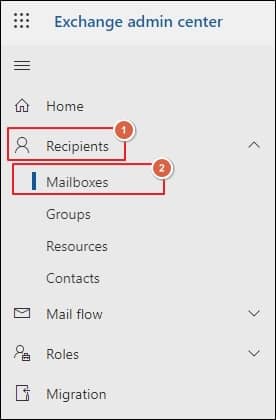
- Mark the checkbox before the recently created shared mailbox, then tap on the Mailbox delegation option.
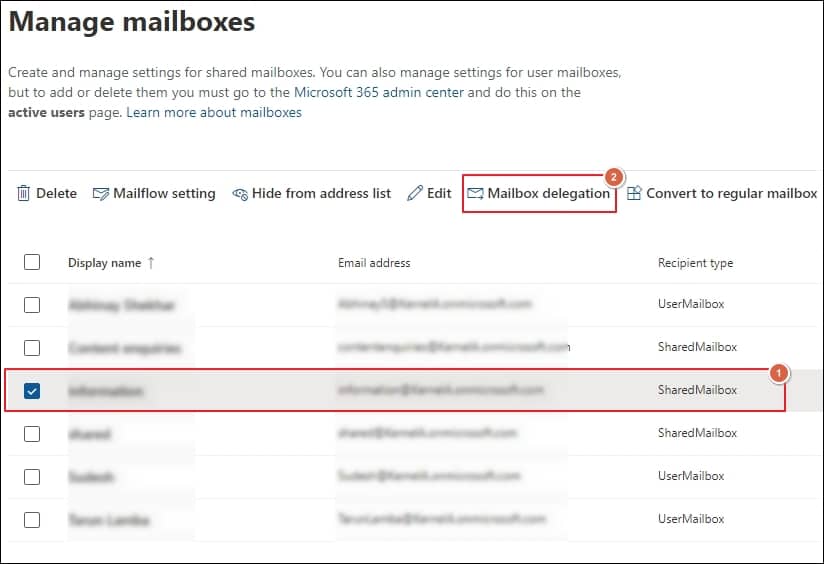
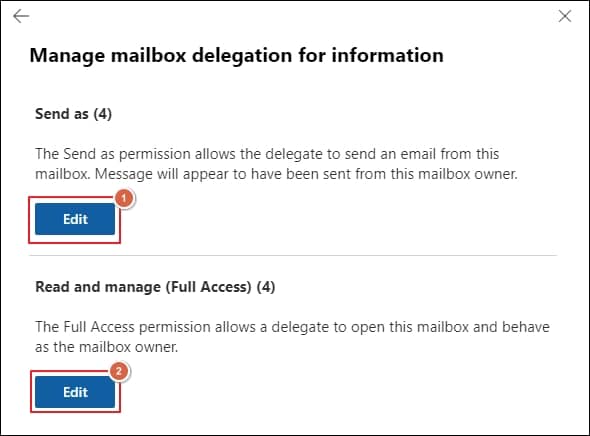
- Assign Save as and Full Access permission at your convenience by clicking on Edit option.
Note: Full Access allows users to open, create, and modify items contained in shared mailboxes.
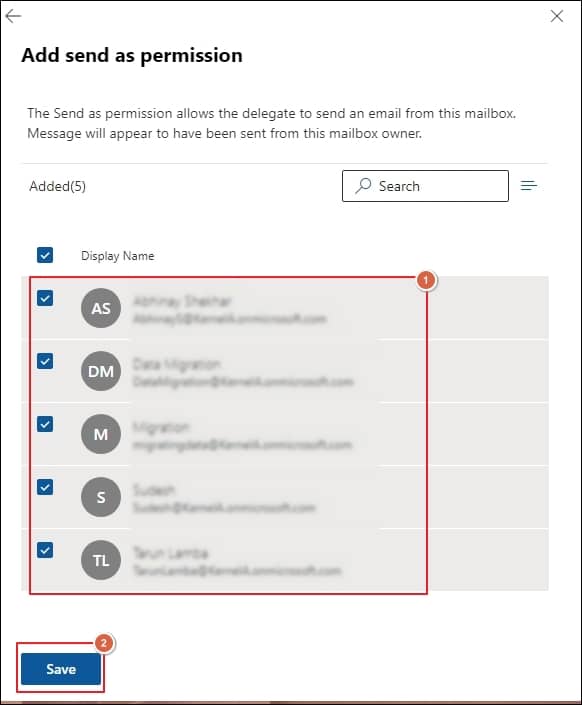
Send As allows users to send emails from that shared mailbox. Both are required for successful operation. - Select the members for both Save as and Full Access permissions separately and proceed to Save option.
Solution 2. Utilizing Exchange Online PowerShell Cmdlets
In addition to Exchange Admin Center, users can convert their distribution group into a shared mailbox using PowerShell cmdlets. Here are the complete steps to perform the operation smoothly via PowerShell.
Note: This process involves the deletion of your distribution group. Thus, it is necessary to record the required information before performing this operation through the Microsoft admin center and Exchange admin center.
Step 1. You can check the following information with the help of the given Cmdlets.
- Whether the distribution group is a member of another group or not.
- Record the distribution group members that you wish to convert.
$dgs = Get-DistributionGroup -ResultSize unlimited
$dgs | foreach {Write-Output -InputObject `r`n,($_.Name),”Group Members”,(“-“*25); Get-DistributionGroupMember -Identity $_ -ResultSize unlimited}
Step 2. You can record all the distribution group properties using the mentioned cmdlet.
Note: Write the group’s name, alias, or email address in place of .
Get-DistributionGroup -Identity <GroupIdentity> | Format-List
Step 3. Execute the cmdlet to delete the distribution group.
Remove-DistributionGroup -Identity <GroupIdentity>
Step 4. Create a shared mailbox by setting the PrimarySMTPAddress and DisplayName values as the deleted distribution group.
You can also set the following properties as the deleted distribution group, including:
- Name
- Alias
- ModerationEnabled (the default value is $false)
- ModeratedBy (the default value is empty)
- SendModerationNotifications (the default value is Always)
New-Mailbox -Shared -Name Marketing -Alias marketing -DisplayName “Marketing Group” -PrimarySMTPAddress marketing@contoso.com
Step 5. Utilize the list of members of deleted distribution groups to add them to the shared mailbox by following Cmdlets.
$m = “<GroupEmailAddress1>”,”<GroupEmailAddress2>”,…”<GroupEmailAddressN>”
$m | foreach {Add-DistributionGroupMember -Identity $_ -Member <SharedMailboxIdentity}
Step 6. Utilize the list of recorded deleted distribution group members to assign valid mail-enabled security principals (mail users, mail-enabled security groups, or mailboxes) FullAccess permission to the created shared mailbox using the given cmdlets.
$u = “<UserOrGroupEmailAddress1>”,”<UserOrGroupEmailAddress2>”,…”UserOrGroupEmailAddressN”
$u | foreach {Add-MailboxPermission -Identity <SharedMailboxIdentity> -AccessRights FullAccess -User $_}
Step 7. Utilize the list of recorded deleted distribution group members to assign valid mail-enabled security principals (mail users, mail-enabled security groups, or mailboxes) SaveAs permission to the created shared mailbox with the help of the mentioned cmdlets.
$u | foreach {Add-RecipientPermission -Identity <SharedMailboxIdentity> -AccessRights SendAs -Trustee $_}
Step 8. Utilize Exchange admin center or Set-Mailbox cmdlet to configure other properties that were not available during the shared mailbox creation.
You can add the following properties with the Set-Mailbox cmdlet:
- AcceptMessagesOnlyFrom
- AcceptMessagesOnlyFromDLMembers
- AcceptMessagesOnlyFromSendersOrMembers
- BypassModerationFromSendersOrMembers
- CustomAttribute1 to CustomAttribute10
- EmailAddresses and many more.
Step 9. Send As permissions aren’t copied to the sender by default for messages sent by shared mailbox users. To copy messages to the sender, utilize the mentioned cmdlet.
Set-Mailbox -Identity <SharedMailboxIdentity> -MessageCopyForSentAsEnabled $true
Step 10. The current entry in the AutoComplete list is associated with the deleted group. Users are required to remove the current entries from the AutoComplete list.
You have successfully converted your distribution group to shared mailbox. Once it is done, you can also configure shared mailbox in Outlook to access its content.
How to avoid the constraints that users face while performing this conversion?
By following the above approaches, you can convert a distribution group to a shared mailbox. However, these approaches come with certain limitations, such as being time-consuming, lengthy, and confusing for non-technical users. To overcome all the restrictions, relying on a professional tool will be beneficial to users.
Recoveryfix Migration for Microsoft 365 is a professional tool that can help you out in this scenario. The Microsoft 365 migration software can migrate all Microsoft 365 components, including Groups, Primary Mailbox, Archive Mailbox, Public folder, and many more, more efficiently with accurate data hierarchy. Additionally, its advanced filters give users precise control over data migration.
Final thoughts
The blog has covered a detailed process on how to convert distribution group to shared mailbox. By going through them, you can accomplish the task of converting your distribution group into a shared mailbox with ease. But some of its constraints can interrupt user’s workflow and makes your data vulnerable to data loss. For this purpose, we have put forward a recommended solution to avoid any uncertainties and streamline the conversion process.