Microsoft 365 is the most advanced and powerful cloud productivity platform, which offers a wide range of services to its users. A shared calendar is one of them, which delivers a schedule management facility for teams or groups. It becomes a necessary service when the organization needs to manage the schedule of teams or groups for defined projects.
However, when it comes to setting up this service, users hesitate due to all the technicalities involved in the process. But you don’t need to worry; here, you will get the detailed process to configure the same service. Let’s have a look at the benefits that you can get by setting up this service.
What benefits can you avail of by creating a shared calendar in Microsoft 365?
Creating shared calendars in Microsoft 365 facilitates several internal and external benefits to users. Here, we have listed the most significant ones of them.
- Provides multiple users accessibility with permission settings for controlled authorization.
- Easily integrates with Microsoft applications such as Outlook, Microsoft Teams & SharePoint for enhanced productivity.
- Facilitates real-time updates that ensure the latest and up-to-date information reaches its users.
- Ensures cross-device compatibility, which allows users to access their schedule anytime from anywhere.
- Offers event customization facility to create the most appropriate schedule plan with detailed descriptions.
How to create Office 365 shared calendar manually?
After analyzing the situation, we have come up with the best approach to create a shared calendar in Microsoft 365. To simplify the process, we have divided it into three segments. Here’s the detailed process to create shared calendar in Office 365.
Part 1. Create a security group for the organization
To create Office 365 shared calendar, you need to create a security group that contains all the people to whom you want to grant access to the shared calendar or contact list.
- Go to Office.com and log in with your account credentials.
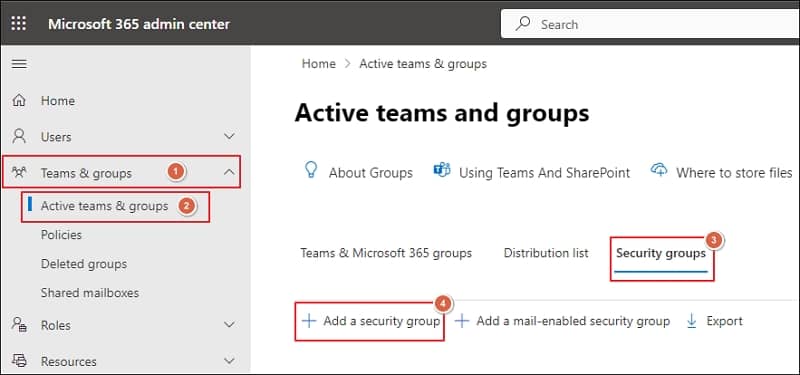
- Click on Admin to access the Microsoft 365 admin center. Then, expand Teams & groups and access Active teams & groups. Go to the Security groups tab and click on Add a security group option.
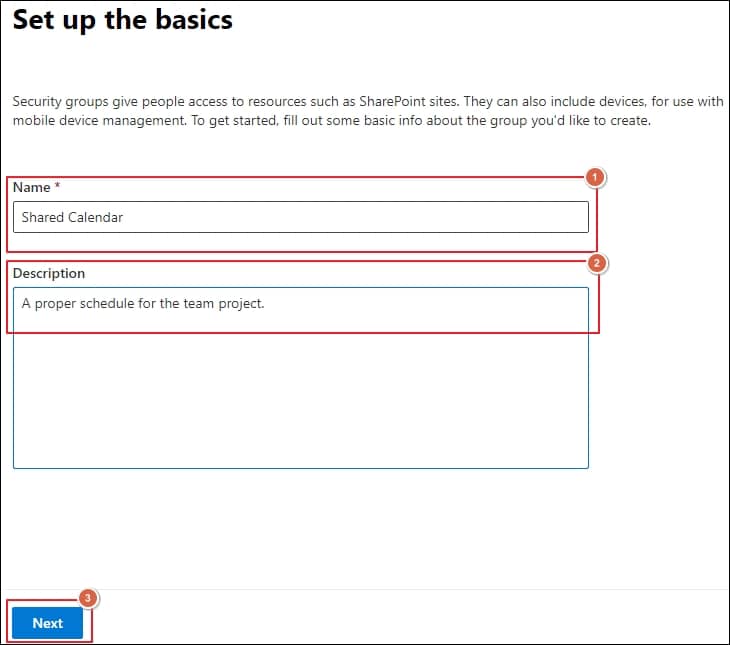
- Provide a Name and Description to create a new security group and proceed to Next option
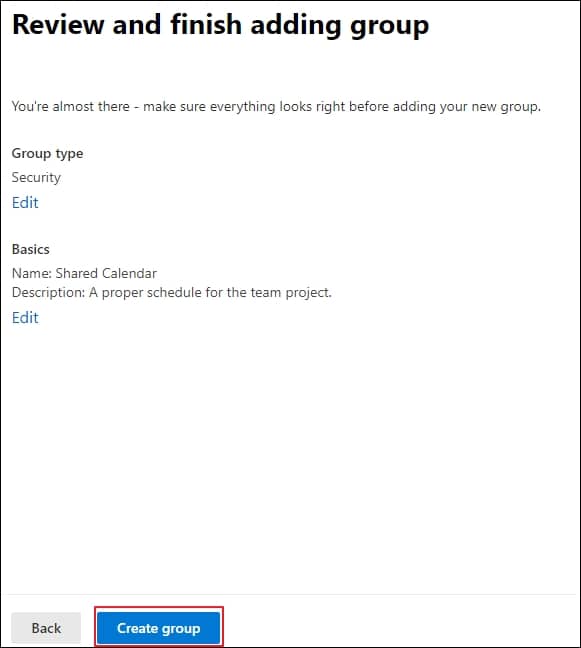
- Review the group details shown on the screen and click on Create group option.
- Your security group has been created successfully and will be visible in the groups.
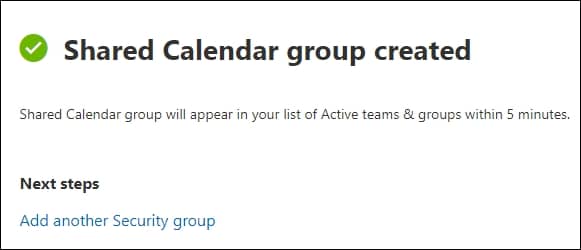
- Navigate and click on the newly created group and then Add group owners.
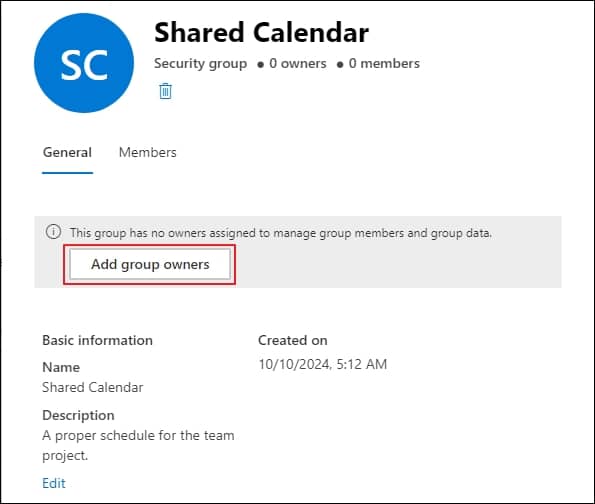
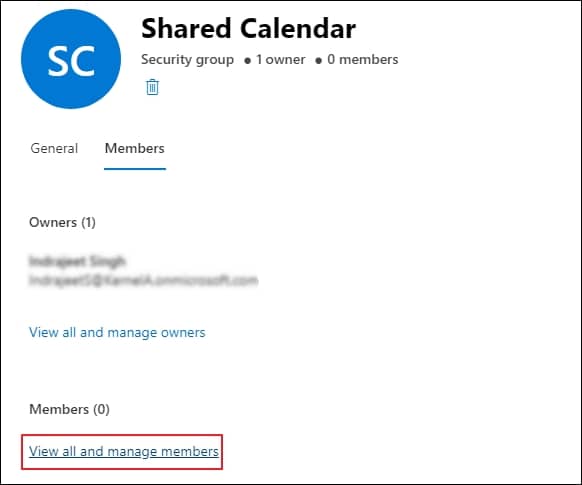
- Access the Members tab and click on View all and manage members option.
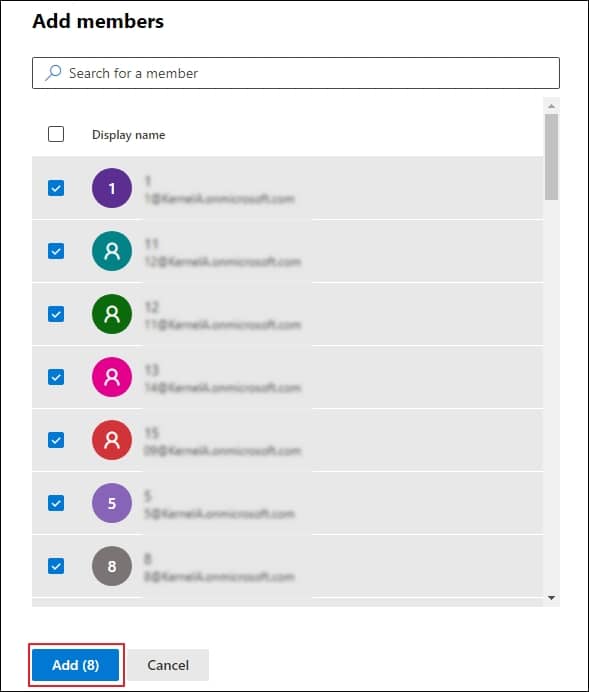
- Select the members you wish to add to the security group and proceed to the Add option.
Part 2. Create a shared mailbox by utilizing the security group
The next step is to create a shared mailbox and assign full access permission to the security group that you recently created. Here’s how you can do it.
- Go to Exchange admin center, expand Recipients option, and click on Mailboxes. Then, tap on Add a shared mailbox to create a new one.
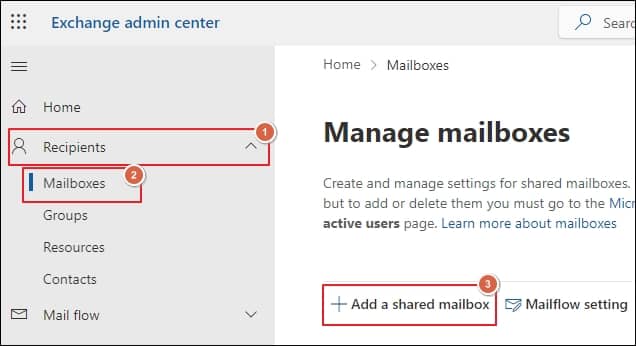
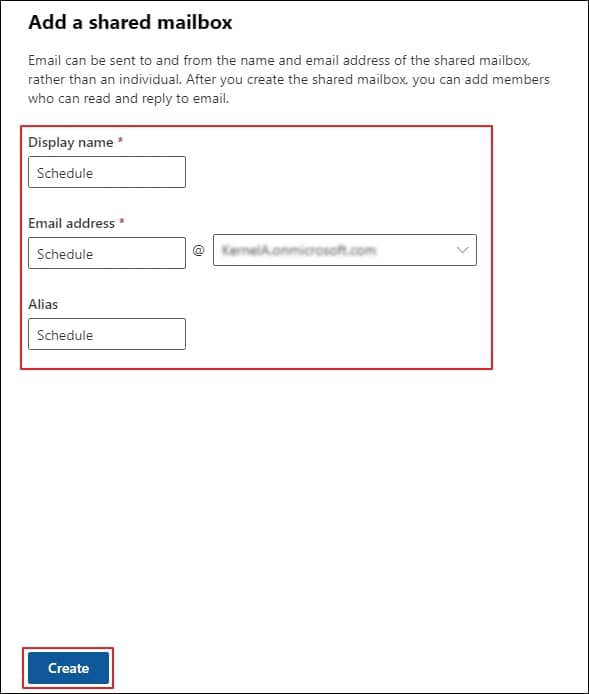
- In their respective columns, enter the Display name, Email address, and Alias, then proceed to the Create option.
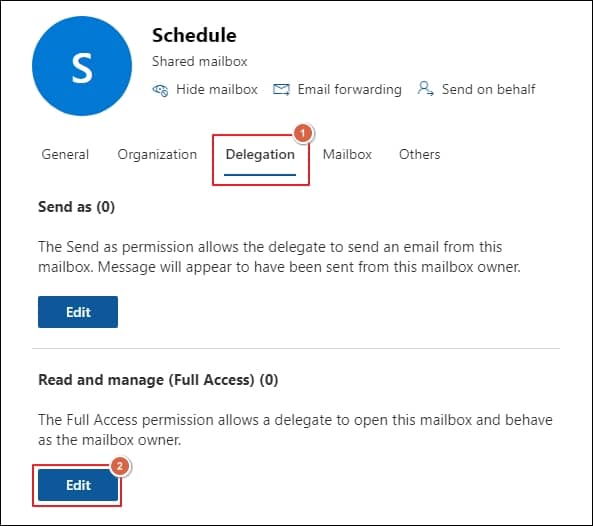
- Click on the shared mailbox you created, access the Delegation tab, and tap on the Edit option under Read and manage (Full Access) permission.
- Click on Add Members to select the previously created security group and click on Save option.
- It will allow the security group members access to the shared calendar and contact list.
Part 3. Access the shared calendar in the Outlook application
In the final step, you need to access the shared calendar using the Outlook application. Follow the provided instructions to get the desired results.
- Configure your Microsoft 365 account in Outlook application.
- Launch Outlook and click the Calendar icon on the left side. You will be able to see shared calendars associated with your account.
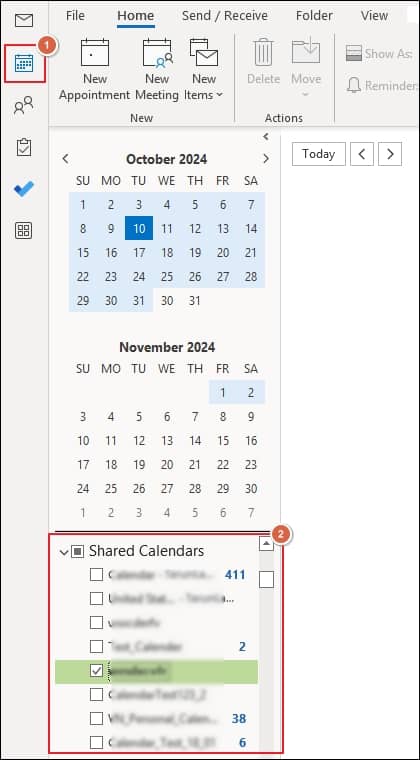
These steps help you to create shared calendar in Office 365 without any difficulties.
Why is taking backup of Microsoft 365 data necessary for you?
By going through the above-mentioned approach, you will be able to create Office 365 shared calendar easily. Its step-by-step illustrations make the execution of Office 365 creating a shared calendar process more convenient. There is no doubt that Microsoft is one of the reliable platforms, yet taking regular backups allows you to stand on the safe side. If you are doing so, then you can ensure data security from mishaps. However, the issue arises when you are not practicing it.
You can execute the Microsoft 365 emails data backup process anytime to secure your precious data with its native solutions. But, if you want to make the process more streamlined and efficient, opting for automated solutions like Recoveryfix Backup for Microsoft benefits you. Microsoft 365 Backup software not only helps you backup your entire data into multiple formats, but it also helps you restore the backed-up file into Microsoft 365 instantly.
Final thoughts
The blog has covered a detailed process on how to create a shared calendar in Office 365. The simplified approach allows Office 365 creating a shared calendar process more straightforward. We have also recommended the best approach to backup your Microsoft 365 data safely and securely. On top of that, it helps you to restore deleted mailboxes in Office 365 with ease.


