Reliable method to setup archive and deletion policies for Office 365 mailboxes

Published On - August 12, 2024

In today’s world, email has become the primary medium of communication among organizations or individuals. Hence its management is also a crucial task for the organization. But Office 365 provides its users with the ability to manage their email efficiently by providing default retention policies.
However, the requirement of admins varies according to their organizational need. Therefore, Office 365 admins have accessibility to set up the new MRM (Messaging Records Management) or Archive & Deletion policy suitable to their enterprise. In this regard, this blog will help you to set up the retention policies manually.
Setup Archive & Deletion policies manually
Performing the setup manually is quite a critical task. So, perform it with utmost care for getting the desired result. For executing this process, you need to follow the given four parts. Let’s delve into them:
Part 1: Enable the user’s archive mailbox
To operate this process, each user needs to have enabled archive mailboxes in the organization. This will help execute the retention tag “Move to Archive” flawlessly on email messages after the retention age expires. So, follow the given steps to enable the user archive mailbox if not enabled:
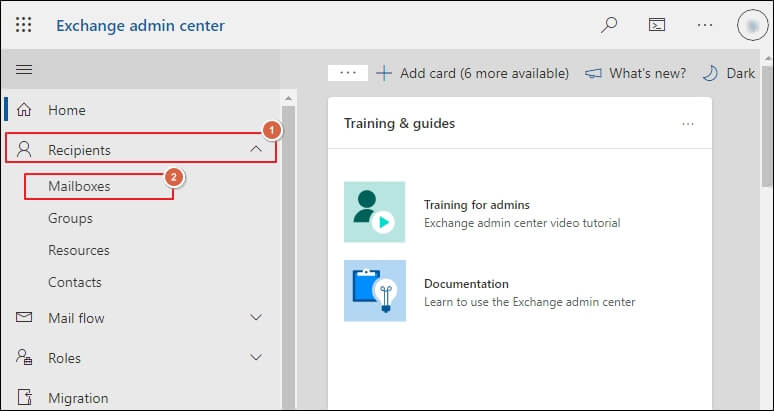
- Access the Exchange admin center & go to the Recipients > Mailboxes option.
- Under the list of mailboxes, choose the users for enabling their archive mailboxes.
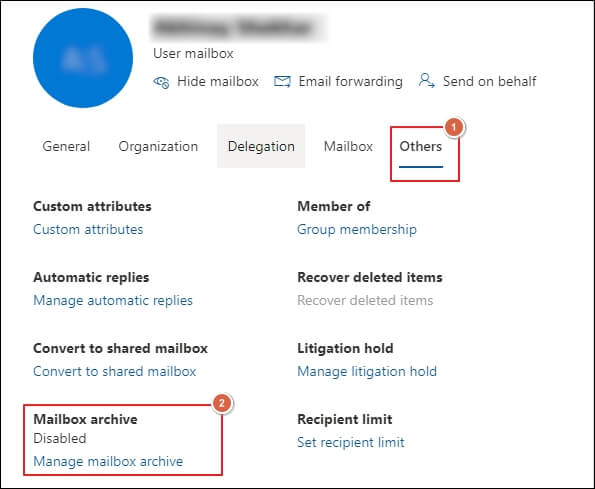
- In the next window, tap on the Others & choose Manage mailbox archive option.
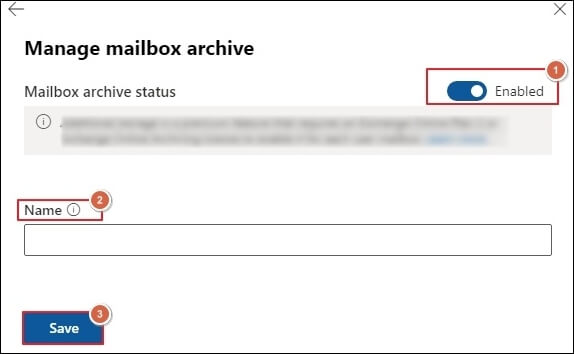
- Finally, enable the Mailbox archive status & then, click on the Save option. You can also provide the name of the folder in the user’s mailbox that contains the archive. Refresh the page to see the required changes for selected users.
Note: It will take around 30 minutes. So, wait till you see the changes in the settings.
Part 2: Create new retention tags
In this section, we will create two retention tags for your understanding. For the default archive, create the Testing 3 year Move to Archive & for Deleted folder items, create the Testing 5 year Move to Archive retention tag. So, follow the given steps to execute the process for getting the desired output:
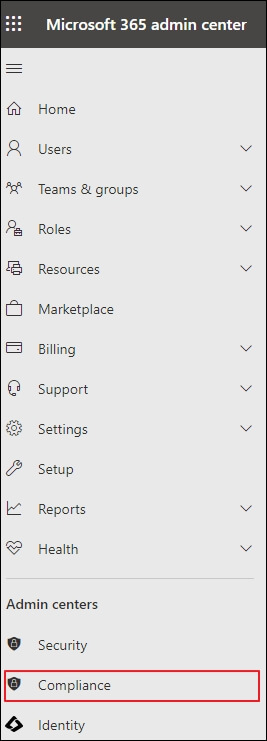
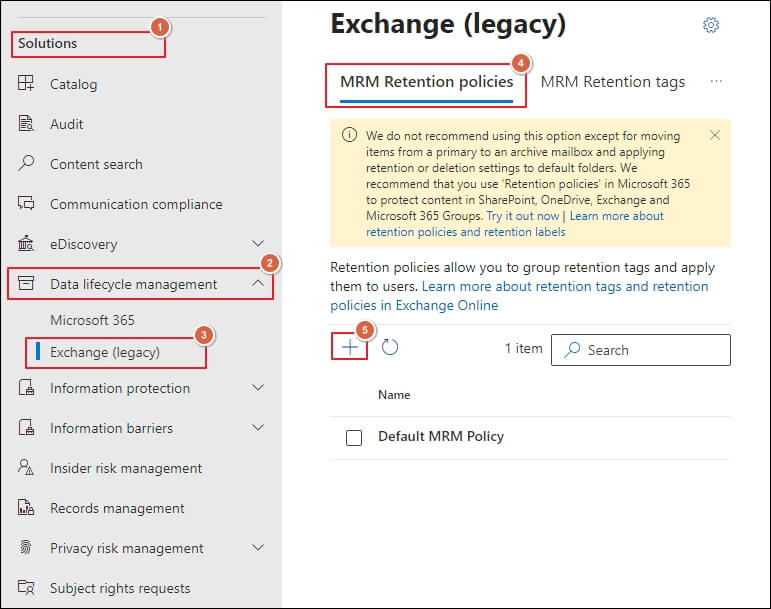
- Log in to the Exchange admin center & choose the Compliance option from the Admin centers section.
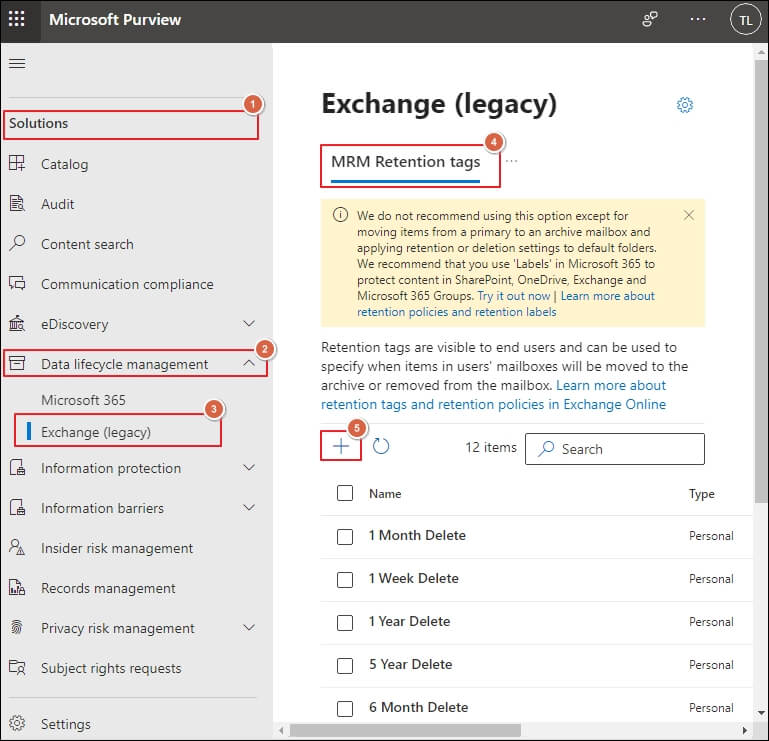
- Go to the Solutions> Data lifecycle management > Exchange(legacy) > MRM Retention tags & tap on the + option to create the new one. It will display all retention tags for your organization.
Now, to create the specific ones, follow the given steps:
For creating the default archive retention tag
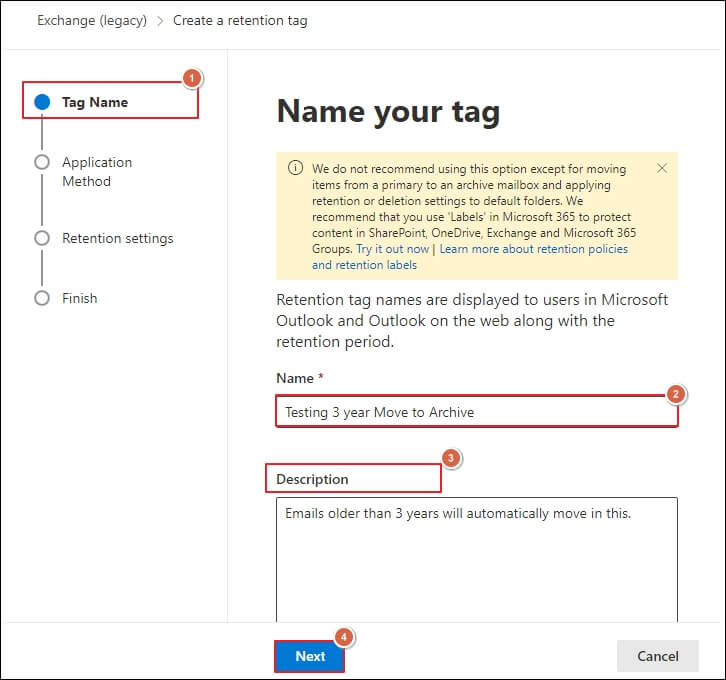
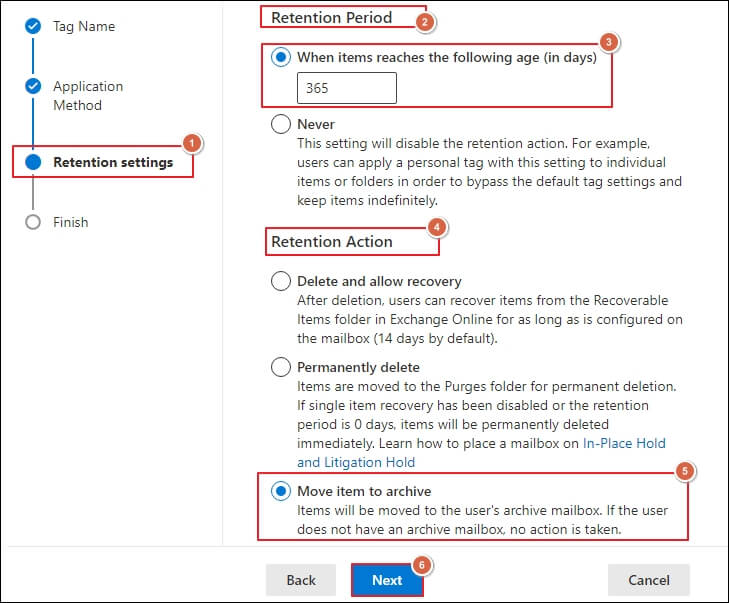
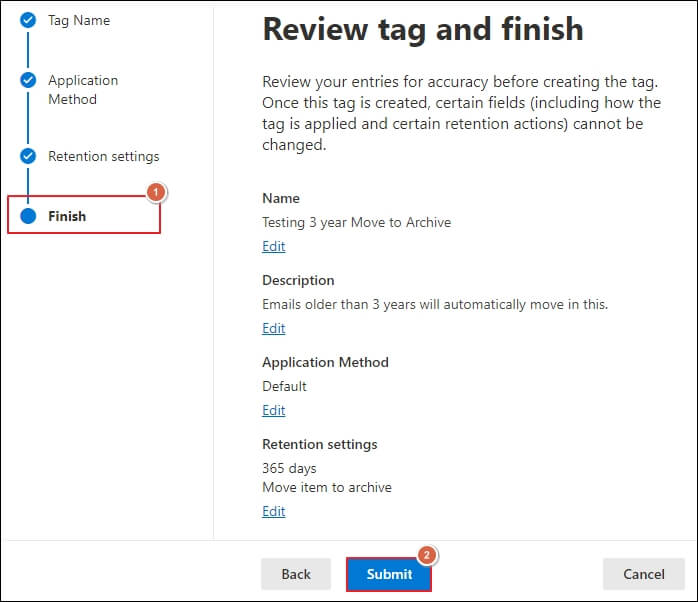
- Click on the + tag on the MRM Retention tags page & then enter the name of your tag as Testing 3 year Move to Archive. You can also add a Description here.
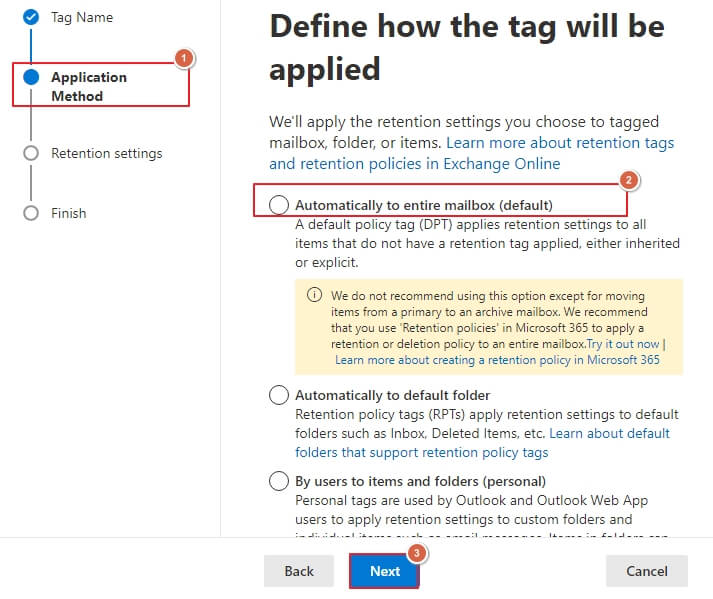
- On the next page, choose the Automatically to entire mailbox(default), followed by the Next option.
- In the Retention settings section, enter the days in the Retention Period section and check the Move item to archive option in the Retention Action section. Then, click on the Next option.
- Now, click on the Submit option in the Review tag and finish page.
For creating the retention policy tag for the Deleted Items folder
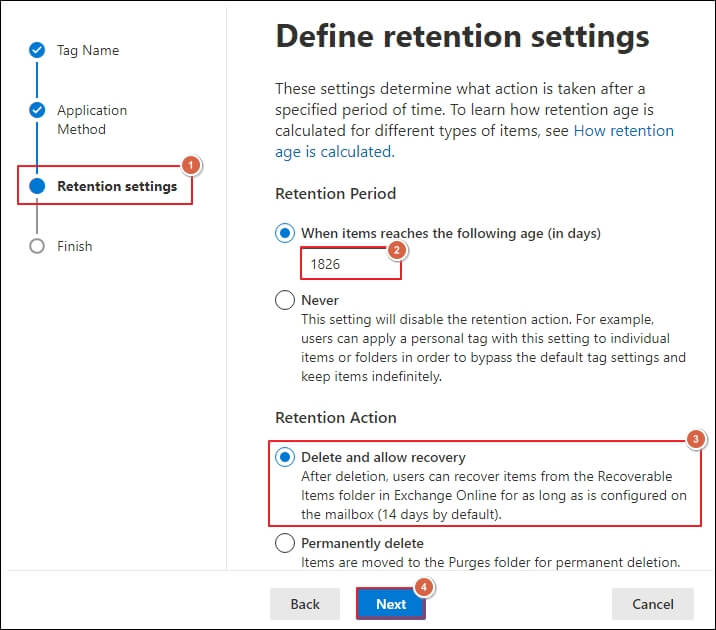
- Go to the MRM retention tags again, click on the + tag & enter the name as Testing 5 year Move to Archive.
- In the next window, choose the Automatically to default folder option, tap on the Apply tag to this folder option & choose Deleted Items folder.
- In the Define retention settings, fill in days in the Retention Period, choose Delete and allow recovery in the Retention Action, and click on the Next option.
- Finally, click on the Submit option in the Review tag & finish page.

Part 3: Create new retention policies
Now, after creating the retention tags, it is required to create the new retention policies & add the created retention tags. So, follow the given steps to execute the task:
- Open the Exchange admin center again & go to the Compliance option in the Admin centers.
- Now, tap on the Solutions > Data lifecycle management> Exchange(legacy) > MRM Retention policies options & click on the + option to create the new one.
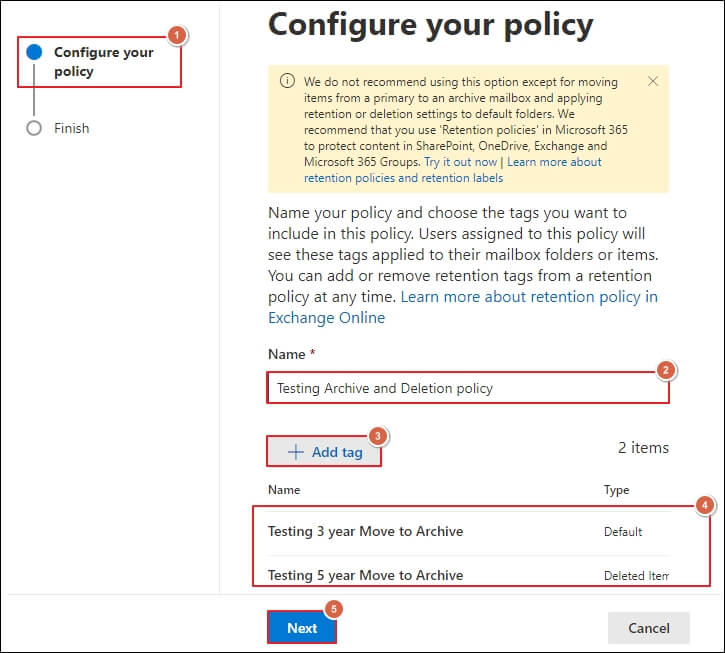
- Now, in the Configure your policy section, enter the name of the new retention policy as Testing Archive and Deletion policy and select +Add tag (Add the created retention tags). Then, click on the Next option.
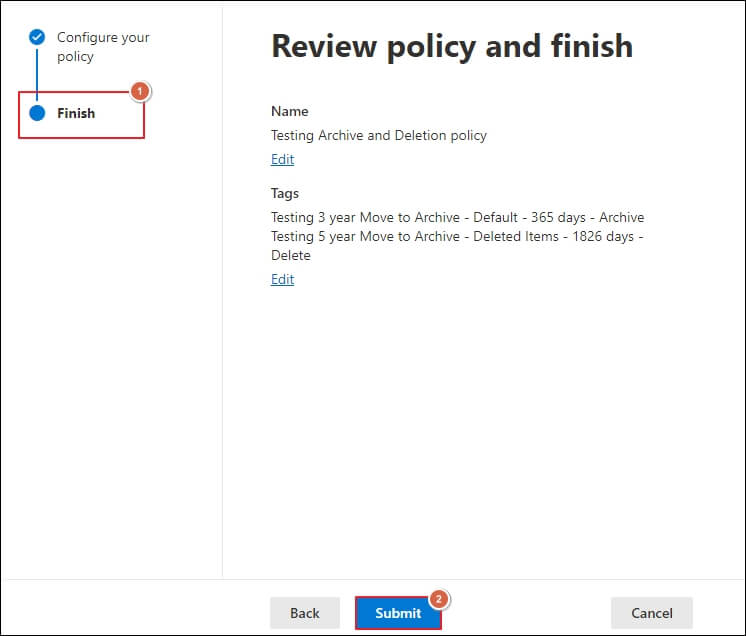
- Finally, click on the Submit option in the Review policy and finish section, followed by the Done option.
- The new retention policy will be displayed on the list. By selecting it, you can verify whether retention tags are linked to it or not.
Part 4: Assign new retention policies to users’ mailbox
Default MRM policy or Archive & Deletion settings are assigned when a new mailbox is created. Since only one MRM retention policy can be assigned at a time, you need to assign a new one if you want to change the default one. Let’s look at the steps to know how you can change the retention policies manually:
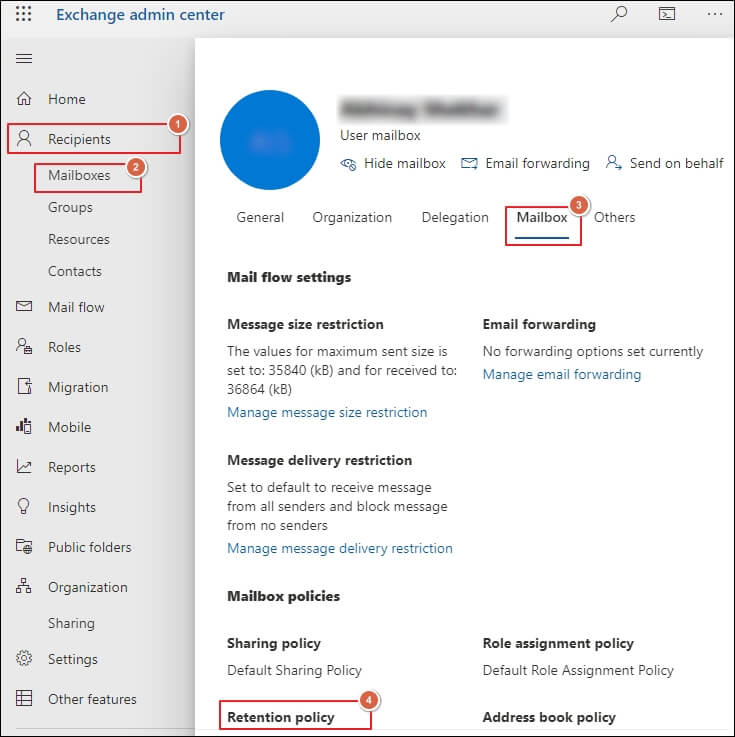
- Sign in to the Exchange admin center & click on Recipients > Mailboxes will display the list of all user mailboxes in your organization.
- Check the desired user’s mailbox to change the retention policy.
- Select the Mailbox option & click on the Manage retention
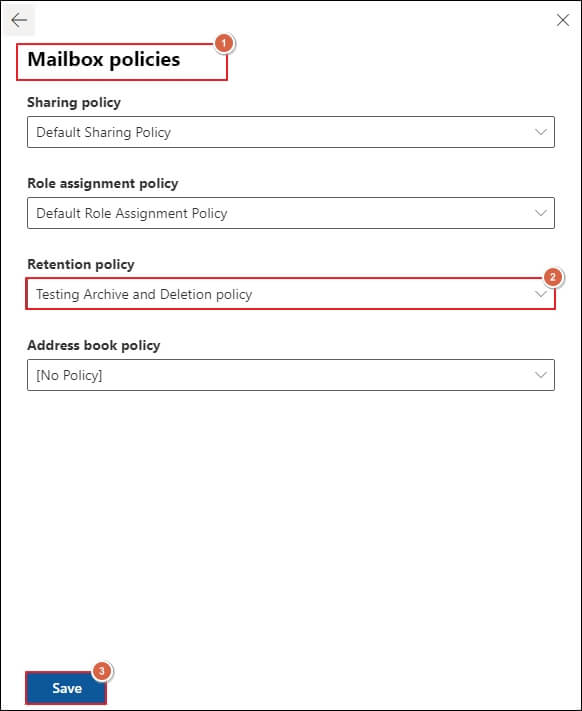
- Now, in the Mailbox policies, select the created retention policy in the Retention policy section and tap on the Save option to execute the new retention policy on the users’ mailboxes.
policies in the Retention policy section.
What is the best alternative to secure your mail for a long time?
By following the above method, you can resolve your query about changing the archiving and deletion settings. However, what do you do if they get deleted permanently, or do you want earlier emails for your organization? In that case, you cannot access them if you do not have any alternate option; hence, to avoid these situations, taking backup always puts you on the safer side. It will not only help you access older emails but also help manage storage for efficient email communication.
You can perform the backup operation using several manual methods, but they won’t give you 100% successful results and might increase the vulnerability to data loss. Hence, experts always recommend considering an advanced Microsoft 365 Backup tool for taking backup, which is preferable for getting the desired results without interruption.
Recoveryfix Backup for Microsoft 365 is the tool that can make your email backup process a breeze. It leads in the front in this section among the users due to its interactive user-interface & range of satisfactory features. With its advanced algorithms, you can take backup of your entire Exchange Online components, including Primary mailboxes, Archive mailboxes, & Public folders into several formats like MSG, HTML, PDF & many more. Its incremental backup feature & wide range of filters make your backup data more structured without any duplicity.
Conclusion
We have provided you with the manual method for changing the archiving and deletion settings on Office 365. It will allow you to change the default MRM policy and create a new one for your organization’s users. We have also highlighted the importance of taking backups to secure your emails for future use without any disruption. Hence, for hands-on experience, you can check out the trial version of the recommended automated tool.