Shared mailboxes are a great way for organizations to communicate with the masses. Adding them to Outlook helps organizations to streamline their workflow and enhances their efficiency. On top of that, it establishes better collaboration among team members with Outlook’s advanced functionalities.
However, Microsoft regularly rolls out software updates for its different applications, including Outlook, to meet users’ increasing demands. This creates an unusual situation in front of users, where they have to learn about updated applications while working on them.
One such situation arises when users need to add their shared mailbox to the latest Outlook version. But don’t worry; we are here to help you in this situation. Our comprehensive guide to adding shared mailboxes in Outlook will provide complete assistance.
How to add a Shared Mailbox in New Outlook?
Adding a Shared Mailbox in Outlook application is a straightforward process. To do so, follow the provided instructions carefully:
Note: It is essential that you have Outlook administrator rights and access rights to the shared mailbox you will add.
Adding a Shared Mailbox in Outlook 365
- Open Outlook 365 application and click on File tab.
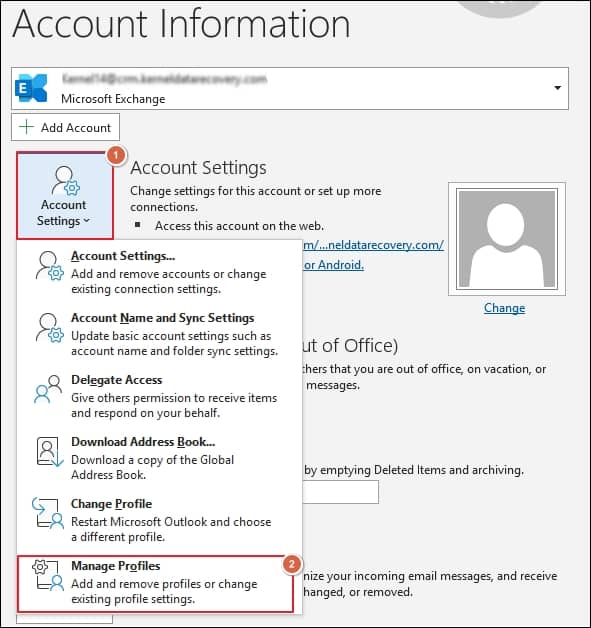
- Tap on Account Settings and click on Manage Profiles .
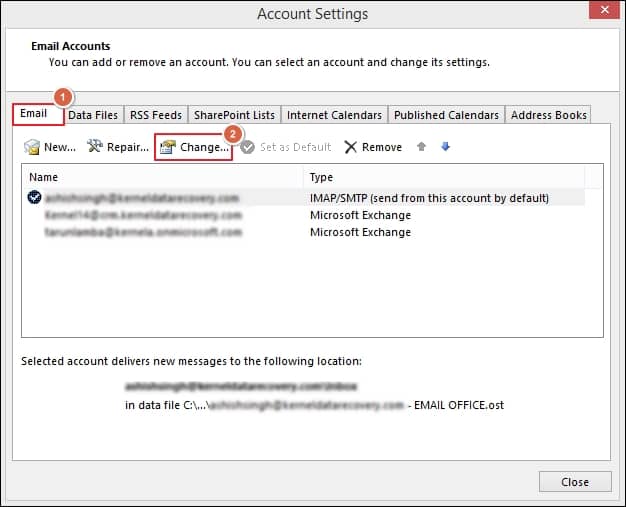
- In Mail Setup wizard, click on Email Accounts option.

- In Email tab, choose the desired account, then click on Change option, followed by More Settings in the next window.
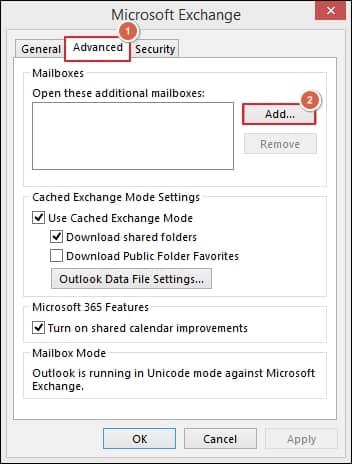
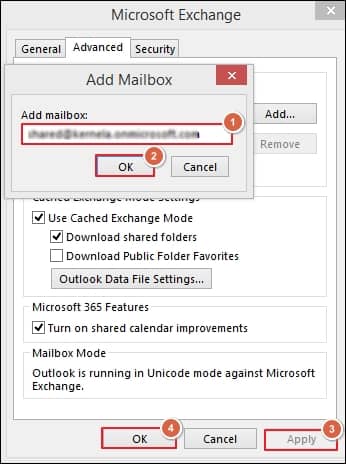
- Select Advanced tab and click on Add option to add a shared mailbox.
- Enter your shared mailbox email address and click OK. Once the shared mailbox is added, click Apply and proceed to OK.
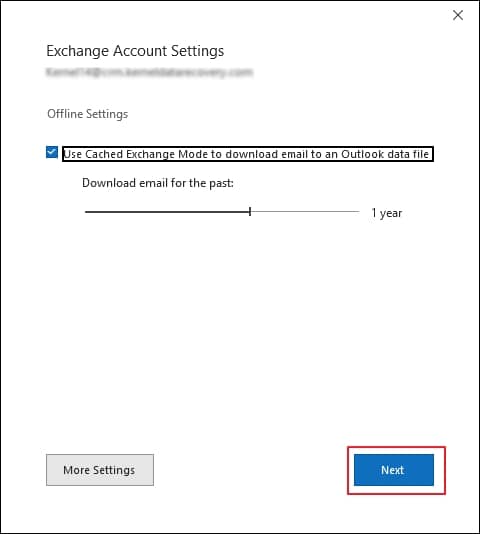
- After that, click on Next and press on Done option.
- You have successfully added your shared mailbox in Outlook.
To add a Shared Mailbox in Outlook 2021, 2016, 2019, & 2020
- Close all the instances of Outlook if running.
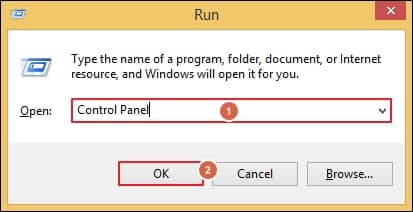
- Press Windows + R keys to access Run wizard. Type Control Panel in the box and click OK.
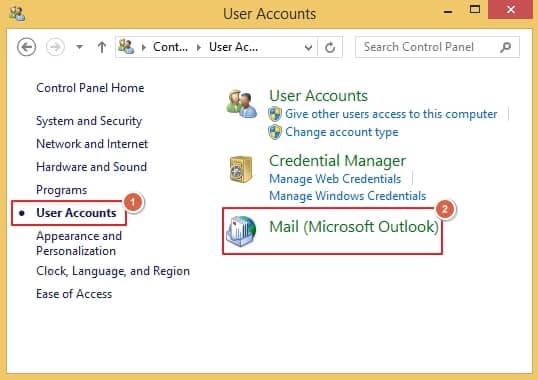
- Select Users Accounts, then proceed to Mail (Microsoft Outlook) option.
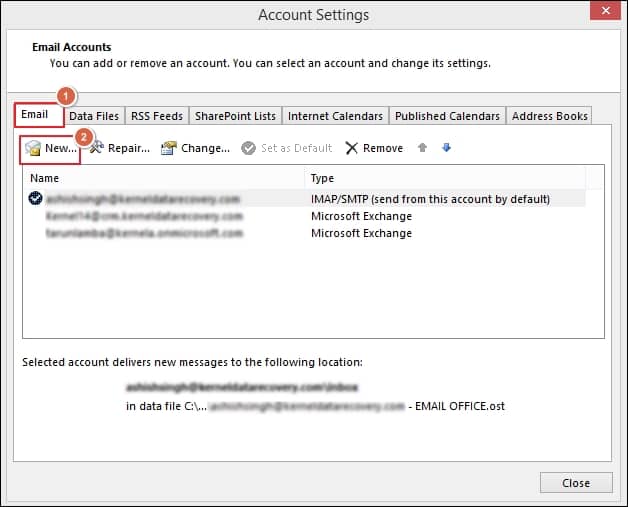
- Go to Email tab and tap on New option.
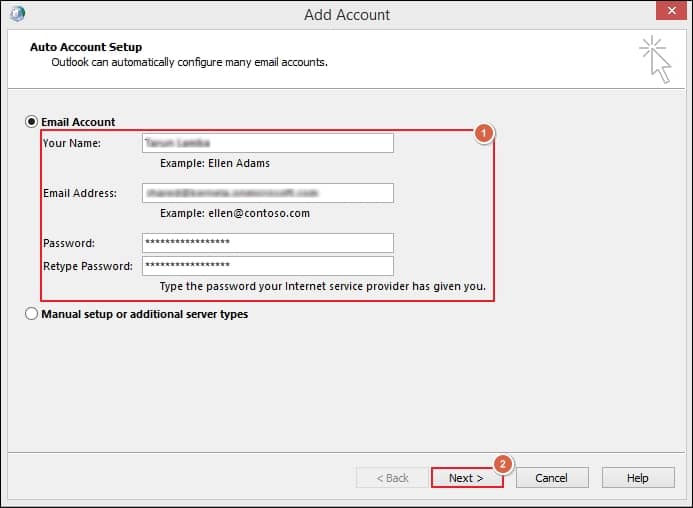
- Enter account credentials such as Your Name, Email Address, Password, and Retype Password in their respective columns and proceed to Next.
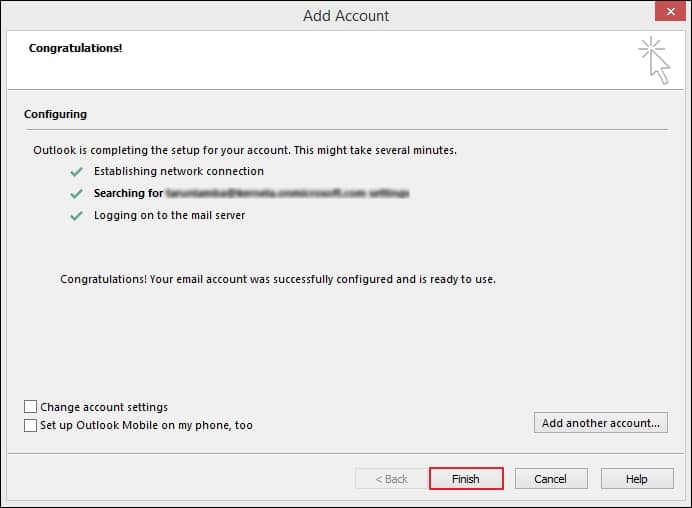
- Your shared mailbox has been successfully set up in Outlook. Click Finish to proceed.
- Restart Outlook option to reflect the changes properly.
How to secure your emails for future purposes?
By going through the above-mentioned steps, you can add your shared mailbox to the latest Outlook without any hassle. Subsequently, setting up a shared mailbox account in Outlook application will create a separate OST file in your system’s local drive. Besides that, sending or receiving an email with that shared mailbox will be stored in the same OST file. After a certain time, it will lead to large-sized OST files and cause storage, performance, productivity, and corruption issues. All of these create challenging situations for users, which demand an innovative solution to resolve the problem without hampering their mailbox data.
One such solution is Recoveryfix Backup for Microsoft 365 software, which allows you to backup Microsoft 365 mailboxes with a few clicks. This Microsoft 365 backup software can effortlessly backup your entire Exchange Online components, including Primary Mailbox, Archive Mailbox, and Public Folder, into several formats with their original hierarchy. Additionally, it provides multiple filters to selectively backup mailbox data at your convenience.
Wrap up
We have provided a comprehensive guide for adding a shared mailbox in Outlook application. By following these simple instructions, you can add your shared mailbox to Outlook without any hassle. However, it’s important to be aware that adding it to Outlook can lead to several issues over time. To overcome these issues and streamline your work process as before, opting for the recommended solution is a viable choice. It can resolve your issue without disrupting the mailbox structure by taking backup in multiple formats.


