2 Easy Solutions to Convert MBOX to EML

Updated On - February 25, 2025

Since multiple email clients support the MBOX file format, it is widely used among users for their daily email communication. As MBOX files are used to store complete email messages, certain situations arise where users need to send individual email copies to their clients as references that resemble the properties of EML files. Therefore, executing the MBOX to EML process is necessary to address these situations.
The task may seem complicated, but with this comprehensive guide, you can convert MBOX to EML files with ease. Let’s start the discussion with the reasons for executing the MBOX to EML conversion.
Reason to convert MBOX files to EML format
As per the analysis, we have noticed some common reasons that drive users to initiate the conversion of MBOX to EML files.
- Locating specific emails becomes easy in the case of EML files.
- EML files support wider platforms in comparison to MBOX files.
- MBOX files store large datasets, which makes them susceptible to corruption.
- EML files’ individual email storage capability provides better shareability over MBOX files.
- EML files allow selective backup of emails, which helps with effective storage management.
Best Ways to convert MBOX to EML files
This section will guide you through the methods to execute MBOX to EML conversion either manually or by using the advanced MBOX to EML converter.
Way 1. With the help of a reliable automated approach
The automated approach always helps users to give accurate results in no time as needed. Considering the same with the long & time-consuming MBOX to EML manual conversion methods, professionals suggest an automated approach over the manual one. It reduces the chances of data loss & provides structured data without disturbing data integrity. Now, the main brainstorming question is, which option do we prefer?
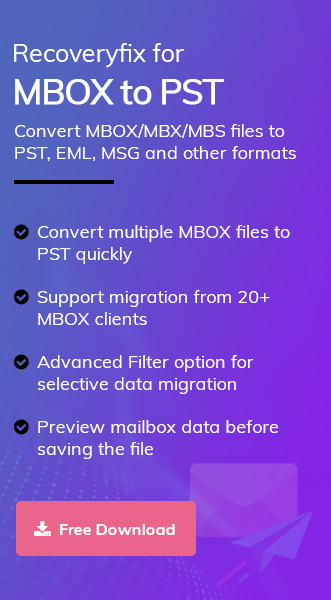
Among others, Recoveryfix Converter for MBOX has come out as the best option in this category without hesitation. Its high-tech algorithms allow users to convert MBOX files into EML & other formats with no size or number restrictions.
Explore the functionality of the software with the following stepwise approach.
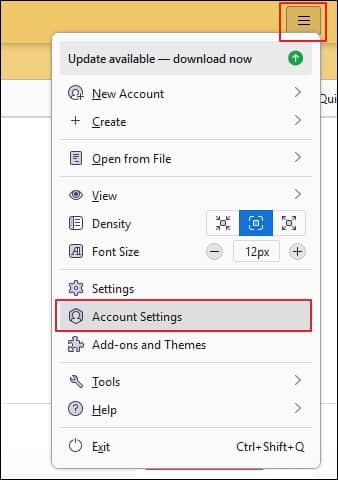
- Open the Thunderbird, click on three lines from the top right corner, and proceed to Account Settings option.
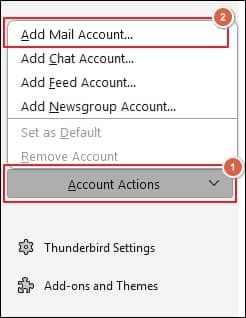
- Click on Account Actions and choose Add Mail Account option.
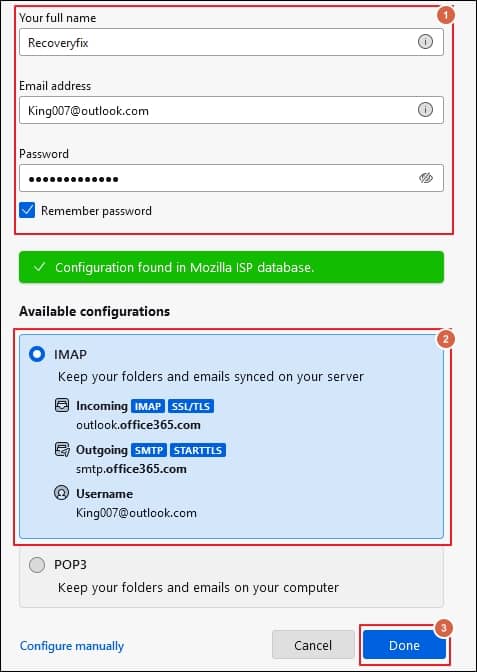
- On the Account Setup window, enter the details such as name, email address, and password, then click Continue to proceed. Select IMAP from the Available configurations and tap on Done option.
- Your email account has been successfully configured in the Thunderbird application.
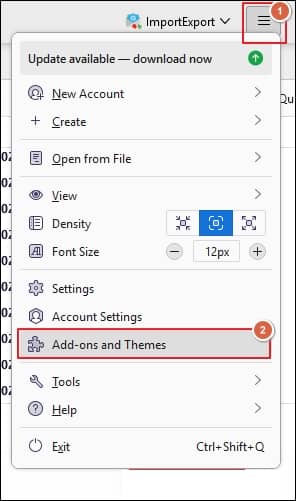
- Launch Thunderbird, click on three lines, and proceed to Add-ons and Themes option.
- Type ImportExportToolsNG in the search bar and click on + Add to Thunderbird option to add this utility.
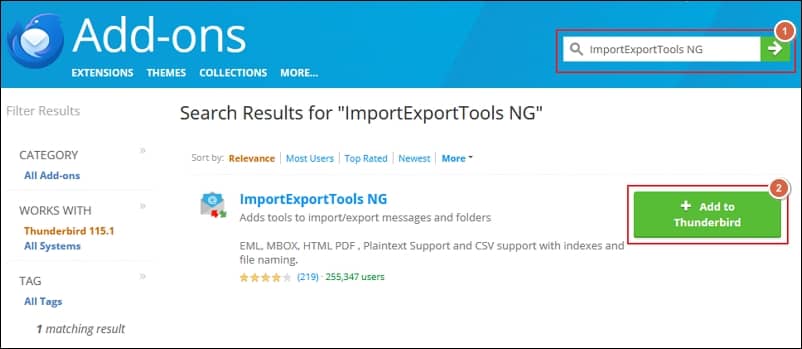
- It will add the ImportExportToolsNG add-on to your Thunderbird application.
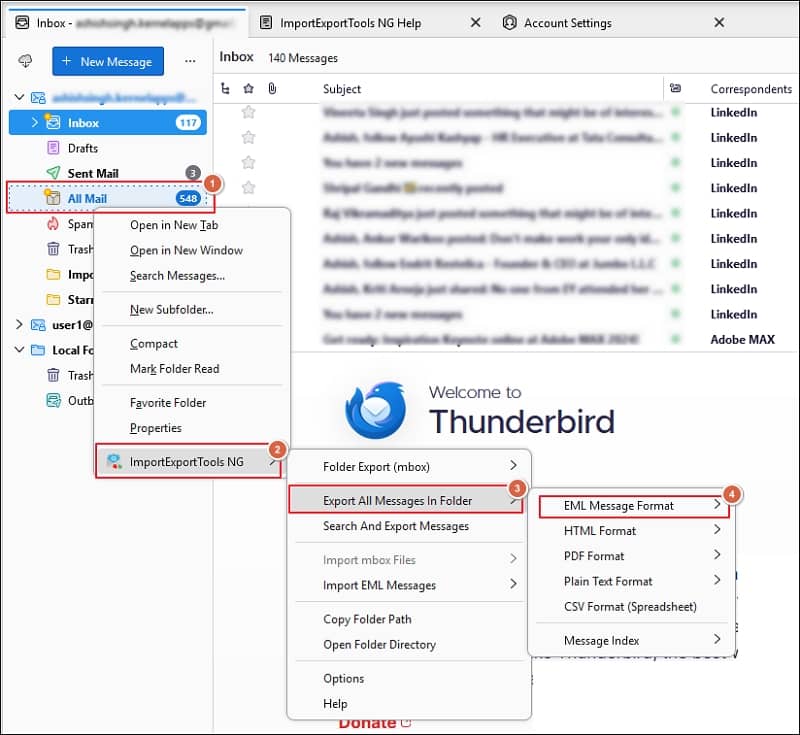
- Open the Thunderbird and access the All Mail folder.
- Right-click on All Mail folder, go to ImportExportToolsNG, choose Export All Messages in Folder, and click EML Message Format.
- Select the desired location to save the EML file.
- You have successfully converted your MBOX files into EML format.
- No guarantee of data security.
- Lengthy & time-consuming process.
- Needs technical expertise to execute the process.
- High chances of human error that leads to the failure situations.
Step 1. Download the MBOX converter from the official website.
Step 2. Complete the setup to install the software on your local system.
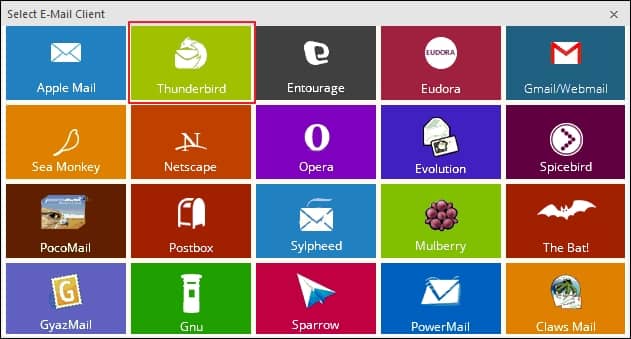
Step 3. Launch the software and select the associated email client to add the MBOX files.
Step 4. Click on the Add File(s) option to select the MBOX files, then tap on Finish. 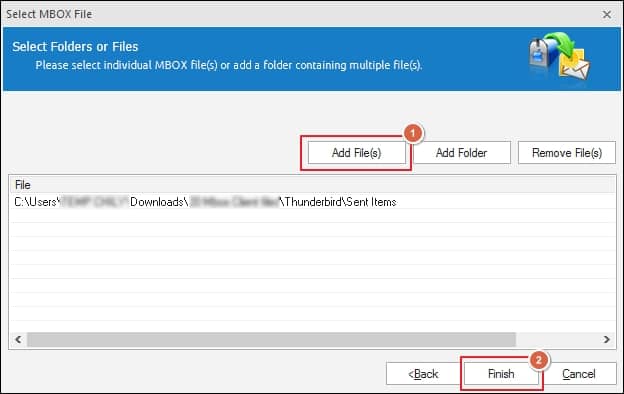
Step 5. After previewing your file’s content, click on the Save option.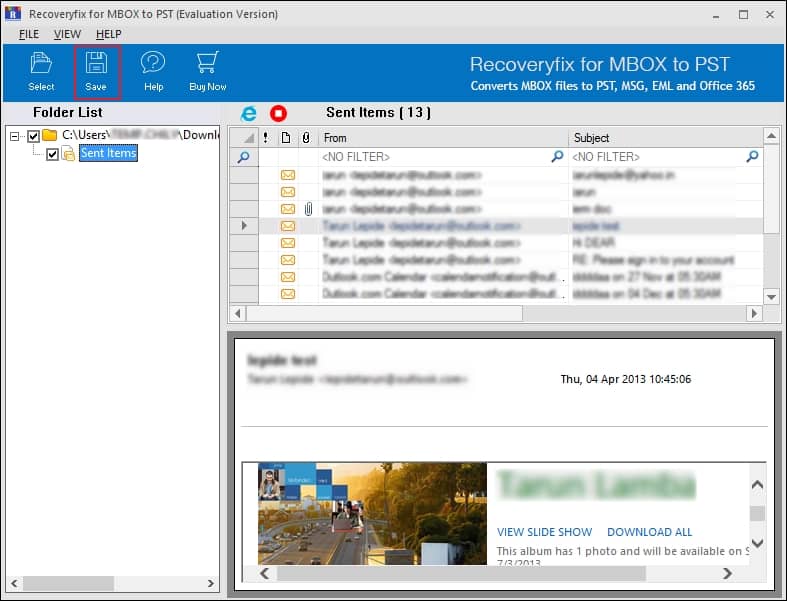
Step 6. On this wizard, you can apply filters for selective data conversion and then proceed to Next.
Step 7. Choose Save in EML option, then Browse to select the preferred saving location and click Save.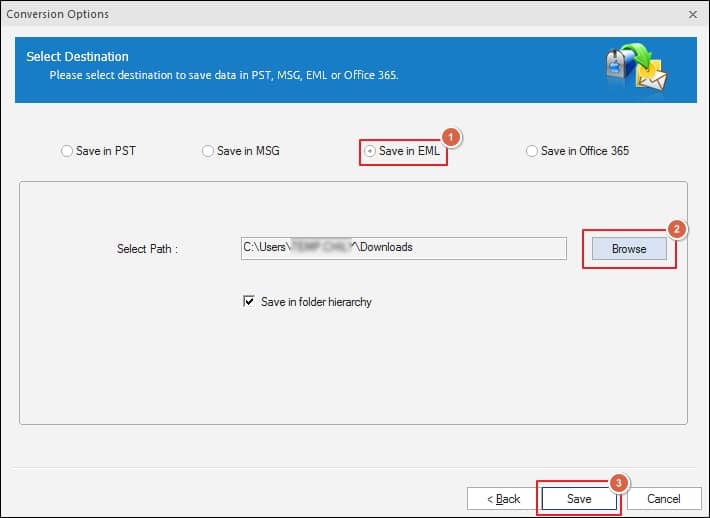
Step 8. A new pop-up window comes when your file is successfully saved at your desired location. Click OK to end the process.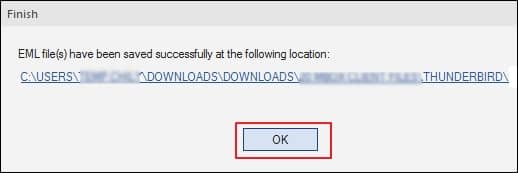
Way 2. Using the Thunderbird’s built-in utilities
Utilizing Thunderbird’s built-in utilities can also help users to convert MBOX to EML files manually. But to get the desired output, you need to go through a lengthy process. Here, we have divided the whole process into parts to make it more understandable.
Part 1. Configure your email account in Thunderbird application
After the Thunderbird application is installed, follow the mentioned steps to configure your email account.
Part 2. Add ImportExportToolsNG utility in Thunderbird application
The ImportExportToolsNg add-on is a useful utility of the Thunderbird application that allows you to import and export emails into it. It also helps users to archive Thunderbird emails with ease. Here are the detailed steps to add this add-on.
Part 3. Export emails into EML format though ImportExportToolsNG utility
Once you have successfully added the ImportExportToolsNG utility in your Thunderbird application, execute the following steps to export your emails into EML format.
Wrap up
By going through this detailed guide, you can easily convert MBOX to EML files. You need to follow our expert guidance to implement it correctly. However, considering the recommended advanced MBOX converter can be the best option if you are concerned with data security & its integrity. For hands-on experience, explore the MBOX to EML converter free trial version that also helps users to export MBOX files to Office 365 with ease.
Frequently Asked Questions – convert MBOX to EML
Q1- Is there any option to convert MBOX to EML free of any error?
Ans- With the recommended software MBOX to EML converter free trial version, you can convert MBOX to EML free of any error for up to 25 items per folder. However, for complete conversion, go with the licensed version.
Q2- Does Outlook support EML file format?
Ans- Yes, you can access the EML files on the Outlook application by performing double-clicking or dragging operations on EML files.
Q3- Why are manual approaches not preferred over advanced ones?
Ans- Certain setbacks might hinder the MBOX to EML file conversion experience.