Email communication has become an integral part of the organization. To fulfill this requirement, organizations rely on different email client applications as per their suitability. However, in certain instances, users need to share a single email message copy with their clients for reference purposes. Converting your emails into MSG format will provide better shareability in this situation. It stores single email messages and can be easily accessible with the same formatting.
Once you have identified the solution, a question arises: How can you convert MBOX to MSG without hampering its content? Don’t worry. Our step-by-step guide will help you conveniently perform the entire MBOX to MSG process. But first, let’s look at the possible reasons behind the MBOX to MSG file conversion.
What benefits can I get on converting MBOX files to MSG?
Converting MBOX to MSG will provide several benefits to users. Some of them are listed here.
- Compatibility: Ensures compatibility with several email clients.
- Ease of Sharing: MSG files are commonly used for sharing individual email messages, making it easier to exchange specific emails with others.
- Migration Purposes: Migrating between email clients or platforms, MSG files are often preferred for their ease of transfer and import.
- Storage Optimization: Converting MBOX files to MSG can help in optimizing storage space.
- Selective Extraction:MSG format allows selective extraction of individual emails from MBOX files, enabling users to manage their email archives more effectively.
How to convert MBOX files into MSG manually?
After deep analysis, we have identified a manual solution for converting your MBOX files into MSG format. To convert MBOX to MSG, follow the provided sections carefully.
Part 1. Configure email account in Thunderbird and export emails into EML format.
First, you have to configure your email account in the Thunderbird application and export the emails into EML format. Here are the detailed steps to do the same.
- Launch the Thunderbird application in your system.
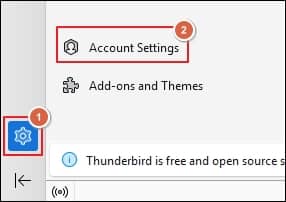
- Click on Account Settings under the Settings.
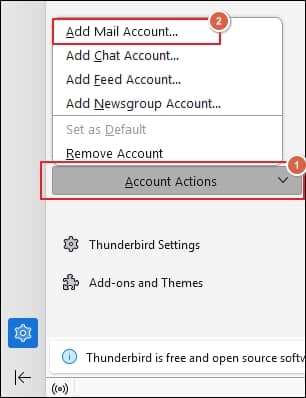
- Select Add Mail Account option from the drop-down list under Account Actions.
- Enter your account details, such as Your full name, Email address, and Password, in their respective columns and click Continue. After that, select IMAP from the Available configurations and proceed to the Done option.
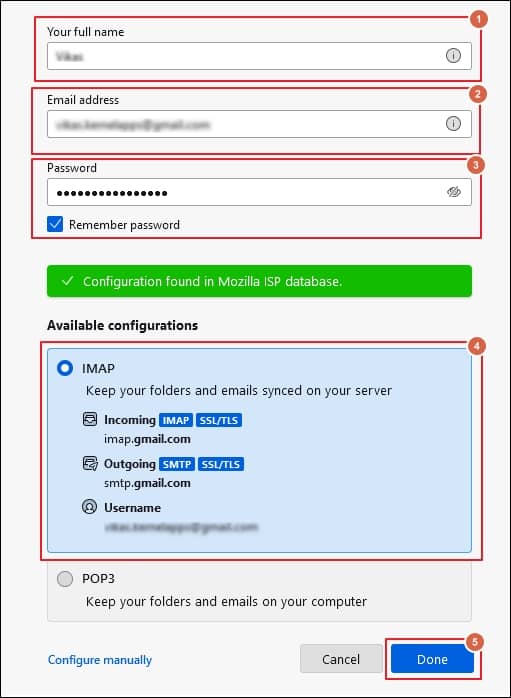
- You have configured the email account successfully in Thunderbird application.
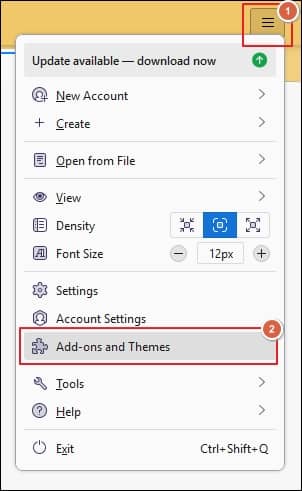
- Click on three lines from the top corner to add ImportExportToolsNg add-on using the Add-on and Themes option.
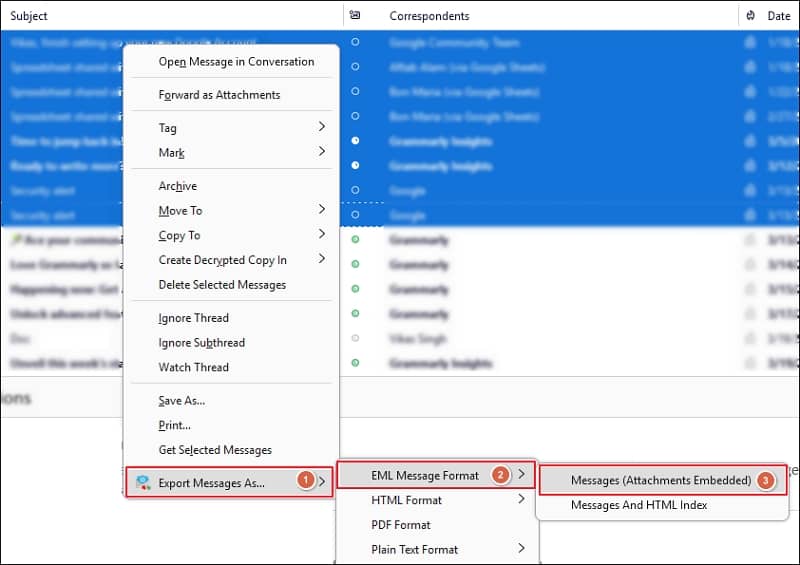
- Select the emails that you want to convert, then right-click on it. Choose the Export Messages As option, then click on EML Message Format and proceed to Messages (Attachments Embedded).
- Choose the desired folder to save the converted emails and click on Select Folder option.
Part 2. Utilize Outlook to convert EML files into MSG format.
Once you have exported your emails into EML format, you can access them in the Outlook application to save them in MSG format. To do so, follow the provided instructions.
- Drag & drop the converted emails into Outlook application to access them.
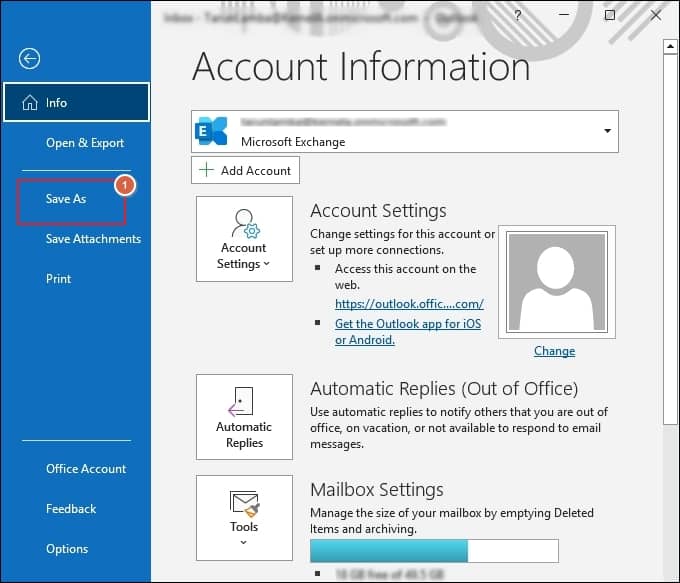
- Click on the email that you wish to convert, then go to the File tab, and click on the Save As option.
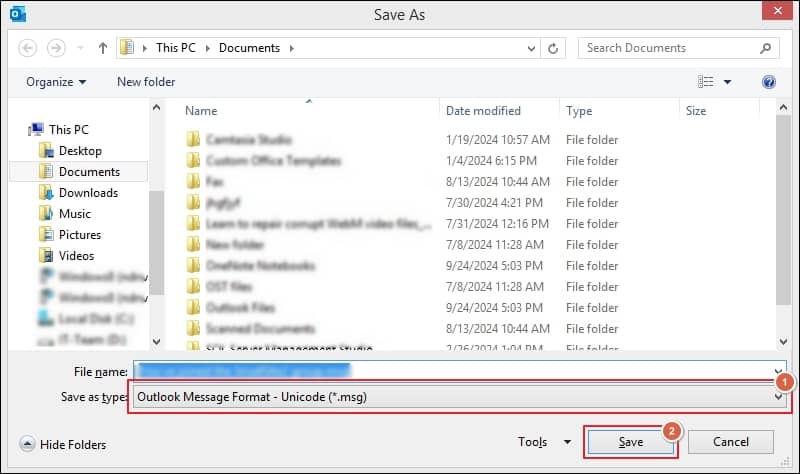
- Select Outlook Message Format—Unicode (.msg) using the drop-down menu and proceed to Save option.
- Repeat the process to save the multiple emails in MSG format.
Why choosing a professional tool is more beneficial for you?
The above-mentioned solution makes it easy to execute the MBOX to MSG conversion. However, the approach has certain limitations, such as being time-consuming, a bit confusing, and not suitable for large mailboxes. To avoid all these limitations and get a smooth conversion experience, utilizing an automated solution like Recoveryfix for MBOX to PST software will be the best resort.
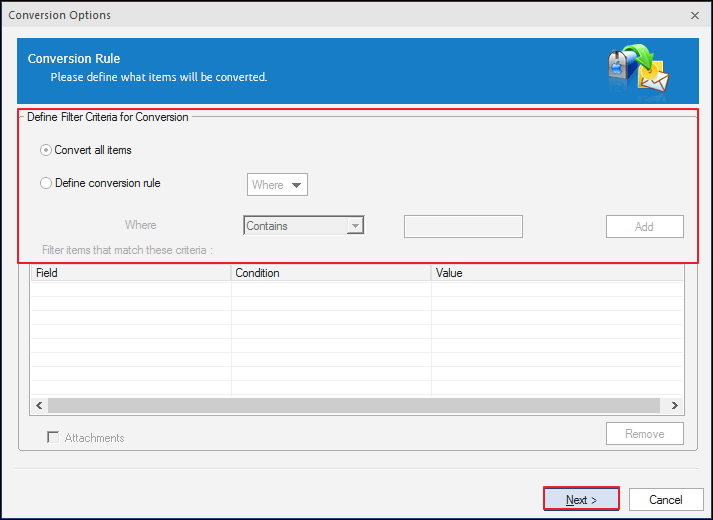
The MBOX to MSG Converter allows you to convert your MSG files into PST format with a few simple steps. The software not only converts your MBOX files into different formats but also saves the converted emails directly to Office 365 with data integrity. It comes with a conversion rule feature using which you can filter the data by Date, Subject, To, From, and more.
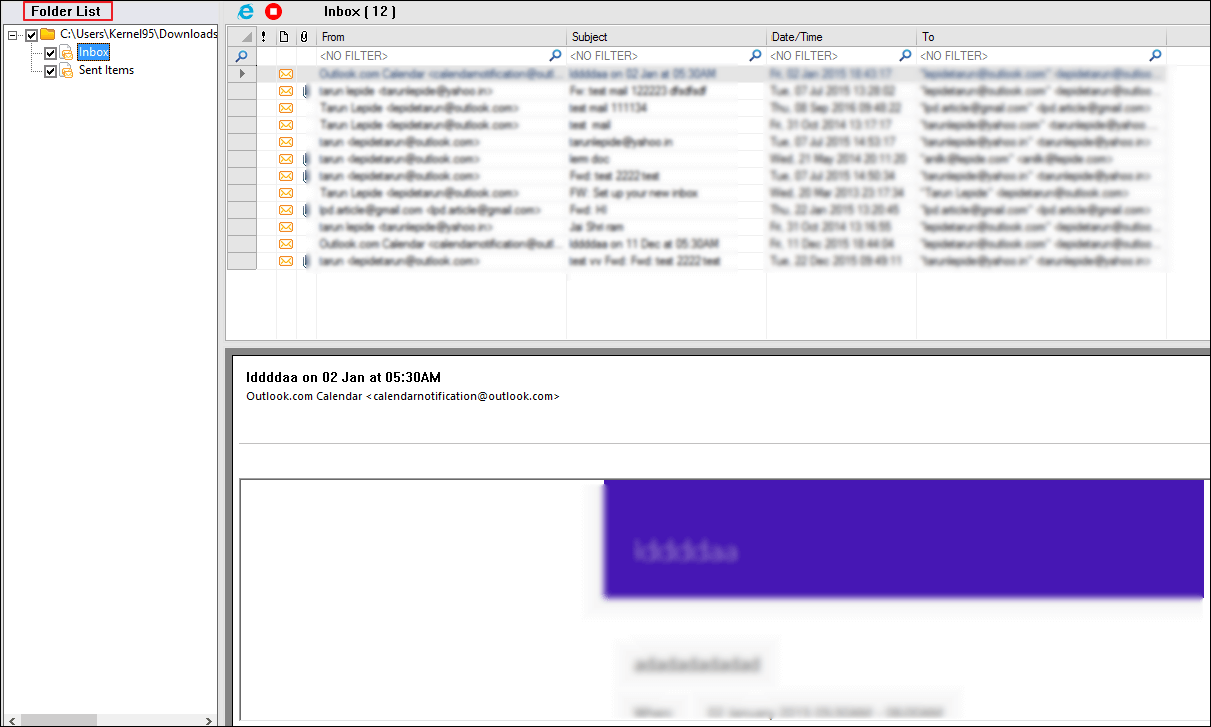
Moreover, the live preview feature sets it apart from other similar tools. By using this feature, you can get a detailed preview of your mailbox items before exporting them to the desired location. You don’t need to worry about the migration as your data is migrated with absolute precision without altering the original structure (maintaining the original hierarchy).
Follow all the steps given carefully to convert your MBOX files into MSG and EML.
- Launch the application and select your email client.
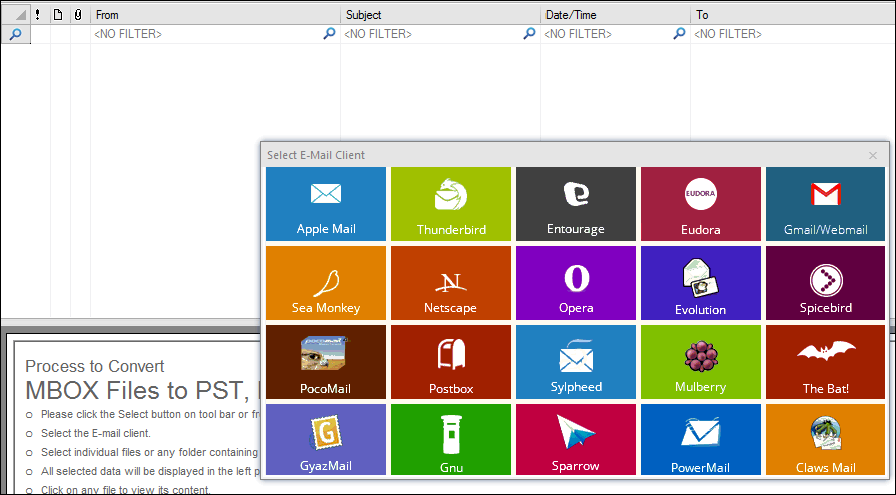
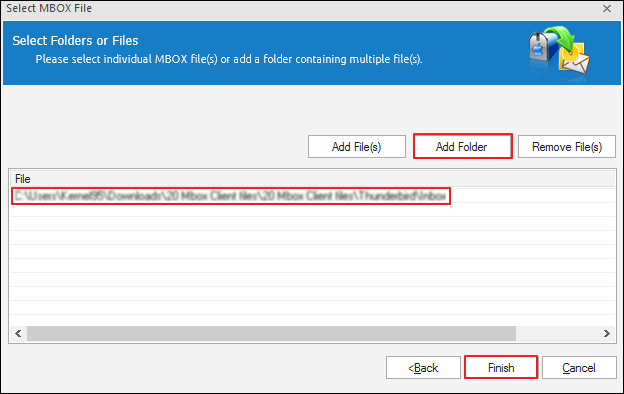
- Tap on Add Folder to select the folder that contains MBOX files and proceed to Next.
- Choose the folders from the Folder List to preview the content.
- Click on Save, and a conversion wizard option will pop up. Select the filters according to your requirements under the ‘Define Filter Criteria for conversion’ section.
- Select Save in MSG format, then Browse to choose the saving location, and check the Save in folder hierarchy option to Save the converted file.

- Monitor the conversion progress in the dialog box.
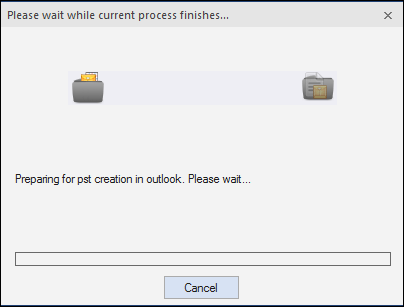
- You can see the location of your saved files on the screen.
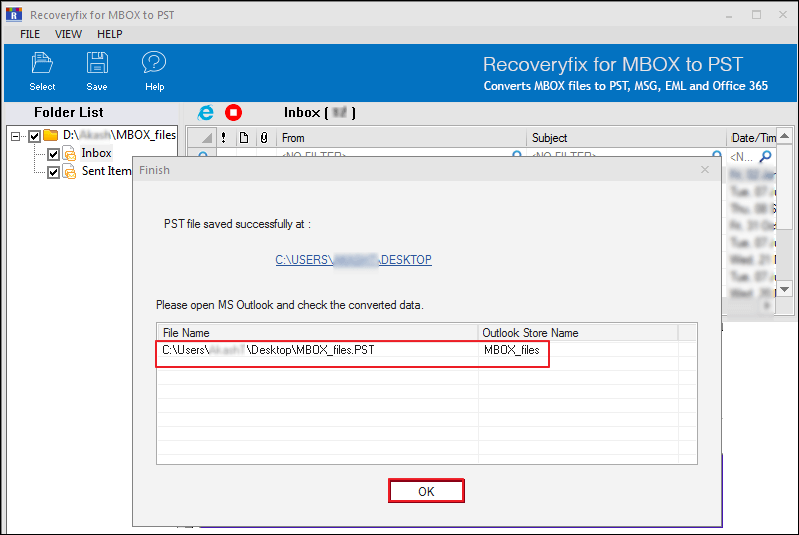
- A PST file is stored at your desired location.
Conclusion
The blog has discussed a comprehensive guide to convert MBOX to MSG with the most appropriate manual solution. But the method is not appropriate for large mailbox conversions. In such a situation, relying on the recommended MBOX to MSG Converter software will help you accomplish the task smoothly.


