Quick approach to disable OST file in Outlook

Updated On - November 11, 2024

OST or Offline Storage Table are the Outlook data files that store data like emails, chats, contacts, or calendars. They are typically created when configuring Outlook with IMAP or MAPI accounts. Users can modify their content offline, and whatever changes are made will automatically sync once the connection is restored.
Despite their easy-to-use or advanced features that enhance user’s productivity, there are situations when users may find it advantageous to disable these files. It could be due to their insignificance or if they are consuming an unusual amount of storage space.
So, to disable OST file, this blog will comprehensively discuss a suitable approach with a step-by-step guide.
Disable the OST file in Outlook 2010 or later version
Upon analyzing the facts, we conclude that sometimes users need to disable the OST file. So, using Outlook utility makes the process of disabling the OST file easier for the user. Let’s discuss the steps to accomplish the task:
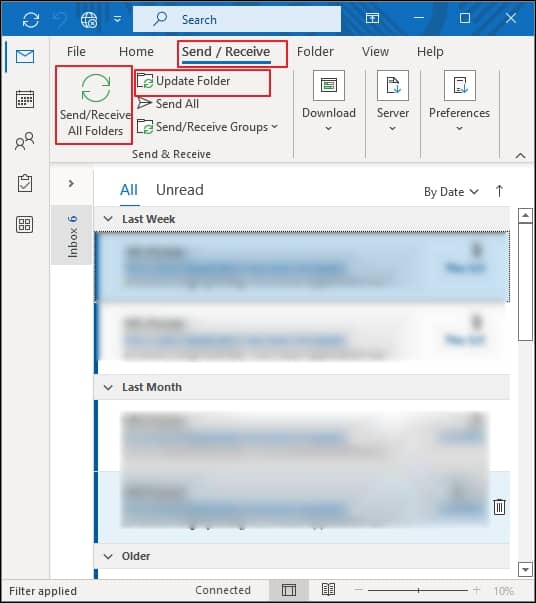
Part 1: First synchronize your offline folders to server folders
To synchronize your offline folders with server folders, follow the below steps:
- Open the Outlook application.
- Follow below sub-steps as per your requirement for synchronization:
- To synchronize specific folders, go to Send/Receive, choose the folder, and click on the Update Folder option.
- To synchronize all folders, go to Send/Receive > Send/Receive all folders.
Part 2: Now, uncheck the Use Cached Exchange Mode
To uncheck this mode from Outlook, follow the below steps:
- Launch the Outlook application again.
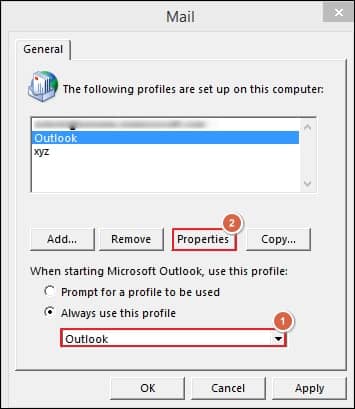
- Go to the File> Account Settings > Manage Profiles options.
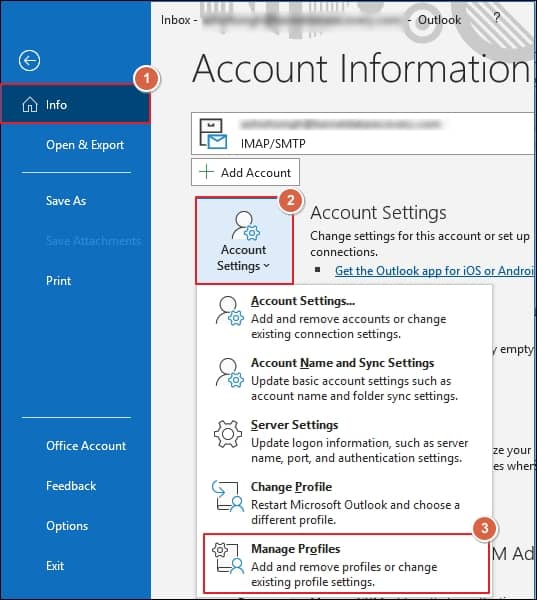
- Tap on the Show Profiles option.
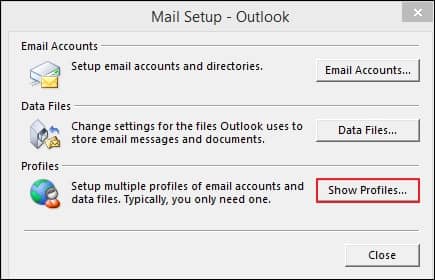
- Select the profile and go to the Properties option.
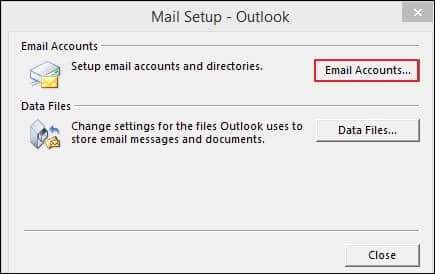
- Tap on the Email Accounts.
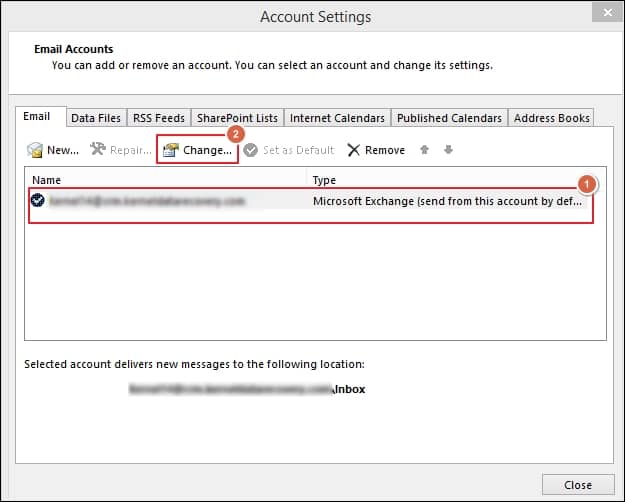
- Select the profile and click on the Change option.
- In the section of Offline Settings, uncheck the Use Cached Exchange Mode.
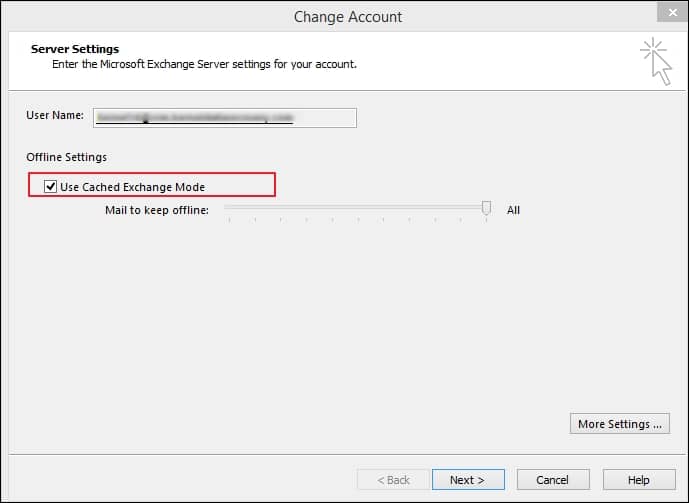
- Restart the Outlook application. It will disable your OST file in Outlook.
Why using an alternate approach is beneficial for managing the OST file
When you disable the OST file, you will lose all chances to access the contents of the file. It can be disastrous in terms of your professional life. Using alternate possibilities is beneficial to avoid any potential data loss. You can save its content as a backup for future use despite disabling the OST file. However, as OST files are not accessible directly like others, you need to convert OST files into a format that is easy to use, such as PST, to access mailbox content.
Use a professional OST to PST converter
Several manual methods might help in managing this concern. But they won’t assure you about data security. Also, it might not be supportive of severe corruption cases. Therefore, using automated specialized tools like Recoveryfix for OST to PST is recommended to tackle all OST-related issues effortlessly.
Recoveryfix for OST to PST advanced tool comes out as the most suitable approach for professionals due to its versatility and powerful features. The OST to PST converter tool offers several facilities that make the tool user-friendly. Here are the significant ones:
- It can convert the OST file of any size and number to the desired output format, including PST, MSG, and many more.
- It even helps the user to recover or repair the corrupted or damaged OST file.
- It allows the user to preview their mailbox content before conversion.
- Its advanced filters allow users to select specific data for conversion.
- It is compatible with all Windows and MS Outlook versions.
Let’s understand the workings of the tool by following the steps given below:
- Download & install the tool.
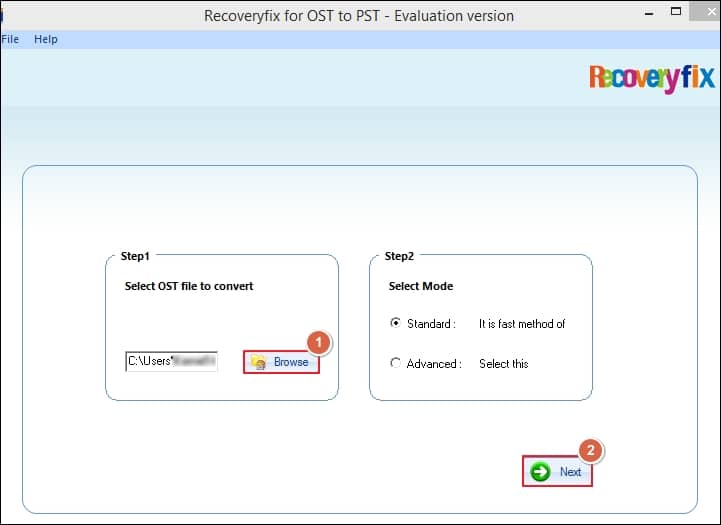
- Open the tool, browse the file that you want to convert and click on the Next option.
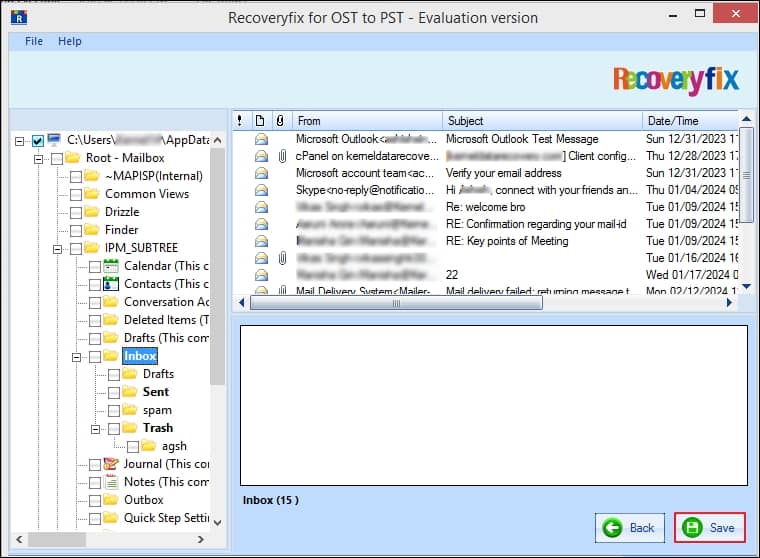
- The following window will show all the folders; you can choose any folder to preview its content.
- You can choose either a whole mailbox or specific folders for conversion. Click on the Save option.
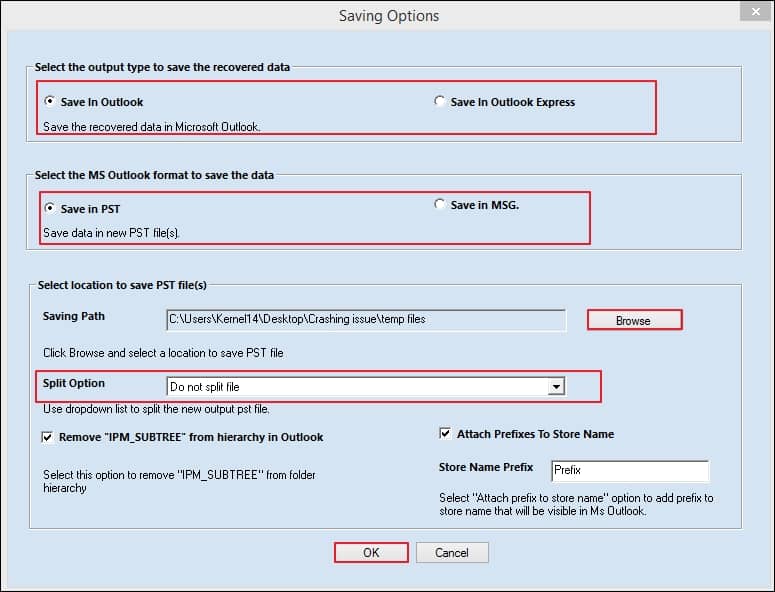
- Now, choose the appropriate options from the Saving Option window to make the converted data more synchronized.
Conclusion
Users looking for an approach to disable the OST file can do so by going through the steps mentioned in the blog. Additionally, the blog has focused on the implications users might face if they disabled the OST file and provided the best alternative to address it. The approach not only manages the OST file but also helps to access the content of inaccessible OST files.