How to migrate Outlook calendar to Office 365?

Published On - March 31, 2025
Switching to Office 365 but worried about losing your calendars? Be relaxed & follow this expert guide to migrate calendar to Office 365 with ease.
Without proper guidance, calendar migration can bring certain challenges, such as missing events, incorrect time zones, and sync errors. Hence, getting this migration becomes crucial whether you are an individual or an organization. Let’s discuss the situations that drive users to perform this migration.
Why do users migrate Outlook calendar to Office 365?
Here are some noticed points that make users migrate Outlook data to Office 365:
- Users can access & manage their schedule from anywhere, which provides flexibility.
- Enhanced collaboration with other Office 365 applications like Microsoft Teams.
- Advanced security protocols provide a more secure environment for users to work.
- Placing calendars in Office 365 helps users centralize their information in one location.
- With the Office 365 subscription plans, users can scale up or down their work requirements as needed.
Top ways to migrate Outlook calendar to Office 365
After going with several hits & trial approaches, we have come up with the top two ways to execute the process that can meet the user’s expectations.
Solution 1. Using the Outlook 365 utilities
It is one of the best manual methods that can help you provide suitable results if the steps are performed correctly. To make the process simple & understandable, we have divided it into two sections. Follow them carefully:
Section 1- Save the Outlook Calendars in .ics format
- Launch the Outlook application & choose the Calendar icon.
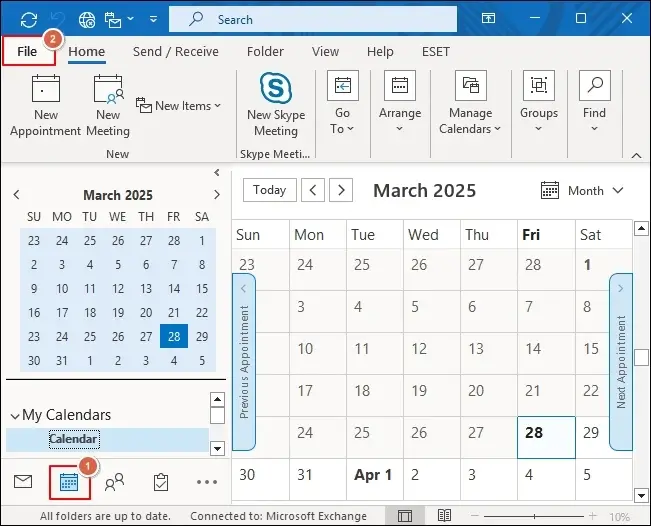
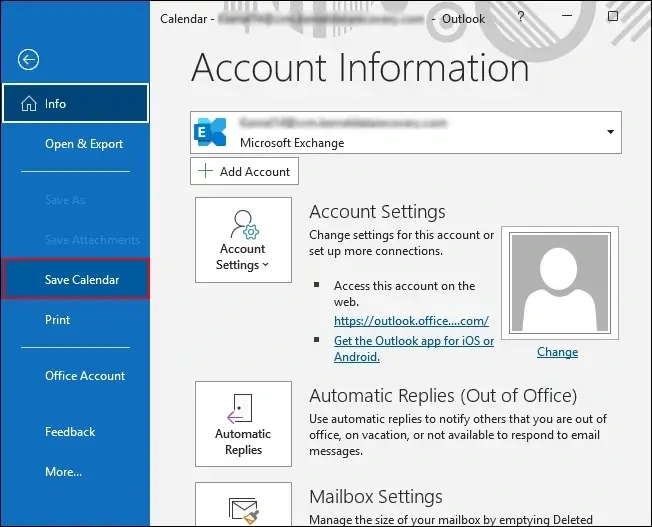
- Go to the File option & click on the Save Calendar option.
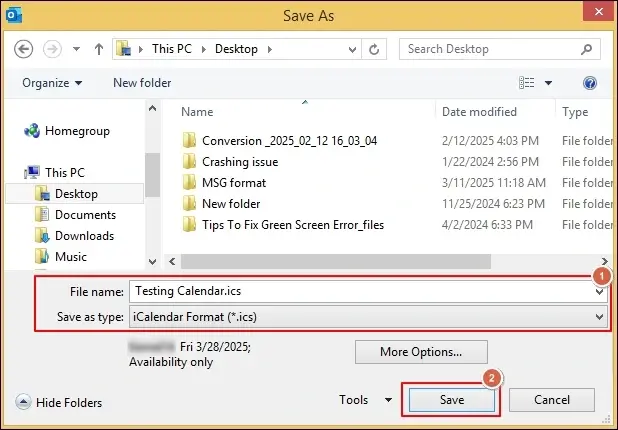
- Select the preferred destination and hit the Save option to store the calendar in .ics format. The calendar will be saved with an ICS extension.
Section 2- Import the calendar in Office 365
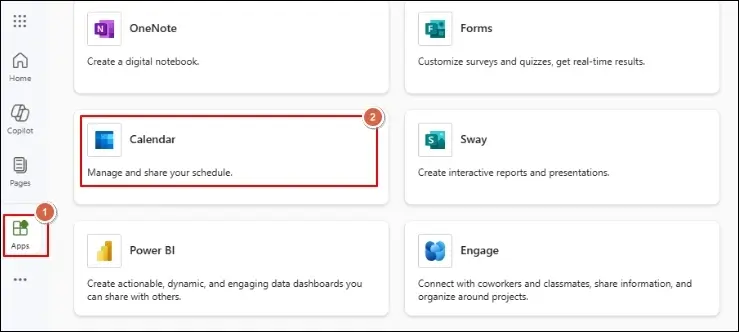
- Access Office 365 with the required credentials.
- Choose the Calendar option from the Office 365 Apps section.
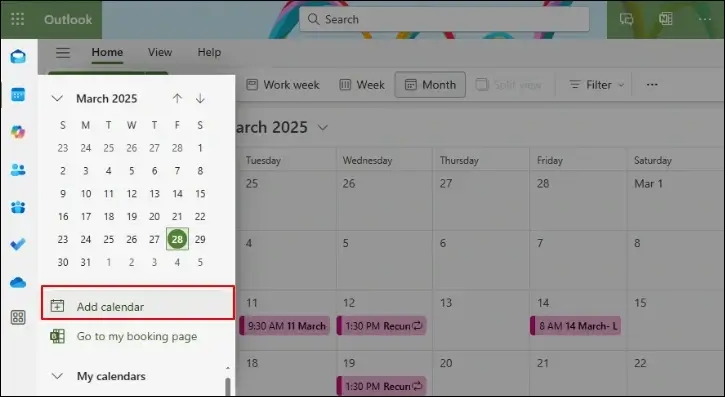
- Click on the Add Calendar option in the next section.
- Under the Add calendar window, select Upload from File option. Browse to the saved calendar .ics file, provide the destination, and click on the Import option. This will start the “migrate calendar to Office 365” process.
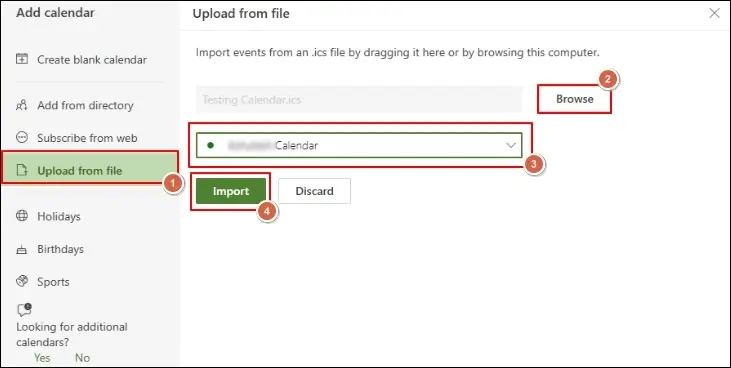
- After some time, you will be prompted with the message “Imported xyz calendars to My calendar.” With this, you can utilize Office 365 services while keeping the calendar data safe.
Solution 2. Use the PST to Office 365 automated method!
User query: I work for a university, where my primary role is to manage, schedule & organize the events within the time frame. So, I used to manage it with the help of Outlook Calendars. But to optimize the work & explore advanced features, we switched our complete work to Office 365. We don’t want to lose the earlier calendars, so we tried different manual methods to keep them for future use. But still showing events like “busy” or “out of office“. Can you suggest any alternate advanced option for instant & accurate results?
Missing steps while performing manual methods or complex technicalities increases the chance of not getting the desired result. So, choosing the advanced PST to Office 365 software can be a better approach than others to avoid ambiguity. But which one?
Since its launch, Recoveryfix PST to Office 365 has been the most handpicked tool among professionals. Its high-end algorithms and user-friendly interface help users migrate data to Office 365 with ease.

Let’s look at its stepwise functionality to understand how it works.
Step 1. Download the software & complete the installation process to the local system.
Step 2. Launch the software and click on the Add option to choose the desired PST file from your local drive.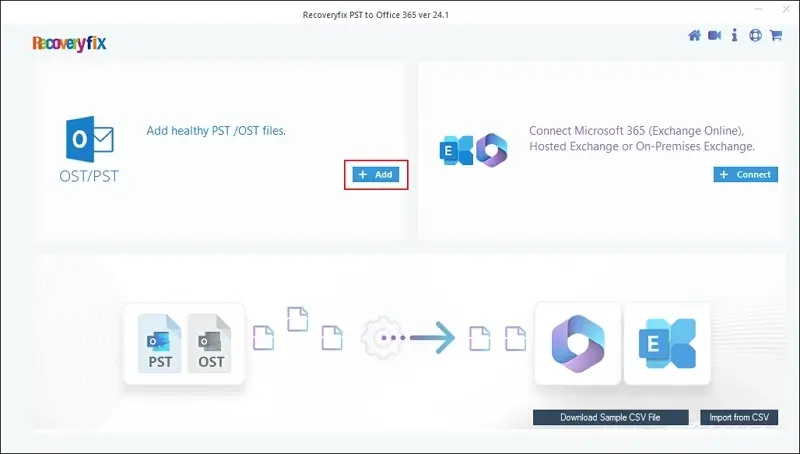
Step 3. When your PST file is mapped with the tool, tap on the Connect option to sign into your Office 365 accounts.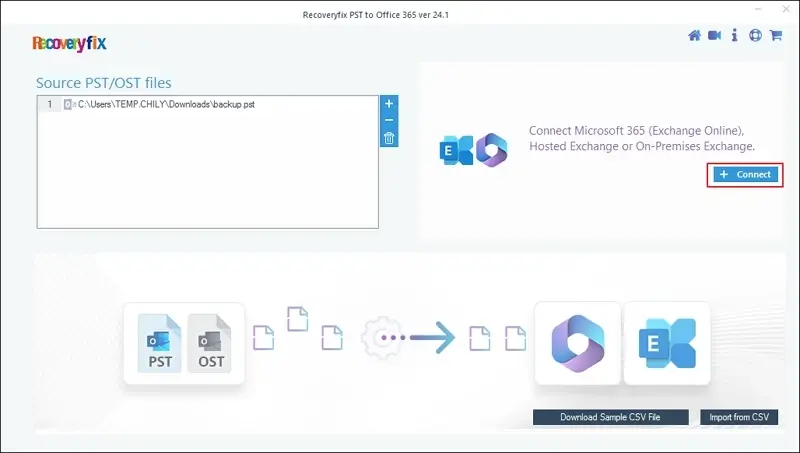
Note: Here, you have the option to map multiple files with the tool for transferring data by using the icons shown.
Step 4. Tap on Use Modern Authentication, followed by clicking on the OK option.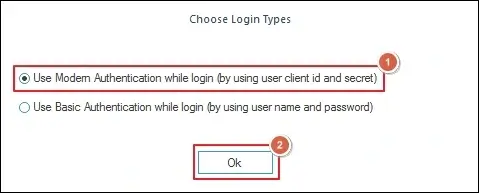
Step 5. In the required fields, enter the necessary details, such as the Tenant ID, Client ID, and Client Secret Value. Then, choose the Single Mailbox or List all Mailboxes option as needed and hit the Add option.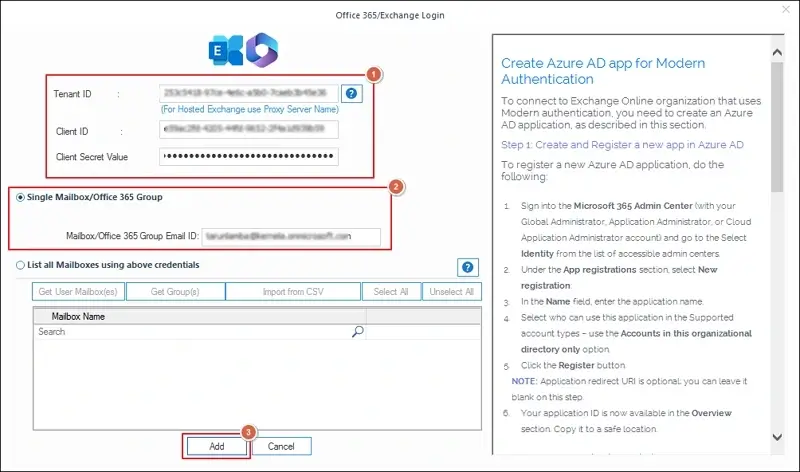
Step 6. Select the destination mailboxes & click on the Set Filter and Migrate option.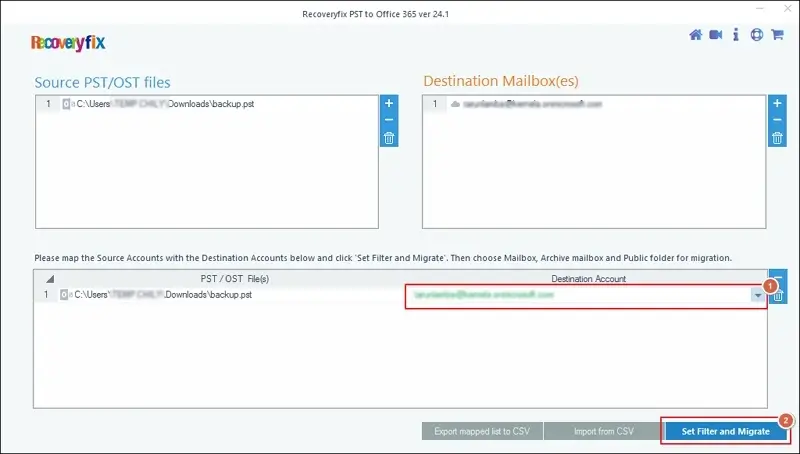
Step 7. Select the desired folder in the destination, such as Archive Mailbox, Mailbox, or Public Folder. Then click on the Migrate option.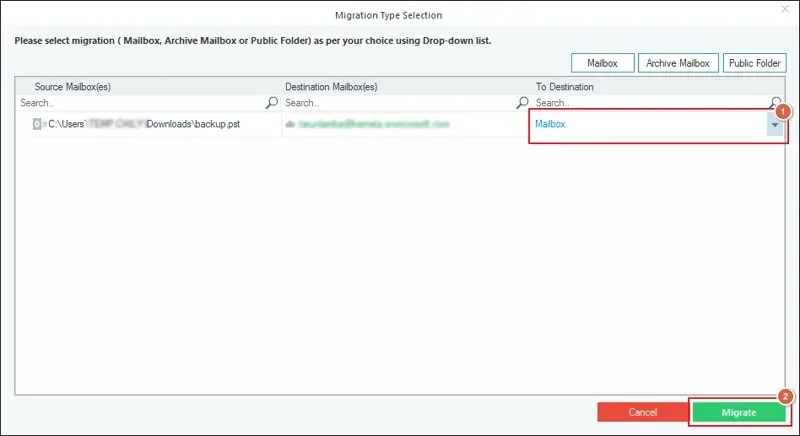
Step 8. Filter your desired data with the provided filters and tap on the “I am OK, Start Migration” option.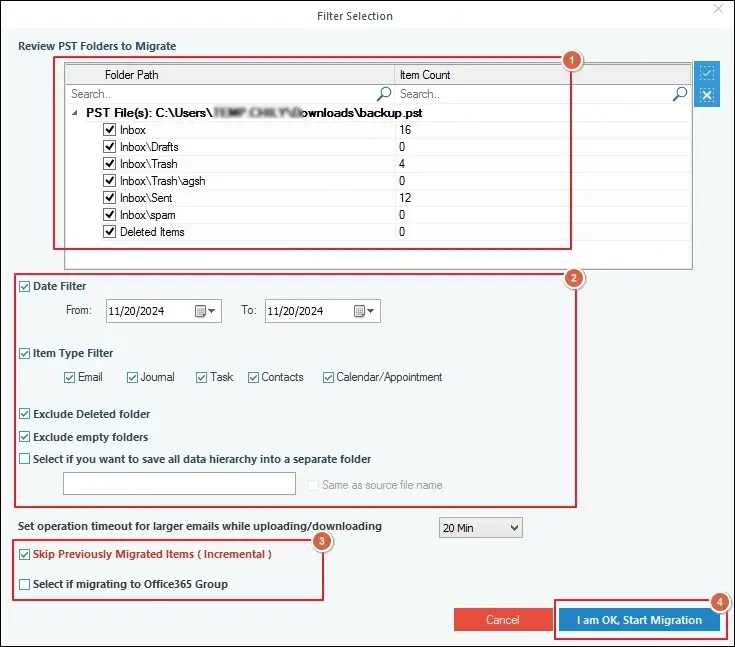
Step 9. It will start the migration. Wait until you get a prompt message: “Process completed. Please save the report to CSV.” Then, save the report in CSV format and hit the OK option to complete the process.
End thoughts
When considering the usability of calendars in our daily lives, it can be understood that saving them becomes a requirement for many users. We hope that our article has provided all the information that users need to know to import calendars into Outlook.
You can choose either the manual or the recommended advanced option. However, make sure that you follow the steps correctly.
FAQs: Most Often doubts!
Q1- Can I export Outlook calendars using Outlook utilities only?
Using Outlook’s built-in Import/Export feature, you can easily export Outlook calendars to CSV and PST formats.
Q2- Why is using manual methods not preferred over automated ones?
Here are some points that support this concern:
- No support for bulk files.
- Size constraints & supports limited file formats.
- Time-consuming & you need certain permission.
- Doesn’t help in selective data migration.