Methods to Backup Outlook PST File

Updated On - April 10, 2024

Personal Storage Files (Outlook PST files) work with an online Outlook account. A copy of this PST file is stored on mail server while using an Outlook account with Microsoft Exchange Server and another on the local drive which Outlook automatically creates.
Creating a backup of your PST file will help you for sure in worst-case scenarios like when your PC (computer) stops working or your PST files become corrupted or infected because of malware, you need to transfer data with different machines, etc. Regular backup ensures the security of data in case of system failure or accidental deletion. Now, we will understand the various methods for backup of PST files.
How to back up Outlook PST files manually?
Considering the different scenarios, we have listed the best available methods to backup Outlook PST files.
Method 1. Backup Complete Outlook data In a Single PST file
This section will explain that how you can take a backup of all your data in a PST file including everything like contacts, emails, email properties, attachments, etc.
Note: Do not follow these steps if you are using Outlook with Microsoft Exchange Server.
Before proceeding, you should close Outlook, Microsoft Exchange or Windows Messaging if any of the programs are running (open) already.
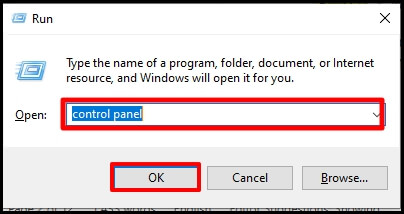
- Press Windows + R > type control panel> press Enter.
Note: Select User Accounts on Pick a Category screen
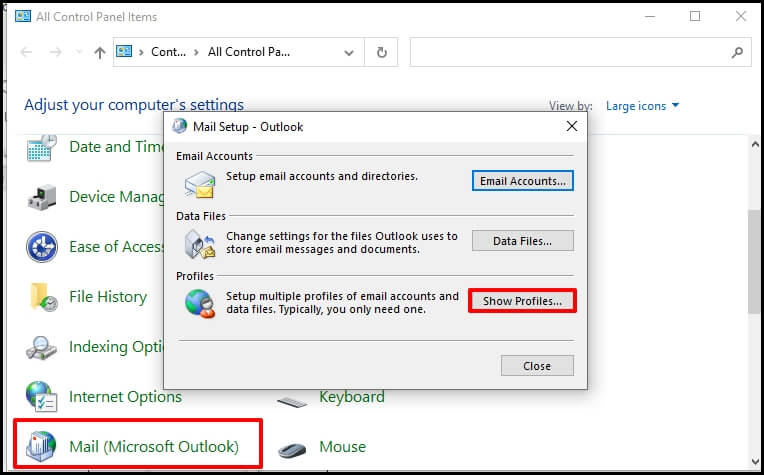
- Click the Mail icon > select Show Profiles.
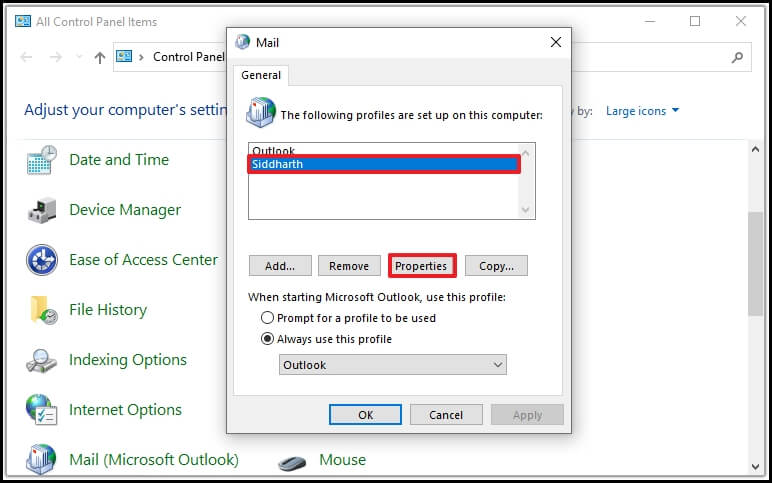
- Select the applicable user profile > click Properties
- Click on Data Files. then, Personal Folders under your username.
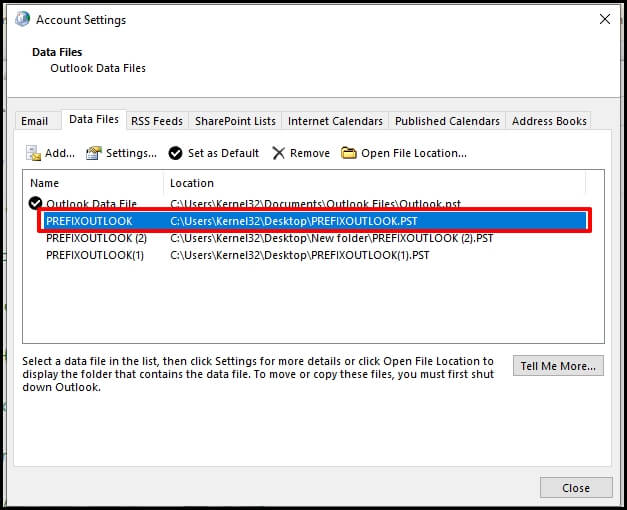
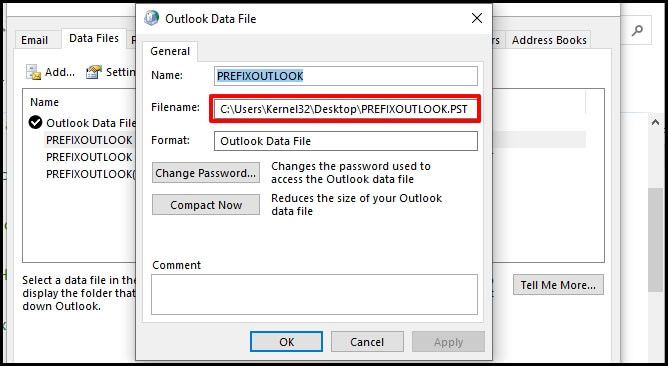
- Click Settings, here copy the path & file name you now in the pop-up window.
- Close all the Windows properties.
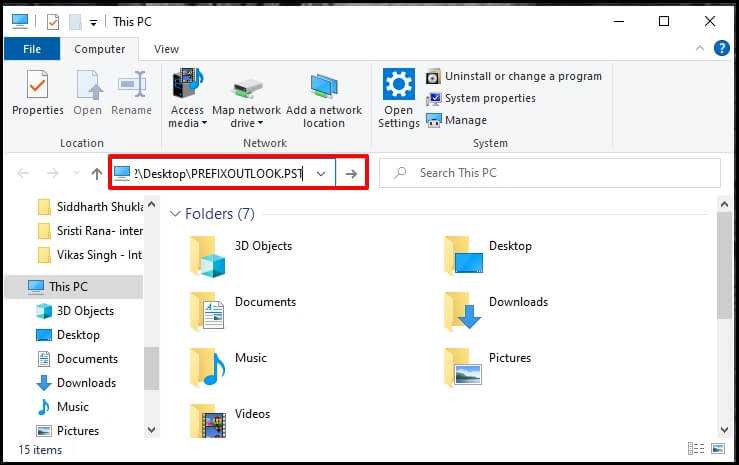
- Open This PC, or My Computer > copy the path noted in step 6 in the address bar > press Enter.
Note: Usually Outlook PST file contains all the data which is stored in the MAPI folder, and the size of this folder can be massive. If you want to reduce the PST file size then, click Settings and select Compact Now.
Now, you can select the PST file, and make a copy (backup) of the file.
Note: If Personal Folders are missing then search for how to create a PST file. If your Outlook account is saving your mailbox data on an Exchange Server, then search for how to back up PST data files located on an Exchange Server.
Method 2. Use Import/Export Option to Backup Selected Data
The above section explains about creating backup of your Outlook account’s PST file containing all your data. But if your concern is data importance over the data quantity, then these steps will help in backing up the files accordingly in Outlook:
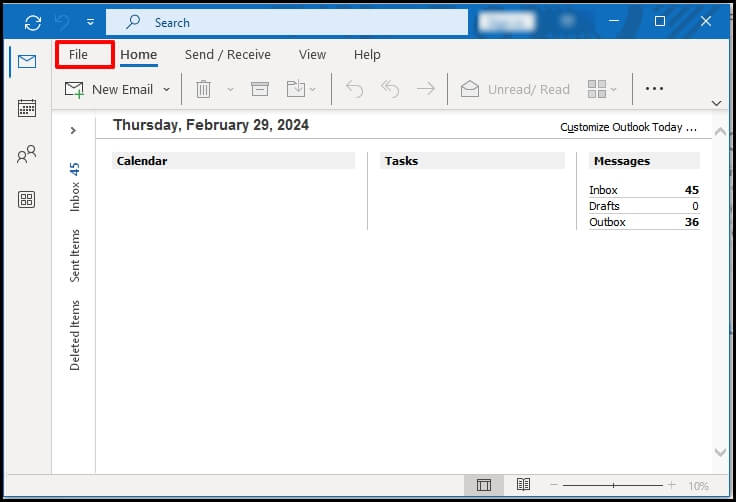
- Click the File tab (top left corner).

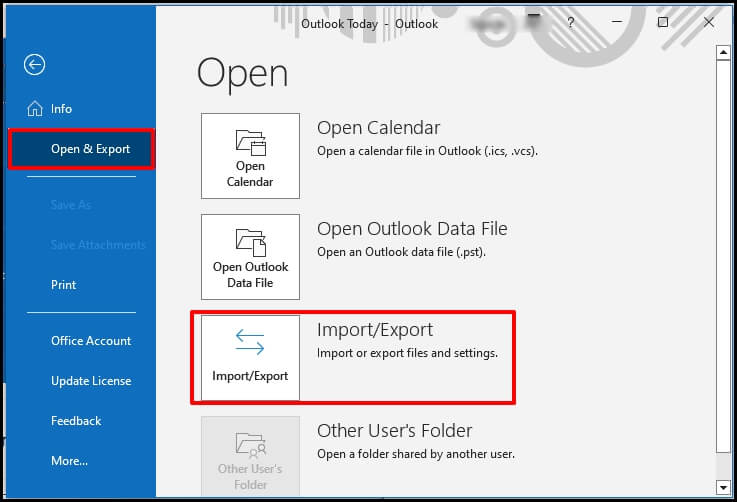
- Click and choose Import & Export

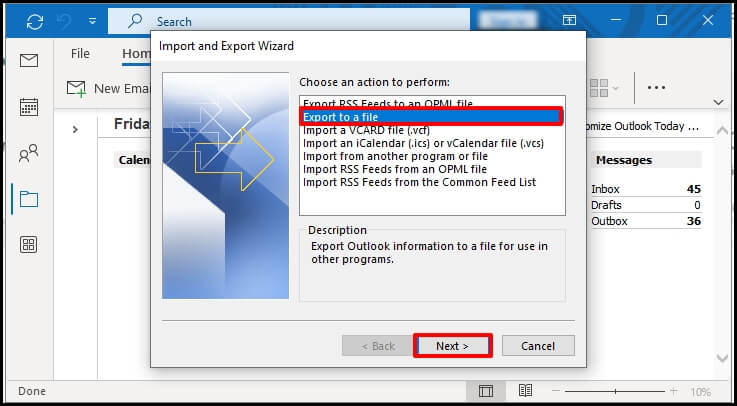
- Select Export to a file > click Next.
- Click on Outlook Data file > select the folder you want to export (backup) > click Next.

- Browse for the location where you want to save your PST file backup > hit Finish.
Note: While backing up the file, you can change the name of the file if you want.
Method 3. Restore Backed Up PST files to Another System
This section explains the technique to transfer Outlook PST data file between one PC to another, and to import that PST data file.
Before proceeding further, take note that you would need a PST backup file which you can import on a new PC, which has been discussed above.
In Outlook 2016
- Open Outlook > click on the File tab (top left corner).
- Click Open & Export > select Import/Export.
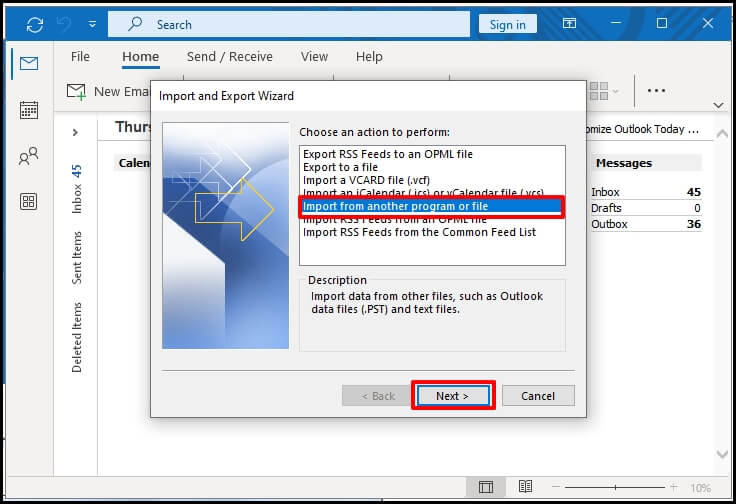
- In the Import/Export wizard > select Import from another program or file > click Next.
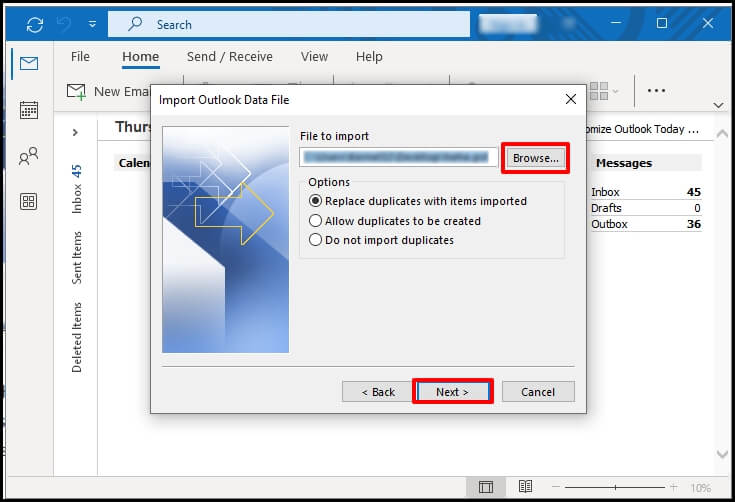
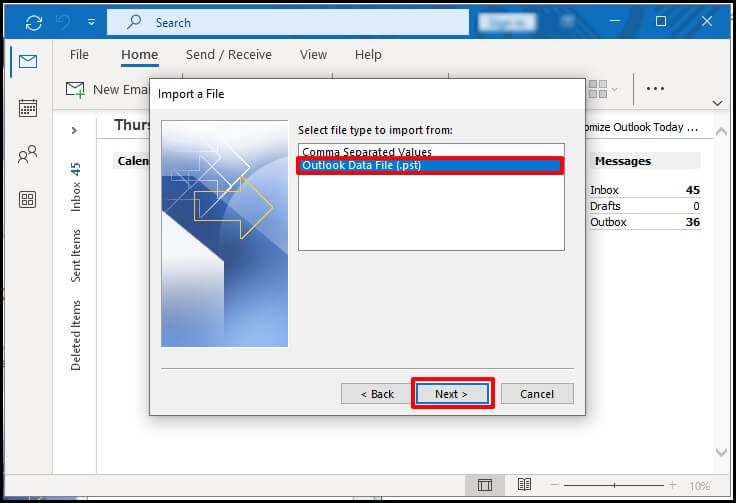
- Select Outlook Data File (.pst) (in import file wizard) > click Next.
- Browse the PST file you want to import, then Next, then Finish.

Note: Select from the given options as you like, under the options area. You can choose to import the full PST file, or you can select which subfolders you want to keep. You can apply filters before finalizing the import process and choose whether to import your data in the current folder or a new one.
In Outlook 2010
- Click File tab > in Info tab, select Account Settings > Account Settings
- Select the Data Files tab (in the account settings pop-up window) > click Add,
- Select Outlook Data File (.pst)
- Click OK and close Outlook.
Note: Give your transfer PST file a new name, like “Transfer”
Note: Now, in Outlook 2010 Windows app, you can select Transfer.pst account file and start saving your data & other stuff.
In earlier versions of Outlook
- Click File tab > select New > select Outlook Data File.
- Give your PST file a new name, like “move.pst.”
- Input a display name for Personal Folders File > click Ok > close Outlook.
So, these are the procedures to transfer Outlook PST data files between two PCs, in Outlook 2016 and earlier versions of Outlook.
Data Backup is Fine: What if PST files are Corrupted?
The above-mentioned solutions will help you backup your Outlook data in PST format. However, issues arise when the PST file becomes corrupted, and you can’t access it when needed.
In that case, choosing professional tools like Recoveryfix for Outlook PST Repair will be the best option. The PST Repair tool will help you restore data from your corrupted or damaged PST files to their original state.
Also, it allows you to save the selected data from the damaged PST file.
Conclusion
The blog has shown you different ways to backup Outlook data into PST files and transfer them to other systems. All the provided solutions will help you secure your important data or access it to another PC.
Lastly, if your PST file is corrupted or damaged, then choose the recommended solution. It will repair corrupt PST file instantly and convert them into different formats.