Migrate Gmail to Office 365: Step-by-step guide

Updated On - September 26, 2024

G Suite & Office 365 are the popular cloud-powered productivity platforms. Gmail is part of the G Suite platform that fulfills the need for effective email communication. However, increasing demand for data storage becomes the limitation of this email client.
So, the organization looks towards the plan in which they will get all significant services. Office 365 is one such platform that has suitable, flexible & scalable plans for businesses along with home users. Its enhanced security, cloud-based collaboration & mobility, easy accessibility, and advanced features make this preferable over others.
These factors motivate users to migrate Gmail to Office 365. Let’s explore the method to execute the migration effectively.
Manual way to migrate Gmail to Office 365
Transfer Gmail to Office 365 process is crucial for any organization or individual, performing the process with utmost care becomes important for the user. So, follow the given steps very carefully to avoid any uncertainty in the result:
Step 1. Domain verification
It is necessary to verify to Microsoft 365 that you own the domain you used for your G Suite accounts. Without verifying the domain, migrate Gmail to Microsoft 365 process may be delayed.
Note: Using your companyname.onmicrosoft.com domain that is included with the Office 365 plan is considered as the alternate option instead of your custom domain.
Step 2. Add users to Office 365
Office 365 provides you with a feature to add users, either one or several users at a time. While adding the users, you also need to assign the corresponding license to them.
Step 3. Create a list of Gmail mailboxes for migration
To execute the task, you need to create a migration file that contains Gmail mailbox lists for migration along with the corresponding app password of each email. Migration file can also be created through Excel. Let’s delve into the steps to accomplish the task:
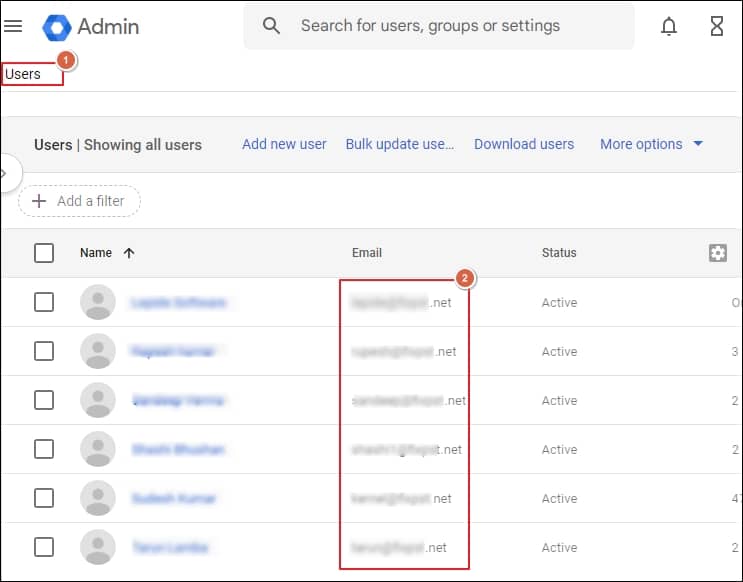
- Login to the Google Workspace admin console with your administrator username & password and go the Users option.
- Copy the user’s email address.
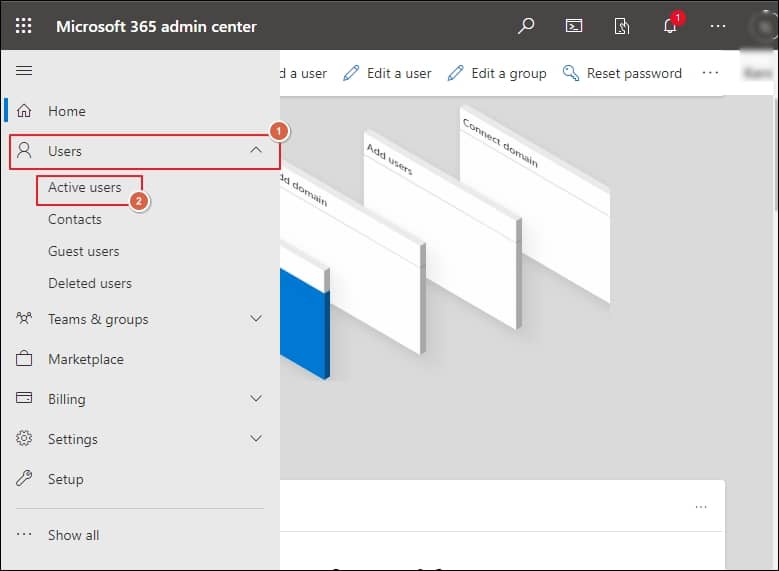
- Now, launch the Office 365 admin center & select Users> Active Users.
- Further, open the Excel application to fill in the entries as shown:
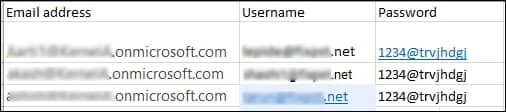
- Then, save the file in CSV format & close the Excel application.
Step 4. Establish a connection between Office 365 & Gmail
For successful migration, Office 365 needs to be connected with Gmail. So, for this concern, Office 365 uses a migration endpoint that establishes the connection between them for the migration. Follow the below steps to create a migration endpoint:
- Go to Migration in the Exchange admin center.
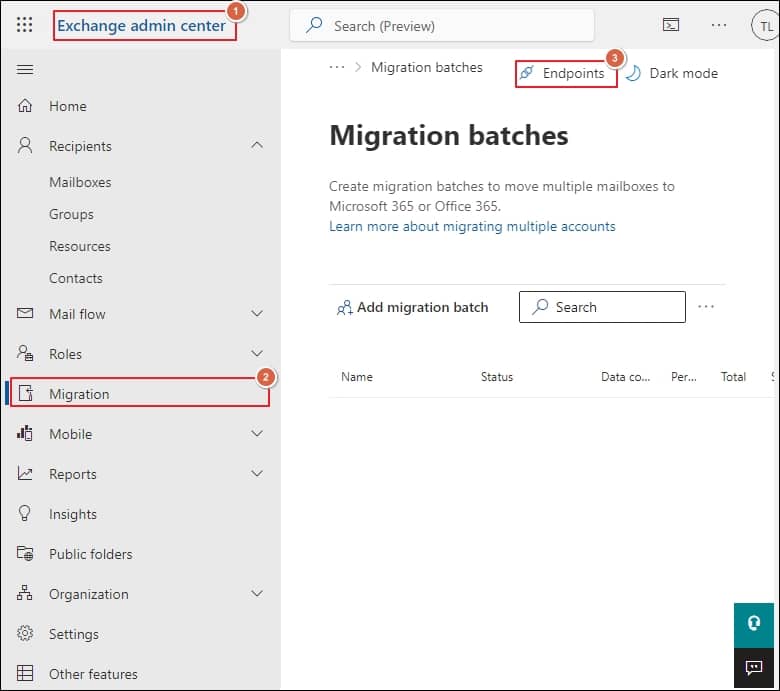
- Click on the Endpoints & go to the Add+ option to create a new migration endpoint.
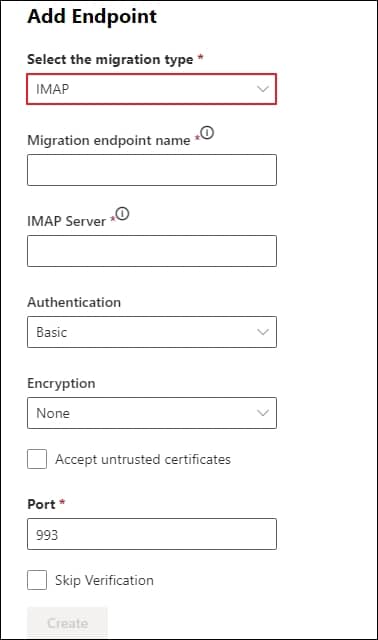
- On the Add Endpoint page, choose IMAP as the migration type & fill appropriate information in the following fields, like Migration endpoint name, IMAP Server & leave the remaining information as the default settings. Finally, click on the Create option.
Step 5. Create a migration batch & initiate Gmail to Office 365 migration
The Migration batch contains the migration file that we have discussed in the previous steps. So, for creating the migration batch, follow the given steps carefully:
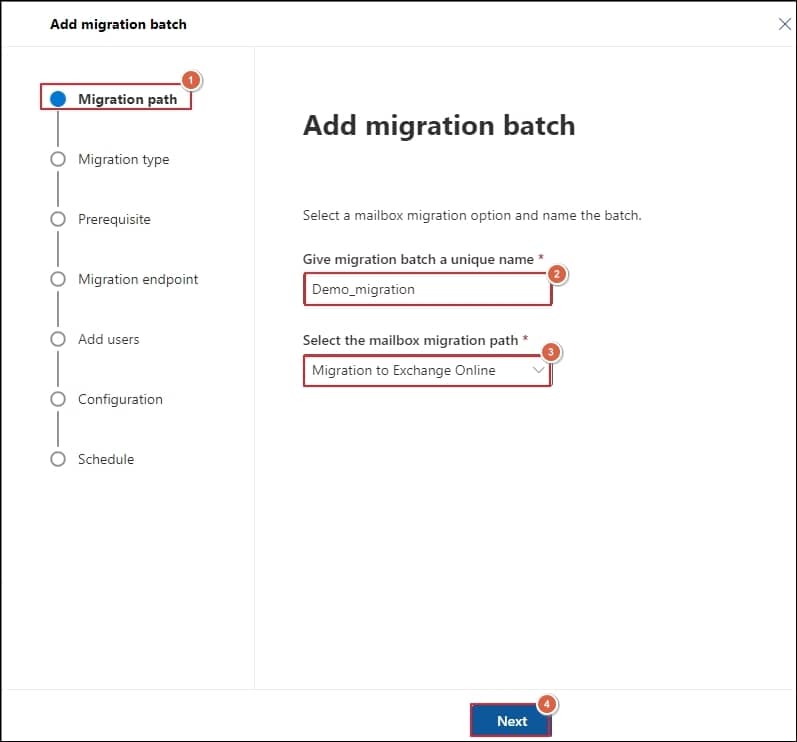
- Go to the Exchange admin center, tap on the Migration followed by the Add migration batch option.

- In the Add migration batch, give a unique name to the batch & select Migrate to Exchange Online as a migration path. Then, click on the Next option.
- Choose the IMAP migration as the migration type & click on the Next option on the Migration type page.
- In the next steps, click on the Next option after ensuring that you have completed all the prerequisites.
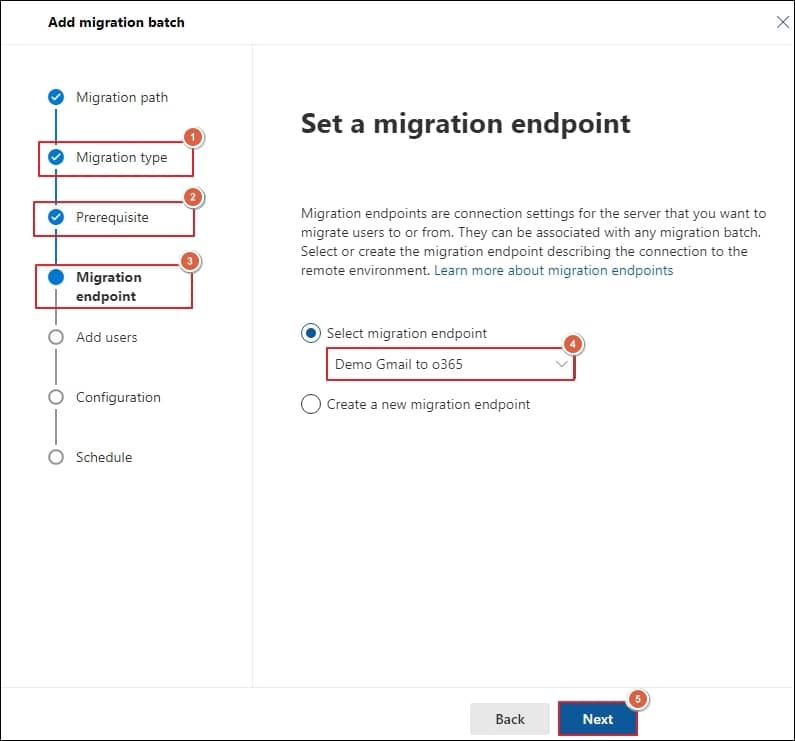
- Now, select migration endpoint from the dropdown list in the Set a migration endpoint page & then click on the Next option.
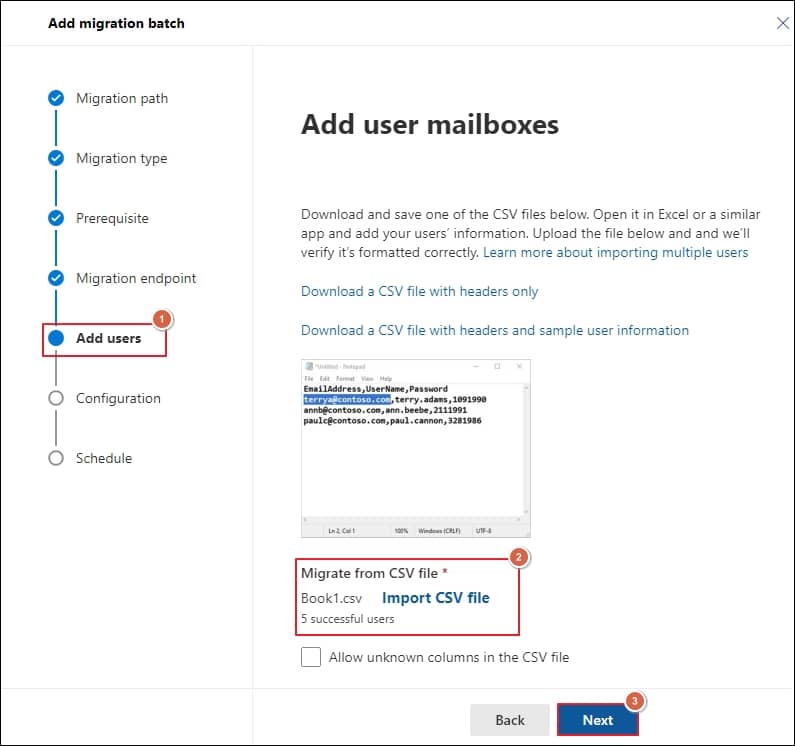
- Now, in the Add user mailboxes page, upload the user information by clicking on the Import CSV file option followed by the Next option.
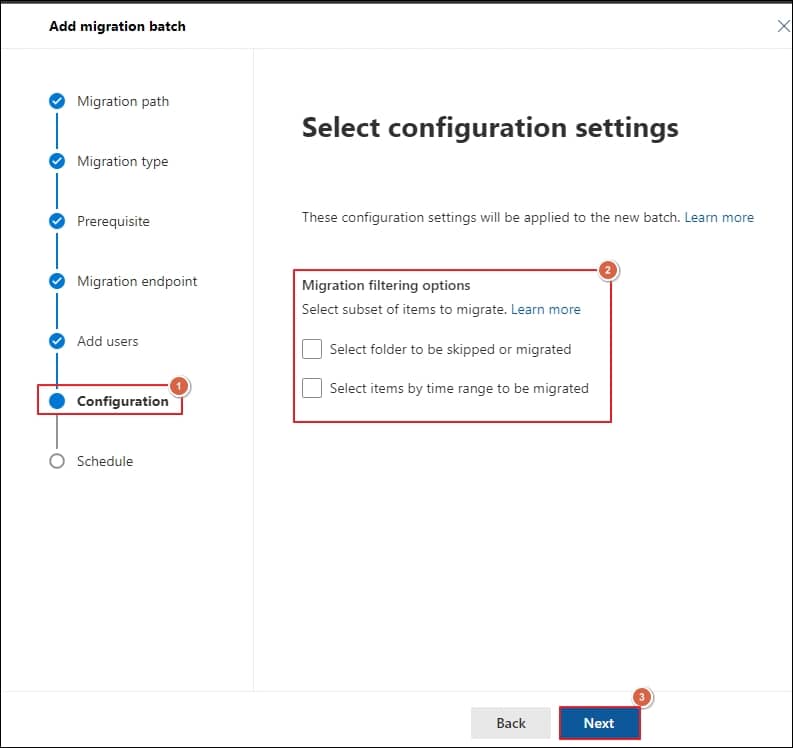
- After selecting the suitable options, tap on the Next option in the Select configuration settings page.
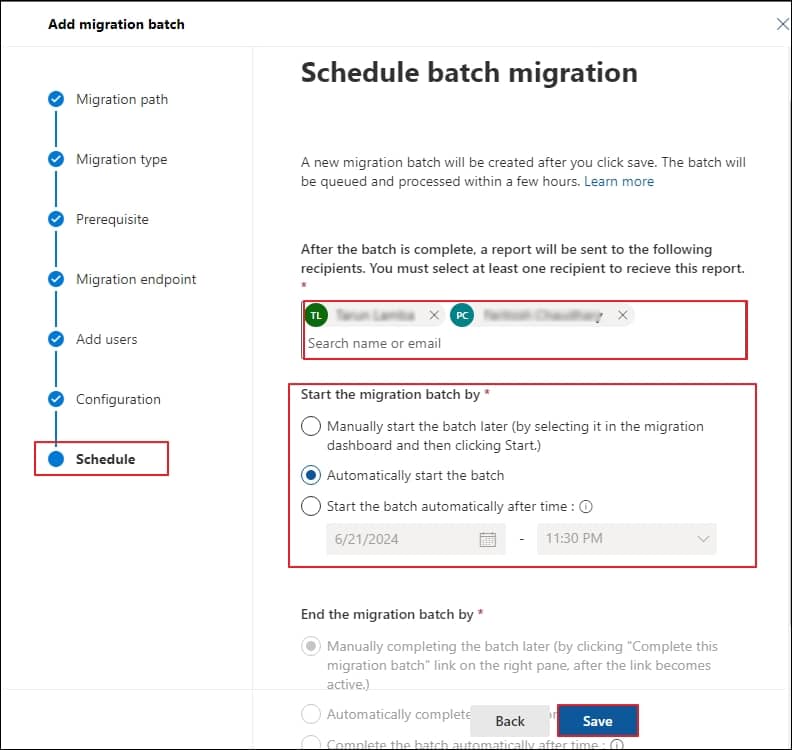
- By selecting the appropriate options for efficiently managing the migration in the Schedule batch migration page, click on Save> Done options.
Note: You can check whether Migration worked or not by going to the Migration option in the Exchange admin center. If the status is Completed, then migrated successfully; otherwise, recheck the associated mailbox status for specific errors.
Step 6. Update your DNS records to route Gmail directly to Office 365
For delivering email, email systems use a DNS record called an MX record to figure out the location. While in the migration process, usually, your MX record was pointing to your Gmail system. But to complete the migration process, it is needed to point your MX record to Office 365.
Follow the given steps to update the DNS record:
- Login to Office 365 with your work or school account.
- Tap on the Setup followed by the Domains option.
- Choose your domain & then select Fix issues.
- Choose What do I fix? for each DNS record type & follow the corresponding instructions to add the records.
- You will see a message that your domain is set up correctly (No action is required) once you add all the records.
Note: Wait for around 72 hours since your partner or customers take this much time to recognize the changed MX record.
This way, you can execute the Gmail to Microsoft 365 migration process completely.
An automated method to transfer Gmail to Office 365
After performing the manual method, you can access your migrated data in the Exchange component of the Office 365 platform. But when you migrate from Gmail to O365, you can face certain limitations like being time-consuming, complex for the novice, & prone to data loss that makes the migration process challenging & frustrating. Also, doing IMAP migration manually doesn’t support the migration of contacts & calendars.
Hence, to avoid these limitations, it is always recommended to prefer an advanced third-party tool like Recoveryfix IMAP to Office 365 for instant migration. It comes with an advanced & robust feature that helps users to migrate Gmail to Office 365 easily & also make the IMAP to Office 365 tool compatible even in unusual scenarios.
Let’s explore some significant aspects of the tools that make the Gmail to Microsoft 365 migration process simple & convenient:
- It helps the migration of not only Gmail accounts but also other IMAP accounts, including Yahoo, G Suite, AOL, Zoho, Amazon Workmail, etc., to Office 365 with complete integrity securely.
- It offers an incremental migration feature that removes duplicity of the data.
- It also generates a final report of migration in CSV form that offers a detailed analysis of the migration process.
- It also offers to migrate specific folders, including mailbox, Archieve mailbox, or public folder.
Conclusion
Enhancing productivity or storage limit are the prime cause to migrate Gmail to Office 365. So, for this concern, we have discussed the Gmail to O365 migration process in detail with a step-by-step guide. Additionally, the blog has highlighted the importance of using an automated tool with its advanced features like automated mapping with CSV files & many more.