How to whitelist a domain in Microsoft 365?

Updated On - December 11, 2024

There are several folders in the mailbox section for managing the mailbox efficiently, like spam, inbox & many more. These folders help users categorize or prioritize their important or useless emails. But sometimes, due to some organizations’ work, users look to be notified about specific domain emails that were considered spam earlier. Office 365 allows its users to change the settings of their mailbox or create some rules for getting notifications about that specific one. In this regard, we will discuss two practical methods to accomplish the task as users want. Let’s delve into the discussion to know more about it.
How can you whitelist a domain in Office 365?
Whitelisting the specific domain emails makes searching easy for organizations or users. However, as it comes with certain technicalities, following the given steps becomes crucial for satisfactory results. Here’s how you can execute this:
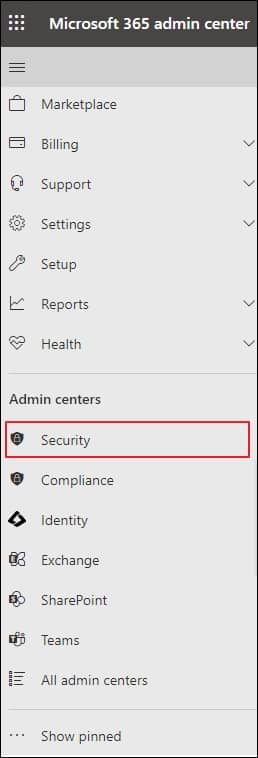
- Access the Office 365 account, go to the Microsoft 365 admin center & click on the Security option in the Admin centers section.
- Now, in the Microsoft Defender window, go to the Email & collaboration section & tap on the Policies & rules, followed by the Threat policies option.
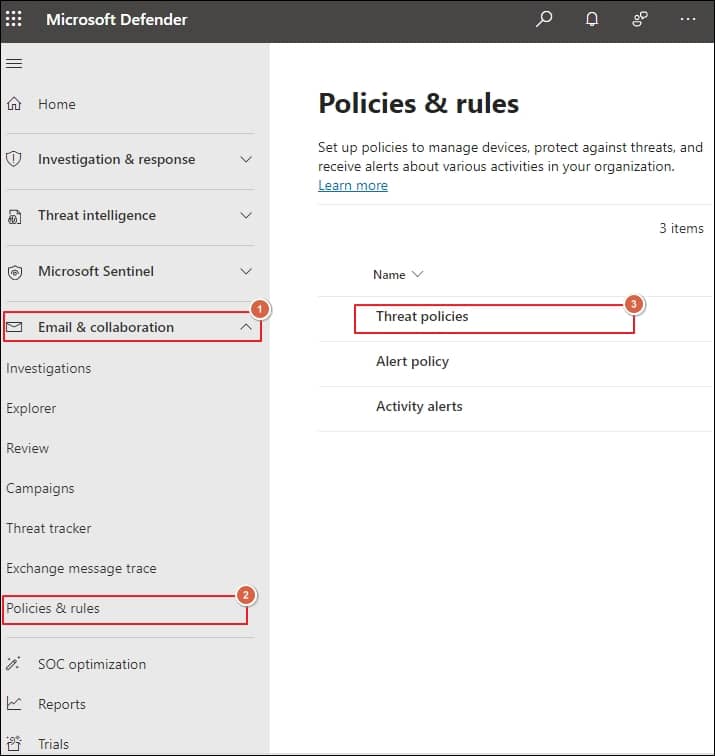
- Hit the Anti-spam option in the Policies section.
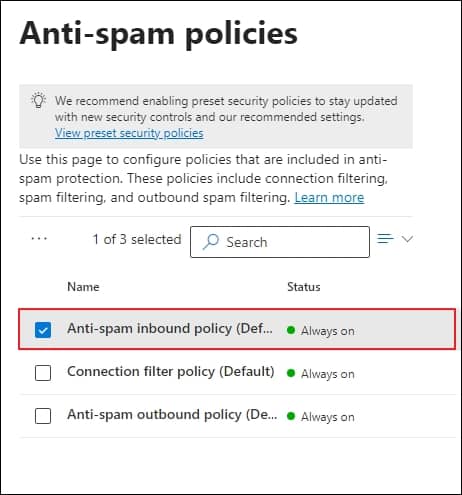
- Under Anti-spam policies, click on the Anti-spam inbound policy (Default) option.
- Now, search for the Edit allowed and blocked senders and domains & tap on it.
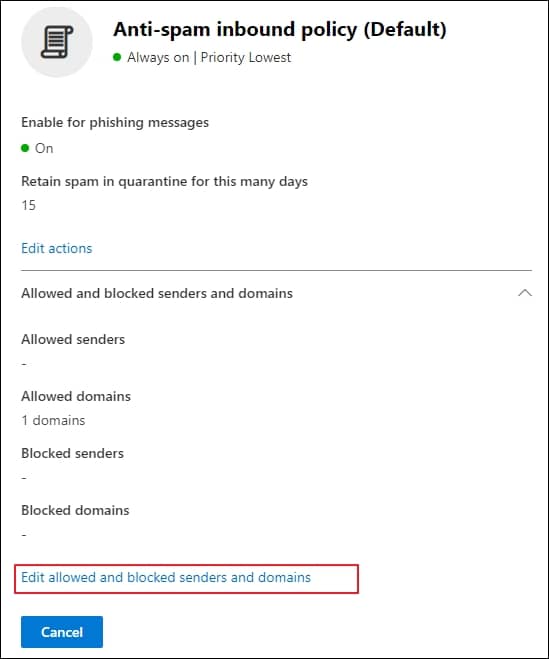
- In the Domains section of the next window, hit the Allow domains option.
- Finally, Add domains under the Manage allowed domains & click on the Done option. Further, tap on the Save option to whitelist a domain in Office 365.
Alternate manual method to get notified about the specific domain email
Besides whitelisting, you can also check out this method, which will help you notify about the specific domain emails you want to whitelist. So, you have to go through the following steps to benefit from this utility. Let’s look at them:
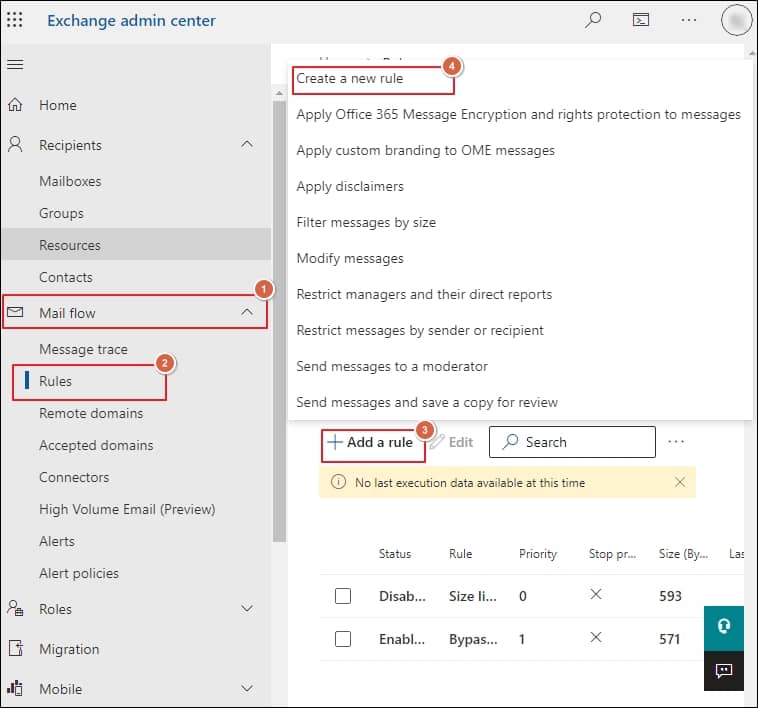
- Log in to your Office 365 account & go to the Exchange Admin Center.
- Click on the Mail flow> Rules, followed by the Add a rule option to create the new rule.
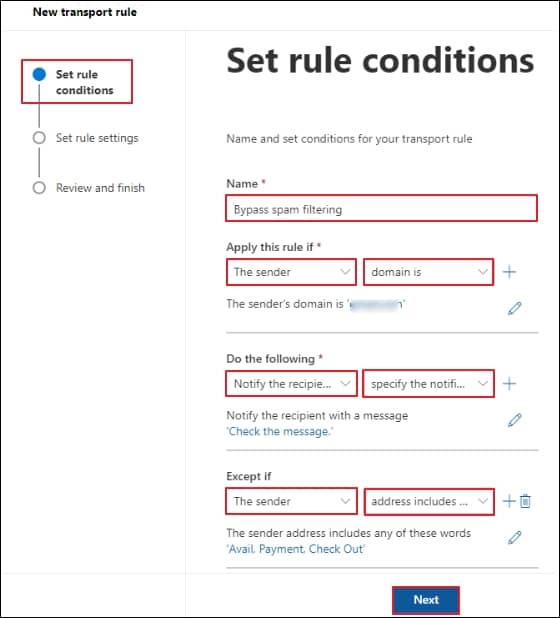
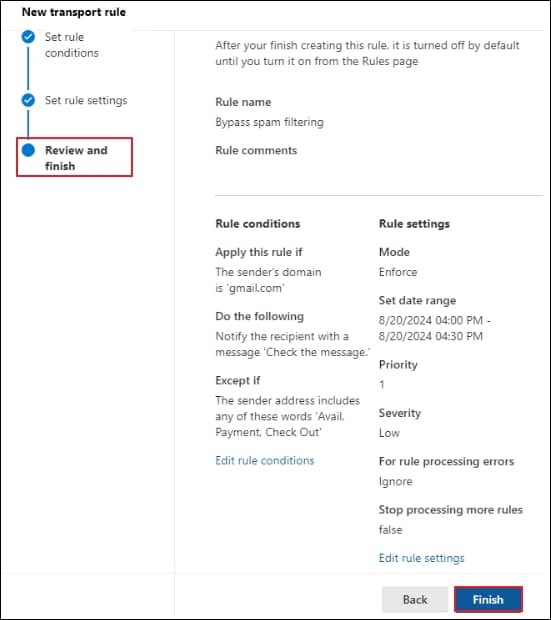
- In the next section, Set rule conditions by providing the name & required details.
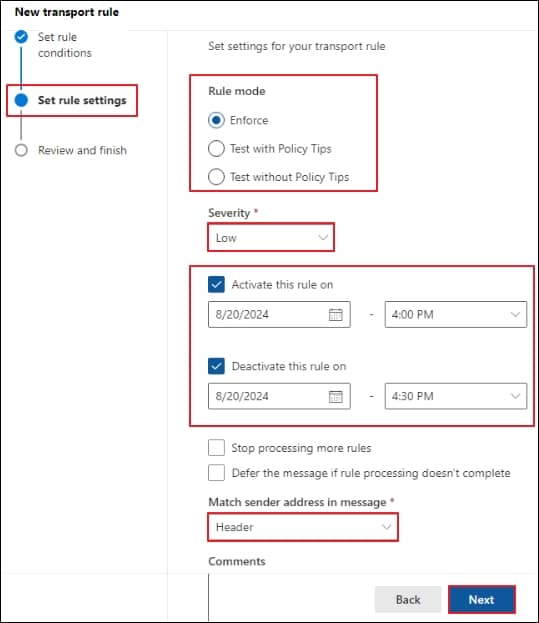
- Now, under Set rule settings, in the Rule mode, check the Enforce option followed by selecting the Severity and data & time of applying the rule. Then, click on the Next option.
- Finally, tap on the Finish option after reviewing the Review and finish section. Then, click on the Done option.
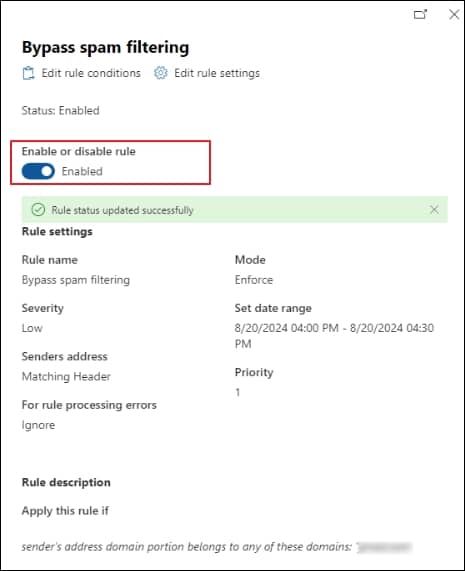
- Enable the created rule by going to the Rules page again to avail the benefits of the rule.
What should we look for securing the mailbox for a long time?
Through the above-given methods, you can whitelist or quickly access the specific domain mailbox as you couldn’t earlier. But sometimes, due to improper mailbox management, users get stuck or confused when finding specific emails, leading to frustration. Hence, they might delete them accidentally to manage their emails. Additionally, in some instances, the above methods fail to give you successful results due to inherited technical glitches. All these scenarios make your mailbox data vulnerable to loss. Hence, experts always suggest going for the backup to avoid these circumstances using third-party Microsoft 365 Backup tool.
Recoveryfix Backup for Microsoft 365 is the best choice among professionals for managing their mailboxes efficiently. It allows you to back up the entire Exchange Online components, like Primary mailboxes, Archive mailboxes, & Public folders, into multiple formats, including PST, without hampering their hierarchy or integrity. Its backup feature or advanced filters make the backup structured without any duplicity. It even provides you with the ability to monitor the live progress of data backup.
Wrap up
Whitelisting domains in Office 365 can be a crucial task for an organization, which we have discussed in the blog. So, after going through the mentioned steps, you can execute the process efficiently. Meanwhile, if you are looking to secure your mailbox data or manage your mailbox storage, the recommended backup tool will become your lifeline. You can explore its trial version to check out its credibility or versatility.