How to create a group in Office 365?
Microsoft 365 is known as the most collaborative platform among all the available cloud-based productivity platforms. Advanced features like application integration, shared scheduling, and Office 365 groups are the major contributing factors. Among them, Office 365 groups are the pillar behind this collaborative platform, which helps users to collaborate across different applications on Microsoft 365 suite. It assists organizations in assigning roles and permissions more efficiently than individual users. The Office 365 groups facilitate smooth communication among team members and improve collaboration for planned group projects.
All these advantages motivate users to create and utilize the Office 365 groups in their day-to-day business operations. So, the blog will guide you with the best solution to create an O365 group. But first, continue with the additional benefits that can be availed of by the users after creating an Office 365 group.
What benefits can be availed by the user after creating an Office 365?
Users get several advantages when they create an email group in office 365. Here, we have listed the most significant benefits that can be utilized by them.
You can add more than 1000 members into an Office 365 group, which can be beneficial for large scale organizations.
Each Group Mailbox size has the assigned limit of 50 Gigabytes. This provides flexibility for the users for sending large documents with their team members.
Managing access and assigning licenses to Office 365 group members are more convenient than individual users.
Office 365 groups establish smooth communication among the group members, which is ultimately beneficial for the organization’s productivity and efficiency.
All the applications of Microsoft 365 suite like Word, PowerPoint, Excel, SharePoint, etc. can be easily integrated with the Office 365 groups.
- OST files are profile-specific; they are not portable.
- Reduce the size of the OST file. As the file is large, it is more vulnerable to corruption.
- Risk of malware or virus attack which leads OST file data to inaccessible.
- OST files cannot be migrated directly to another system without converting into PST or other formats.
- Avoid the risk of data loss.
How to create a group in Office 365 by using manual methods?
We have come up with the most appropriate approach by trying several solutions through hit and trial. Follow the below-mentioned steps carefully to achieve your desired outcome.
Go to Office.com and login with your account credentials.
Access Microsoft 365 admin center by clicking on the Admin option.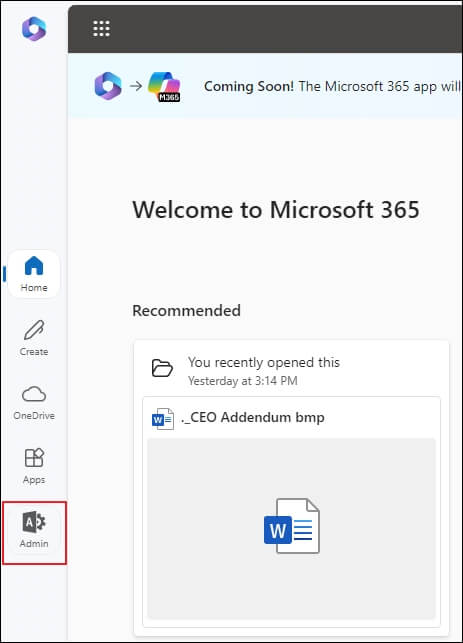
Expand Teams & groups section and go to Active teams & groups.
Click on Add a Microsoft 365 group to add one.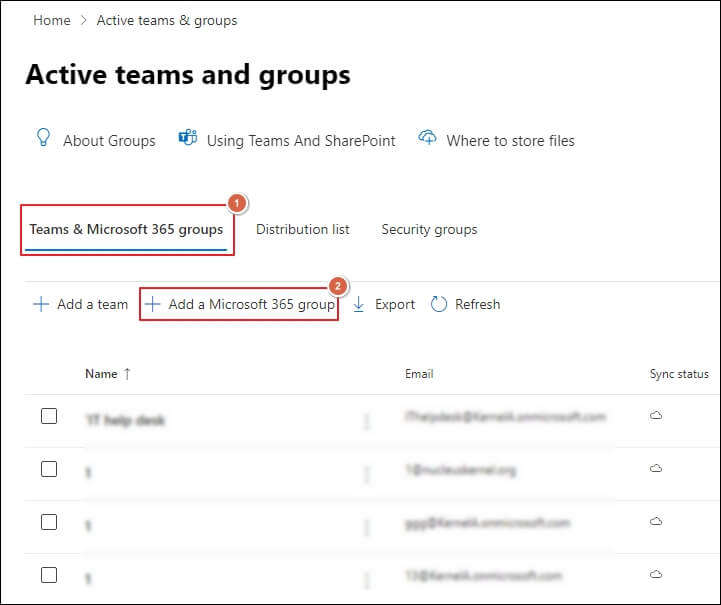
Enter the Name & Description of the group and click Next.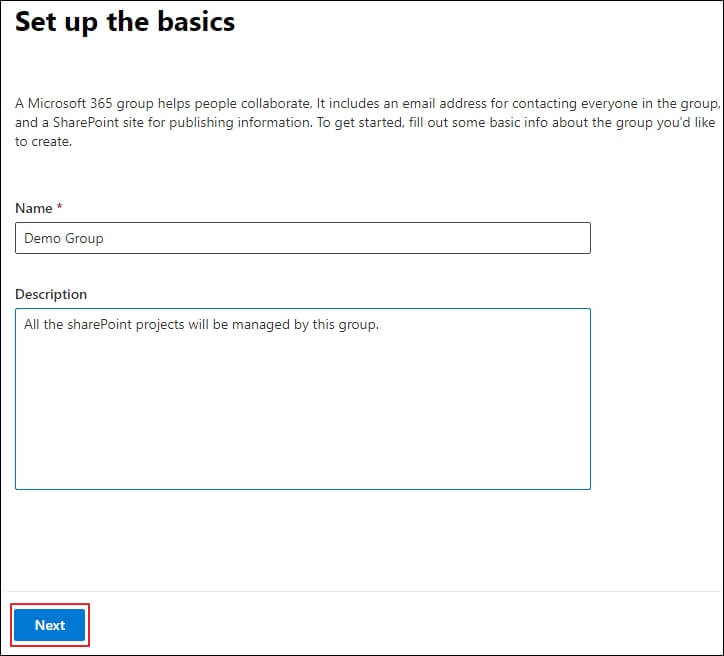
Select the owners of the group by clicking on Assign owners, then tap on Add option. Click Next to proceed.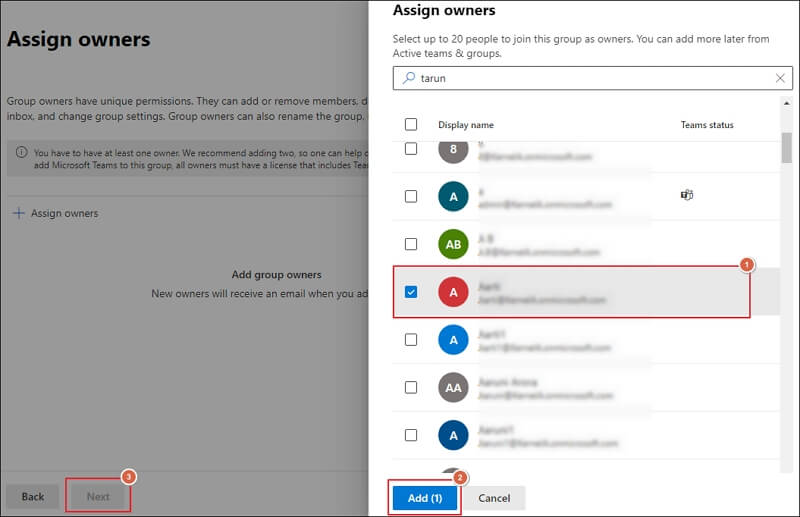
Choose the members of the group by clicking on Add members option and proceed to Add option. Then, tap on Next option.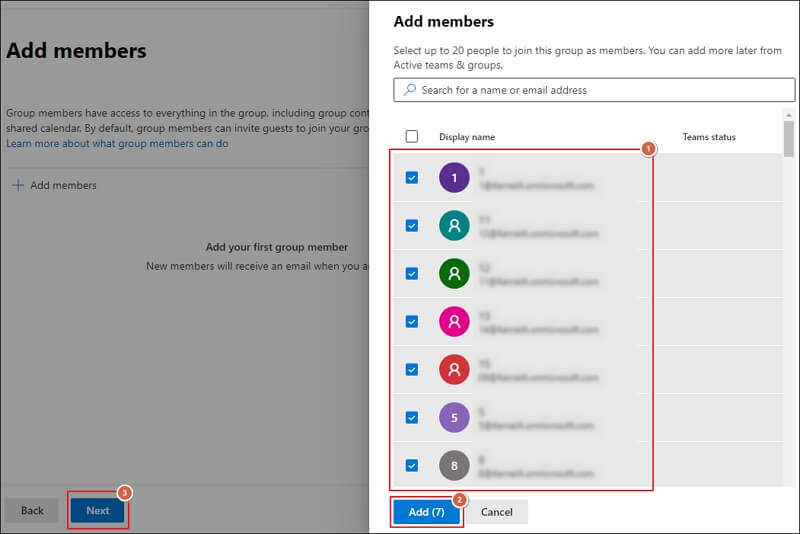
Set up the necessary email settings and click Next.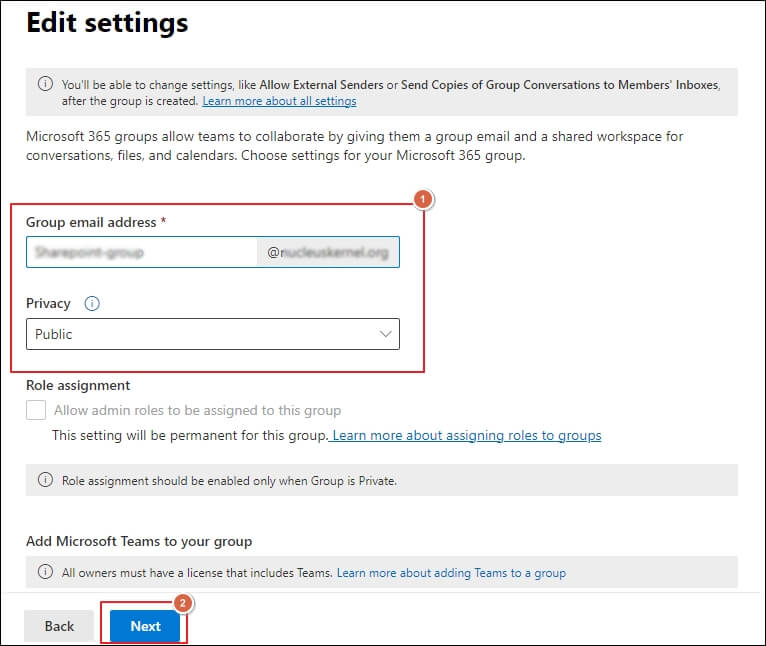
Review all the details and click on Create group option to proceed.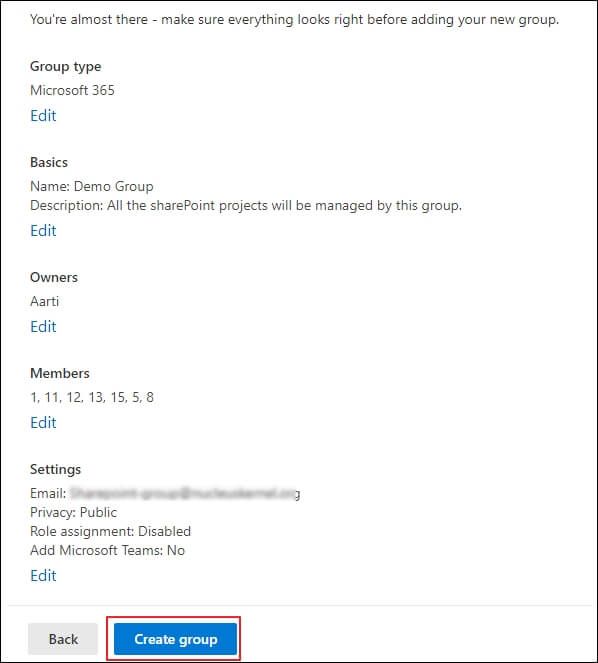
You have successfully created an Office 365 group.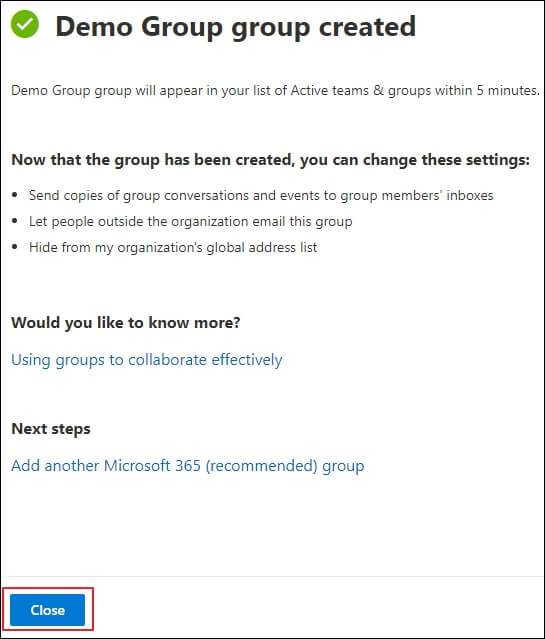
An automated method to migrate my existing group to a Microsoft 365 tenant
The above-mentioned guide will help you to create an Office 365 group. Its step-by-step illustrations assists you to accomplish the Office 365 group creation conveniently. But sometimes user doesn't want to create O365 group. These users are searching for the way to migrate their existing Office 365 group to another tenant. For them, opting a third-party tool like Recoveryfix Migration for Microsoft 365 is one of the best approaches.
Microsoft 365 migration software helps them to migrate their Office 365 groups data to another tenant within few simple steps. On top of that, it allows users to migrate their entire Office 365 data to hosted or on-premises Exchange. The software advanced algorithms help in migrating data of any size to another tenant without altering its original data structure. Moreover, its data sorting filters empower users to migrate their selective data to another tenant with accurate precision.
Final thoughts
The blog has covered a detailed guide on how to create a Microsoft 365 group via manual solution. By following the provided instructions any user can be able to create Outlook 365 groups. These Office 365 groups provide several benefits to the users, which makes them important for any organization. However, organizations may require to migrate their existing Microsoft 365 groups to another tenant. For this purpose, you can utilize the recommended solution. The software migrates your entire data and maintains the data integrity throughout the migration procedure. It is necessary to have a proper Microsoft 365 migration checklist to get a successful migration.