How to migrate from Rackspace to Office 365?
With different cloud-based services and strategies, Rackspace technology leads in different countries. Since its establishment, it has been well known for its native security and compliance service, which ensures users' data safety.
However, certain mismanagement or glitches in its security and services compel users to shift towards a more trustworthy or best-fitted cloud-based platform. Microsoft 365 is one of the preferred options, offering all user needs, features, and facilities.
But a Rackspace to Office 365 migration can be challenging without proper guidance. Be with our expert guidance & make this tedious task easy to perform.
Why do users want to migrate from Rackspace to Office 365?
Migrating from Rackspace to Office 365 provides organizations or users with additional benefits than Rackspace at the same cost. Let’s explore the major ones:
- Enhancing or advancing data security is one of the major concerns for Rackspace users behind this migration.
- Office 365 always has regular updates or new features, making it more reliable than Rackspace.
- Rackspace offers primarily email hosting and cloud services, whereas Office 365 offers the complete package, including Word, Excel, OneDrive, and many more.
- Office 365 allows users to manage their storage space effectively, which might not be possible with Rackspace.
- Simplified management & advanced collaboration tools reduce the burden of every scale of organization.
Know basic prerequisites before to migrate from Rackspace to Office 365
Here are some essential prerequisites that users need to follow or accomplish before moving from Rackspace to Office 365. Let’s get into them one by one:
- Users should have admin credentials for both Rackspace & Office 365 accounts.
- Taking backups is an activity that users should perform to secure their data from any unusual happenings.
- Make sure that you should unhide all objects before executing the migration.
- Internet connectivity must be in a good state for error-free migration.
Manual method to migrate from Rackspace to Office 365
After getting all the necessary information about the migration & fulfilling the prerequisites, you are ready to migrate email from Rackspace to Office 365. Follow the provided steps carefully:
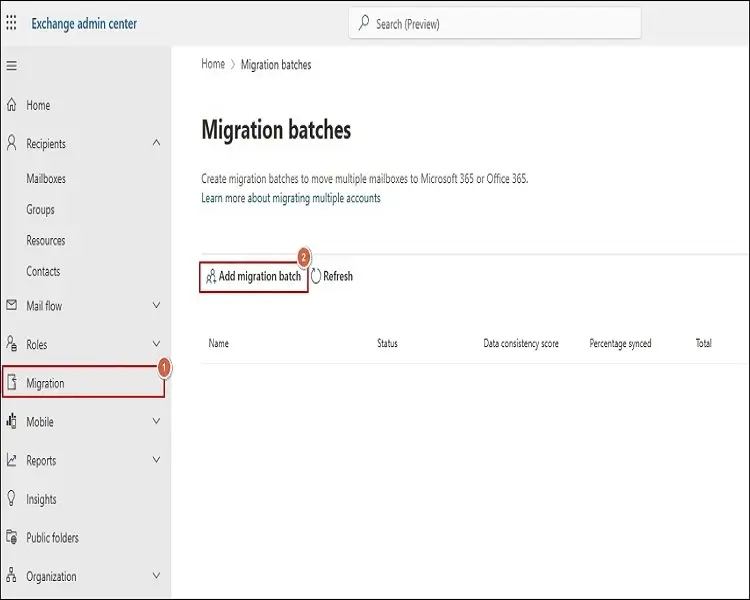
Access the Exchange Admin Center and click Migration > Endpoints option.

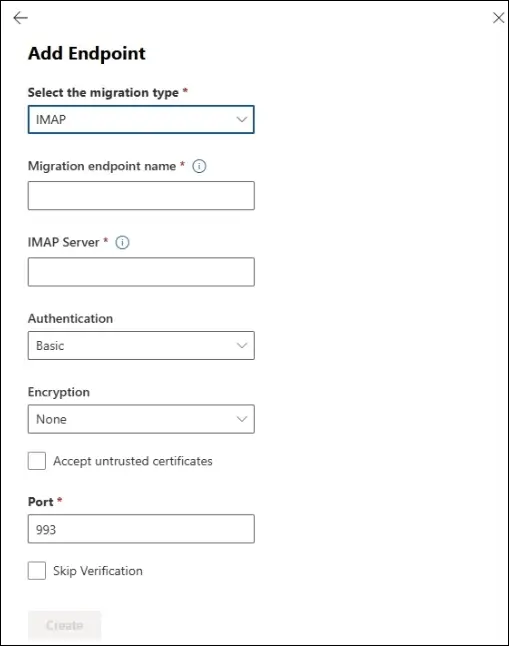
Tap on the +Add option to create the Endpoints by providing the required credentials, such as
- Choose Migration type as the IMAP option from the dropdown list.
- Provide the Migration endpoint name as per your suitability.
- Fill out the IMAP server details for your Rackspace account.
- Select Authentication as Basic and choose the encryption as SSL.
- Fill in the Port number as 993, then click on the Create option.
Now, create a CSV file using the following formats:
| Office 365 email address | Rackspace Username | Rackspace password |
|---|
Then, go to the Migration page again & tap on the Add migration batch option.
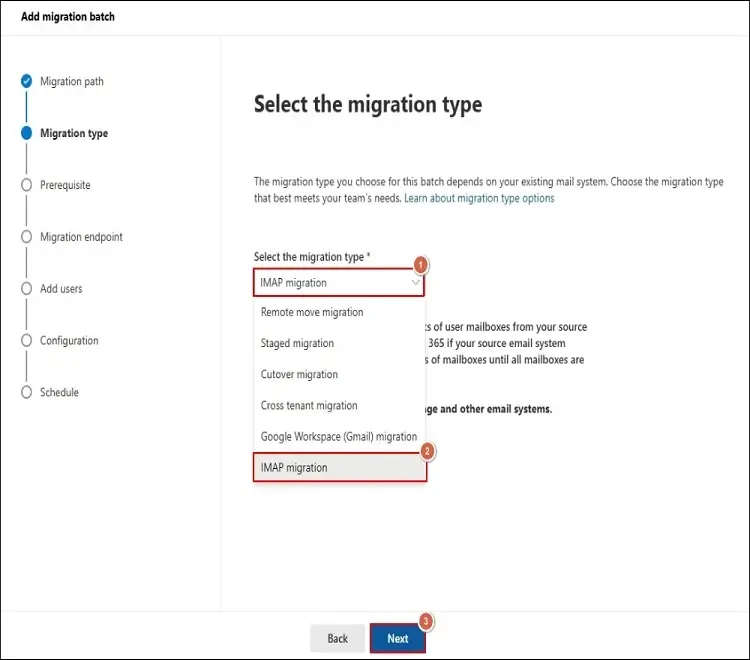
Provide a unique name & select the Migration to Exchange Online option in the Migration path section. Click on the Next option.

Choose the IMAP migration from the dropdown list in the Select the migration type section. Select the Next option.
In the next section, verify the prerequisites as mentioned & then click on the Next option.

Now, select the Migration endpoint created before, then click the Next option.
Add users by importing a CSV file that contains details of the users. Then, tap on the Next option.
Go with the further mentioned steps to configure & schedule the migration.
Once completed, you can change your MX record on the domain holder’s DNS record to get the emails in the Office 365 account instead of Rackspace. In this way, you can migrate Rackspace email to Office 365.
Fed up with the tedious or complex manual method. Check out the best-advanced solution!
The manual method helps you migrate emails from Rackspace to Office 365. However, this method does not allow you to migrate complete data, such as contacts and calendars. Furthermore, users might face additional issues like the complexity of manual methods and lack of complete control.
Therefore, professionals always recommend that using an advanced Microsoft 365 migration tool can be a safe & secure way for migration. But are you confused by the different available options?
As per the expert's review, Recoveryfix Migration for Microsoft 365 is the must-go tool in this section. With many features under a single plan and technical assistance 24/7, it has become the most handpicked tool among users. Users can migrate multiple email accounts from any hosted exchange to Microsoft 365, such as Rackspace to Office 365 migration.
The tool offers several migration options to users, such as On-premises Exchange to Exchange Online, Hybrid Exchange to Microsoft 365, and many more, to access their content as required.
Automated steps to migrate from Rackspace to Office 365
Here’s the detailed step-by-step guide to execute Rackspace to Office 365 migration using the tool.
Visit the official website & download the Recoveryfix Migration for Microsoft 365 software.
Complete the installation process in your local system.
Access the software & click on the Connect option to add the Source Tenant.
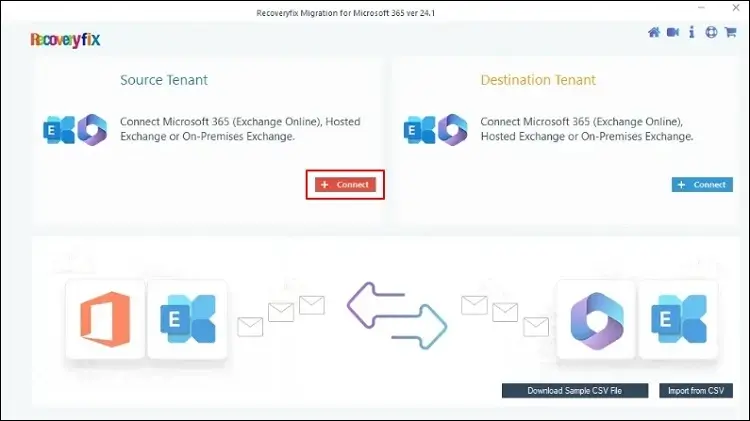
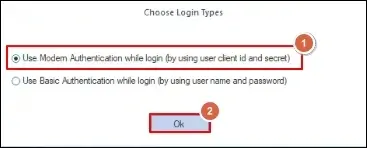
Choose Modern Authentication from the login types of popup & click on the OK option.
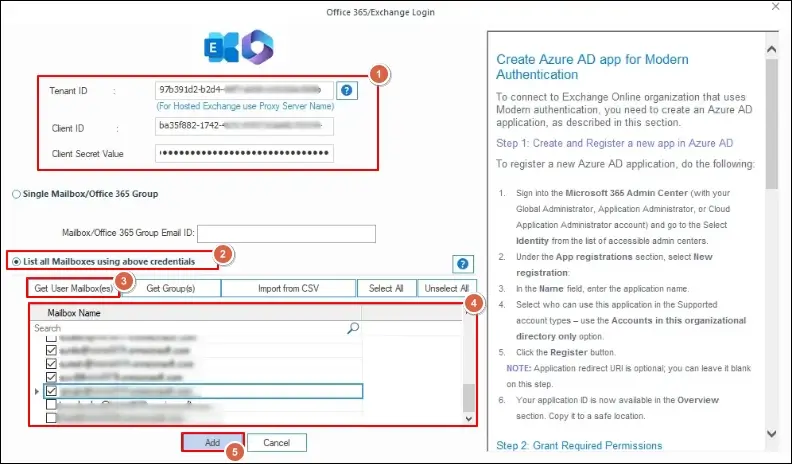
Provide the source details as Tenant ID, Client ID, Client Secret Value, & select the List all Mailboxes using above credentials option. Now, through Get users mailbox(es), select the desired accounts & click on the OK option.
Tap on the Connect option to add the Destination tenant, select Modern Authentication for login & click on the OK option.

Enter the destination account details, including Tenant ID, Client ID & Client Secret Value. Choose List all Mailboxes using above credentials & tap on the Get User Mailbox(es) option to choose the associated accounts. Then, click on the Add option.

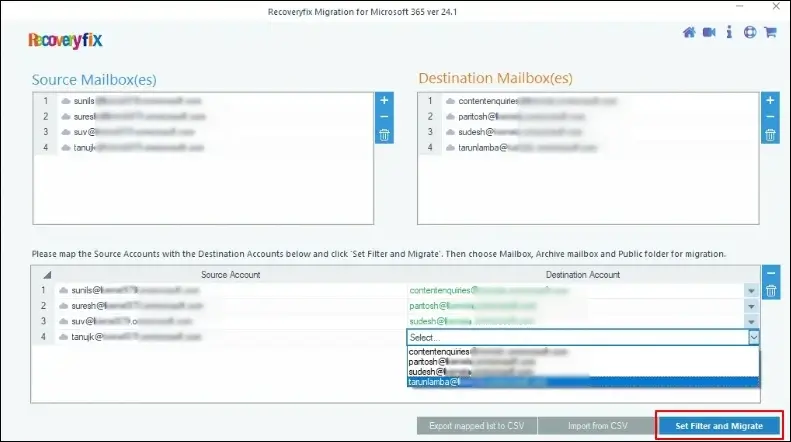
After mapping the source & destination mailboxes, hit on the Set Filter and Migrate option.
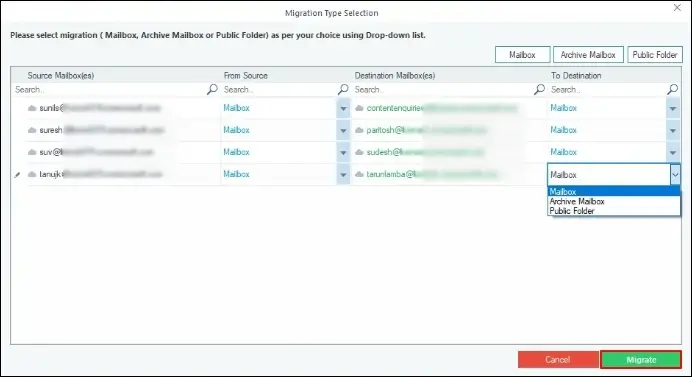
Choose the migration type among Mailbox, Archive Mailbox, and Public Folder as per your suitability from the drop-down menu & click on the Migrate option.
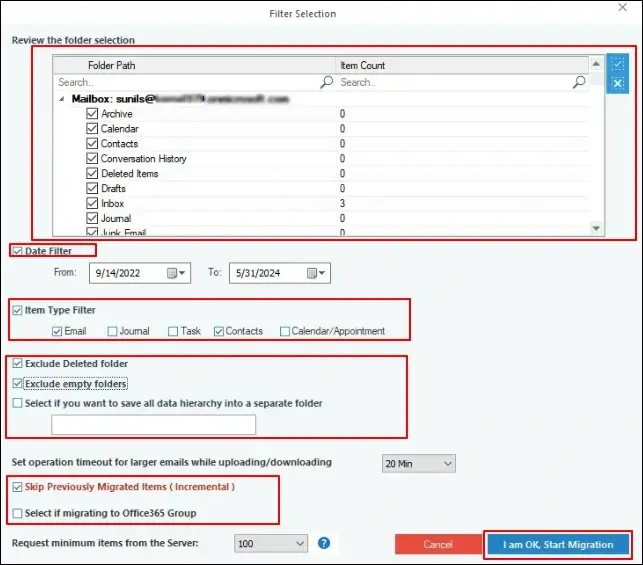
In the filter section, you choose multiple options as per your need, like date filter, Exclude Deleted folders & many more. Then, hit on I am OK, Start Migration option further.
It will initiate the Rackspace to Office 365 migration process. Once you receive the message that the process is complete, click on the OK option.
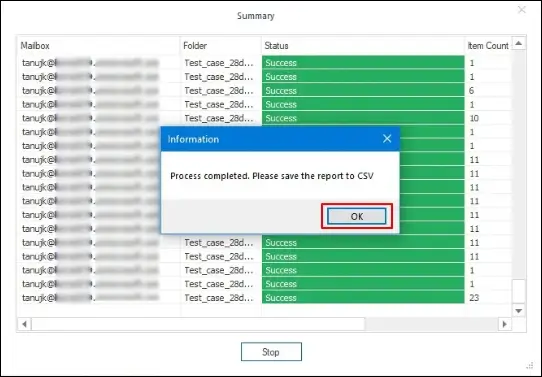
Note: In this way, you can migrate emails from Rackspace to Office 365 successfully. To save the detailed report, click the Save Report to CSV option.
Conclusion
Users migrate from Rackspace to Office 365 to avoid the Rackspace-involved limitations or use the Office 365 range of features. So, we have covered the possible methods to execute the same. For satisfactory results, follow the steps in the correct order.
Moreover, you can opt for the recommended automated approach for complete control with full data migration.