Relocate Outlook OST File
Although Outlook is well known for its outperforming features, it sometimes shows irregularities that create even data loss-like situations. Relocating or backing up an OST file can be the one-stop solution to reduce its consequences.
Since OST files contain all the mailbox data, it can be tricky to change OST file location. Follow this easy walkthrough to understand its reasons & get the corresponding solutions to perform the same.
What can be the reasons to change OST file location?
Check the primary reasons that drive users to relocate Outlook OST files:
- Access the OST file data after account deletion or migration.
- To manage the storage space in a structured manner.
- Prevent data from hardship situations.
- Sometimes, help in troubleshooting the Outlook minor errors.
- Helps in boosting user’s performance & productivity.
Methods to change OST file location
Through extensive research, we have come up with three basic methods that can help you to change location of Outlook OST file. Look at them carefully:
Method 1. Using Outlook’s Data File Settings
In this section, users need to create a new Outlook profile & then change OST file location. Copy the existing OST file location to the new one where you want to shift the files before starting the process. Then, follow the given steps as mentioned below:
Note: It is important to know the proper path to locate Outlook OST file location correctly. Find it with the following given path:
- In Windows 10, Windows 8/8.1, Windows 7, and Windows Vista:
- In Windows XP
C Drive: \Users\%username%\AppData\Local\Microsoft\Outlook (For MS Outlook 2010 or above)
C Drive: \Documents and Settings\%username%\Local Settings\Application Data\Microsoft\Outlook
Follow the given steps to change the location of the OST file from Outlook:
Close the Microsoft Outlook email client.
Go to the Control Panel and select the Mail (Microsoft Outlook) icon.
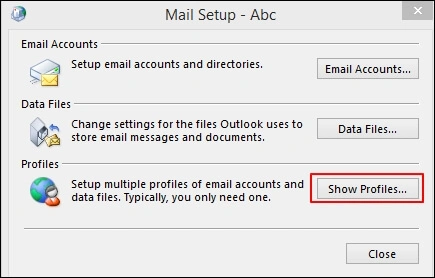
Choose the Show Profiles option.
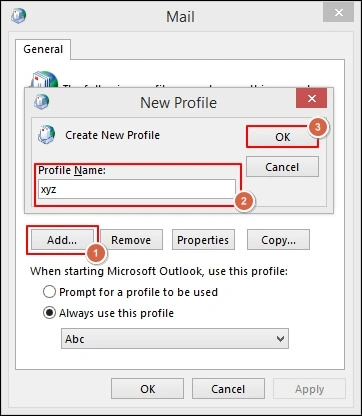
Click on the Add option, type the profile name, & click on the OK option to create the new profile.
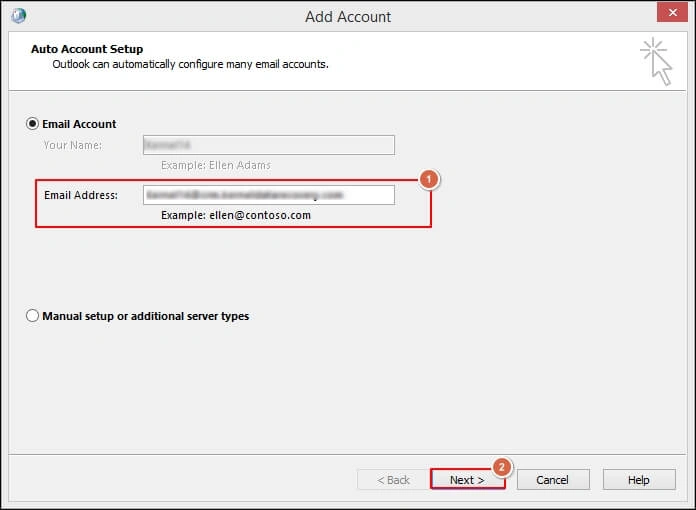
Once your account is setup, click on the Next option.
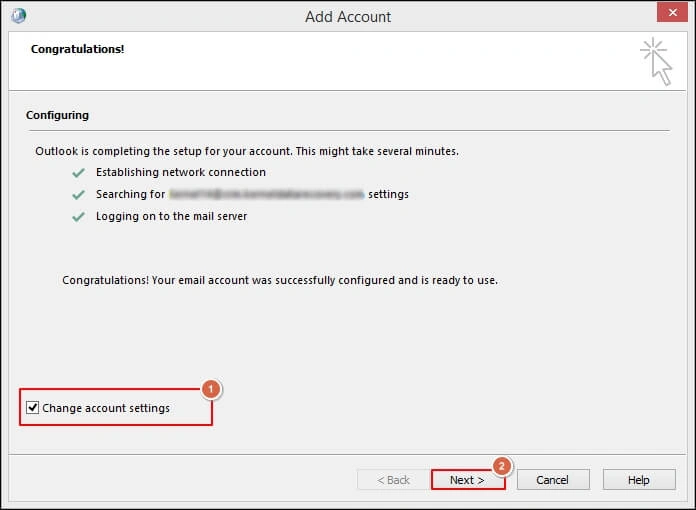
In the upcoming window, choose the Change account settings & tap on the Next option.
Choose the More Settings option under the Server Settings option.
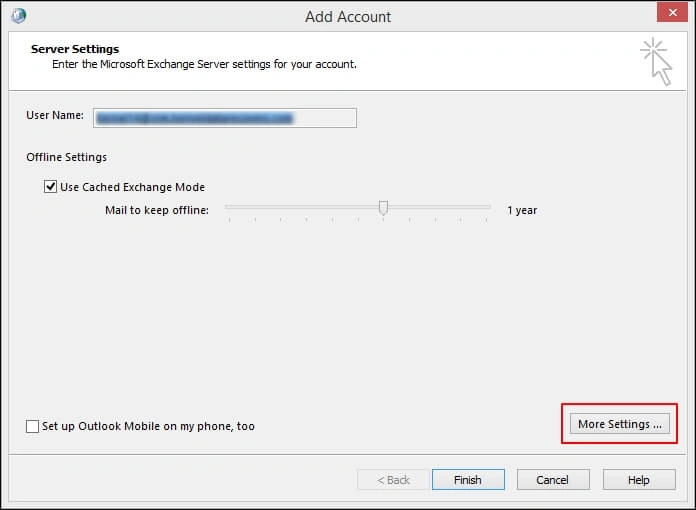
In the Advanced section, tap on the Outlook Data File Settings.

Browse the location of the OST file that you have copied in the first step. Hit on the OK option.
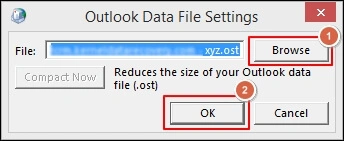
Choose the Finish option to complete the setup process of email account.
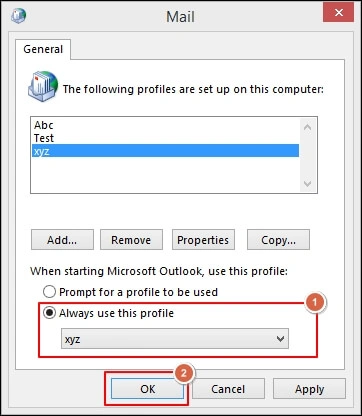
Now, under the Mail window, click on the Always uses this profile, choose the newly created profile & tap on the OK option.
In this way, you can change OST file location with ease. Outlook will now use the OST files from the new location.
Method 2. Using Registry Trick by setting ForceOSTPath
It is comparatively simple and doesn’t require any specific version for changing the location. The steps required to alter the default location of the OST files are as follows:
- ForceOSTPath works only for newly created Outlook profiles.
- Here, you are going to change the registry, so following the correct steps becomes crucial; otherwise, you can face uneven problems. So, it is required to take a backup of the registry before modifying it for safety purposes.
Press the Windows + R key to open the Run box, type regedit and click OK.
The Registry Editor box is launched. Find & then choose the registry subkey: HKEY_CURRENT_USER\Software\Microsoft\Office\version number\Outlook.
Note: Version numbers, like 16.0 for Office 2016, Microsoft 365, Office 2019, or Office LTSC 2021.
On the right side of the Registry Editor box, right-click on the space and tap on New > Expandable String Value.
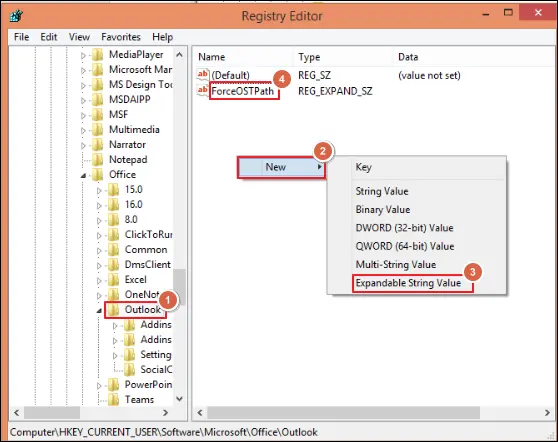
In the Edit String dialog box, type ForceOSTPath and then enter the new default location to save the OST file, such as D:\New OST file location.
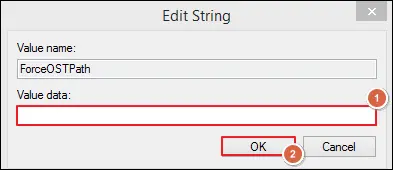
Click OK and exit the Registry Editor.
Method 3. With the help of Symbolic Links
It is another reliable method to change the location of the OST file from its default place. Using the Symbolic links via the mklink command, users can redirect the original path of the OST file location to the new one.
Execute the following steps to change the location of OST file with the symbolic links:
Exit from all the Outlook-related applications.
Change OST file location where you want to place it.
Open the command prompt & click on the Run as administrator option.
Now, use the mklink command to change OST file location to the new path:
"C:\\old-path" "D:\\New path"
Run the command & then restart the Outlook application to verify whether the OST file location has changed or not.
Is changing the OST file location the only option to secure OST files?
Changing the OST file location can be more helpful in managing the storage space than security. Although it can be considered a good security option, it is not recommended due to its compatibility issues with other Outlook accounts. Then what option can be the best to counter these scenarios?
Backup can be the best option since it stores OST file data in PST format. Due to PST file's easy accessibility & shareability, users can increase their security as needed. There are manual workarounds like the Import/Export feature for this, but they might not give 100% reliable results, which can disturb your roadmap.
So, choosing the automated OST to PST converter might be the best alternative to execute the process. Out of all the available software, Recoveryfix Converter for OST's versatile & advanced features can meet the user's needs with complete security.
It quickly repairs & converts all the OST data, irrespective of corruption, to the desired formats like PST with 100% data integrity. The tools high-tech programs help in detecting errors in OST file & resolve it in no time.
Conclusion
OST files stores in different default locations depending on the Outlook and operating system version. Consider the discussed manual methods if you want to change OST file location from its default place.
Moreover, you can opt for the recommended OST to PST Converter to add more security to your OST file data.