How to use – Recoveryfix Backup for Microsoft 365
Backup using Recoveryfix Backup for Microsoft 365 software
Go through the following steps to perform the mailbox backup procedure after installing Recoveryfix Backup for Microsoft 365 software.
Step 1: Launch the software on your system.
Step 2: The software’s first wizard will ask you for your license details, such as your Email Address, Activation Password, License Type, and Duration. Enter them and click on Proceed for Activation.

Step 3: On the home screen of the tool, you will get two options: Backup and Restore. Click on the Backup option to proceed with the process.

Step 4: Click on + Connect to add your Microsoft 365 (Exchange Online), Hosted Exchange or On-Premises Exchange account for backup.
Note: You have the option to Download Sample CSV File, in which you can store your account credentials and then use these details later by utilizing the Import from CSV feature to save time.

Step 5: To connect Microsoft 365 (Exchange Online), On premises, or Hosted Exchange Server, you will get two login types:
- Modern Authentication – To backup Microsoft 365 (Exchange Online) use this authentication mode by providing details like user client ID and secret.
- Basic Authentication – To backup Hosted or On-premises Exchange account mailboxes, use this authentication mode by providing details, like username and password.
Note: Here, we are taking backup of Microsoft 365, that’s why moving with Modern Authentication login type.
Select Use Modern Authentication while login and click Ok to proceed.

Step 6: Enter Microsoft 365 account details, such as Tenant ID, Client ID, and Client Secret Value, in their respective boxes.
Note: To create these details, you can refer to the help section present in the right pane of the software.
Then, select List all Mailboxes using above credentials and click on Get User Mailbox(es). Once all the mailboxes are displayed, select the required ones, and press on Add option to proceed further.
Apart from Get User Mailbox(es) option, you also get four other options, including:
- Get Group(s) – Useful in taking backup of selective Office 365 Groups.
- Import from CSV – Add CSV file of predefined mailboxes to make process quicker.
- Select All – Select all mailboxes in one click.
- Unselect All – Unselect all mailboxes in a single click.
Notes: Click on Single Mailbox/Office 365 Group to backup single mailbox and enter your email ID.

Step 7: Your selected mailboxes are displayed on the screen. Check them and tap on Set Filter and Migrate option.

Step 8: From the drop-down list, select the backup option you want, such as Mailbox, Archive Mailbox, or Public Folder, and click on Migrate.

Step 9: In the Filter Selection wizard, apply different filters for selective data backup. The software provides multiple filtering options, such as:
- Checkbox – Individual folders selection via Checkbox.
- Search filter - For finding specific folders.
- Date Filter – Select particular date range for backup.
- Item Type Filter – Take backup of selective items.
- Exclude Deleted folder – Skip deleted folder in single click.
- Exclude empty folders – Prevents backup of empty folders.
- Select if you want to save all data hierarchy into a separate folder – Saves entire data with folder hierarchy into a separate folder.
- Set operation timeout for larger emails while uploading/downloading – Define a certain period for backing up of large files.
Click on I am OK, Start Migration option when the filter selection is done.

Note: To skip previously migrated mailboxes and avoid data duplication, use Incremental backup feature given in the software.

Step 10: In the Save As dialog box, you will get multiple saving options, including PST, EML, MSG, HTML, MHT, DOCX, DOC, and PDF. Here, we are selecting PST format for backup. Click on it and press OK to continue.
Note: You can also utilize Split Output PST File After: feature to split output PST file as per your requirement.

Step 11: Designate the location to save the backup file and click OK to proceed.

Step 12: It will initiate the backup procedure of Microsoft 365 mailboxes. If you want to stop the backup process, you can click on Stop option.

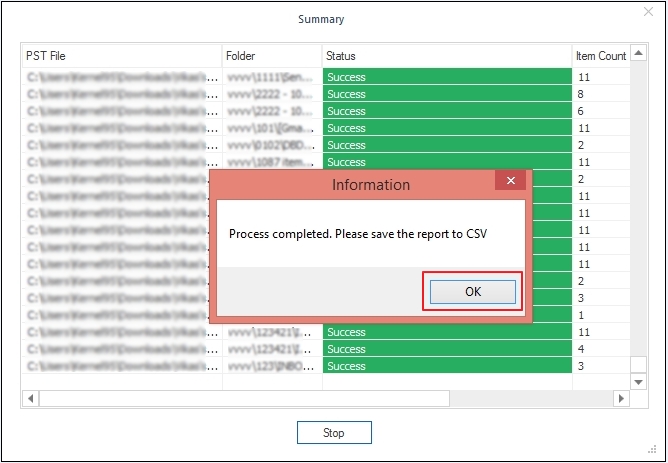
Step 13: A completion message will pop-up on the screen when the backup procedure is completed. Then, click OK to end the process.

Step 14: Finally, save the detailed backup report by clicking on the Save Report to CSV option.

Step 15: You have successfully backed up your data to your preferred location.

Restore using Recoveryfix Backup for Microsoft 365 software
Follow the instructions to restore your OST/PST files using Recoveryfix Backup for Microsoft 365.
Step 1: Install and open the software.
Step 2: The software’s first wizard will ask you for license details, such as your Email Address, Activation Password, License Type, and Duration. Enter them and click on Proceed for Activation.

Step 3: On the software homepage, you can see two options: Backup and Restore. Select Restore option to proceed with the process.

Step 4: Click on + Add to browse and add your OST/PST files for restoration.

Step 5: Once files are added in the software, press + Connect to add your Microsoft 365 (Exchange Online), Hosted Exchange or On-Premises Exchange as destination account.
Note: You have the option to Download Sample CSV File, which allows you to store your account credentials, and you can use these details later by utilizing the Import from CSV feature to save time.

Step 6: The software provides you two authentication mode for login option:
- Modern Authentication – Utilize this authentication mode to restore your files to Microsoft 365 (Exchange Online) by entering user client ID and secret.
- Basic Authentication – Utilize this authentication mode to restore your files to Hosted Exchange or On-Premises Exchange by entering username and password.
Here, we are restoring PST files to Microsoft 365. Therefore, we go with the Use Modern Authentication while login option and click OK.

Step 7: Type your account credentials, including Tenant ID, Client ID, and Client Secret Value, in their respective boxes.
Note: To get these details, you can refer to the help section present in the right pane of the software.
After that, choose List all Mailboxes using above credentials and press on Get User Mailbox(es) option. Then, select the required mailboxes when they are displayed and tap on Add option to proceed.
Besides that, the other options available on this wizard are as follows:
- Get Groups – To restore PST/OST files to selective Office 365 Groups.
- Import from CSV – To add a CSV file for predefined mailboxes.
- Select All – To select all mailboxes in a single click.
- Unselect All – To unselect all mailboxes in one click.
Note: If you want to restore your OST/PST files into single mailbox, then select Single Mailbox/Office 365 Group option and enter your email ID.

Step 8: Select your destination accounts from the drop-down list, then click Set Filter and Migrate.

Step 9: From the drop-down list, choose the import destination as Mailbox, Archive Mailbox, or Public Folder as per your requirement, then press on Migrate option.

Step 10: In the Filter Selection wizard, you have different filters for selective data restoration such as:
- Checkbox – Select mailboxes using checkboxes.
- Date Filter – Utilize date range for file restoration.
- Item Type Filter – Restore selective items of files.
- Exclude Deleted folder – Skip deleted folder from files.
- Exclude empty folders – Prevents restoration of empty folders.
- Select if you want to save all data hierarchy into a separate folder – Restore files data with hierarchy into a separate folder.
- Set operation timeout for larger emails while uploading/downloading – Set period for large file restoration.
- Skip Previously Migrated Items (Incremental) – Skip previously restored data to avoid duplicity.
- Select if migrating to Office 365 Group – Restore data into Office 365 Groups.
Once you have applied desired filters, click I am OK, Start Migration to proceed.

Note: You can skip previously restored data via incremental feature to avoid any data duplicity.

Step 11: It will begin the restoration process of your files. Also, you have the flexibility to stop the process at any point by using the Stop button.

Step 12: When the process is completed, a completion message will pop up on the screen. Then, press OK to end the process.
Step 13: Save the detailed procedure report by clicking on Save report to CSV option.
