Imagine losing access to important emails, contacts, and calendar events stored in your Outlook profile just because they are in NST format.
Also, these files can become a hurdle when you are switching devices, backing up data, or facing corruption issues. Since NST files are linked to Office 365 or Exchange accounts, they are not as flexible as PST files.
But the good news is that you can easily convert NST to PST and regain full access to your mailbox. This guide will help you out with a detailed process using the best method available.
Why do users need to convert NST file to PST format? – Key Reasons Explained!
Convert your files into PST format to avail several advantages. Here, we have listed the most common ones:
- Access emails, contacts, and calendar data without an internet connection.
- Backup important data and keep them safe even in their original structure.
- Migrate mailbox data to a new Outlook profile or new device with ease.
- Prevent frequent syncing issues to restore email access with PST files.
- Export mailbox data in just a few clicks for legal or compliance needs.
- Fix corrupt NST files and recover lost emails by converting them into PST format.
- Reduce Outlook storage load and optimize performance by archiving older emails.
- Transfer and access NST file data on any Outlook-supported system with simple steps.
NST files to PST: The Best Method for Instant Conversion!
It is obvious that you will look for manual solutions to convert your NST files. However, experts don’t recommend them as they don’t provide any data safety to users.
So, the question arises – What would you do in this situation? The best method is to rely on professional tools like Recoveryfix OST to PST Converter.
It converts your NST files into PST and other formats without hampering data integrity. Besides that, the NST to PST converter tool provides several advanced features, including:
- Migrates Outlook data files directly to Office 365.
- Repairs corrupted or damaged OST files immediately.
- Split the resultant PST files into smaller segments.
- Advanced data filtering options for selective conversion.
- Restores deleted items of the OST file in their original formatting.
Let’s see the detailed process of how to convert NST to PST Outlook using this software.
Step 1. Install and launch the software to begin the conversion process.
Step 2. Browse to add NST files, Select Mode as needed, and click Next.
Note: Choose Standard mode for quick scanning and Advanced mode for deep scanning & restoration.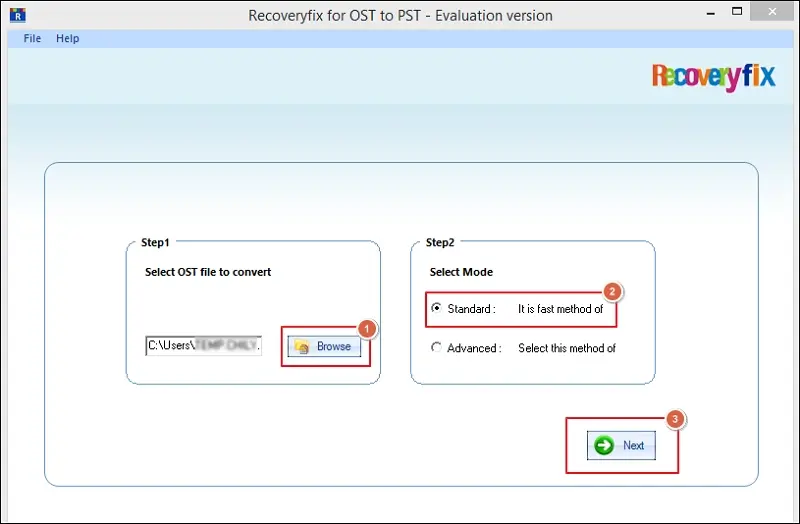
Step 3. Preview NST file content. Then, select the required folders and proceed to the Save option.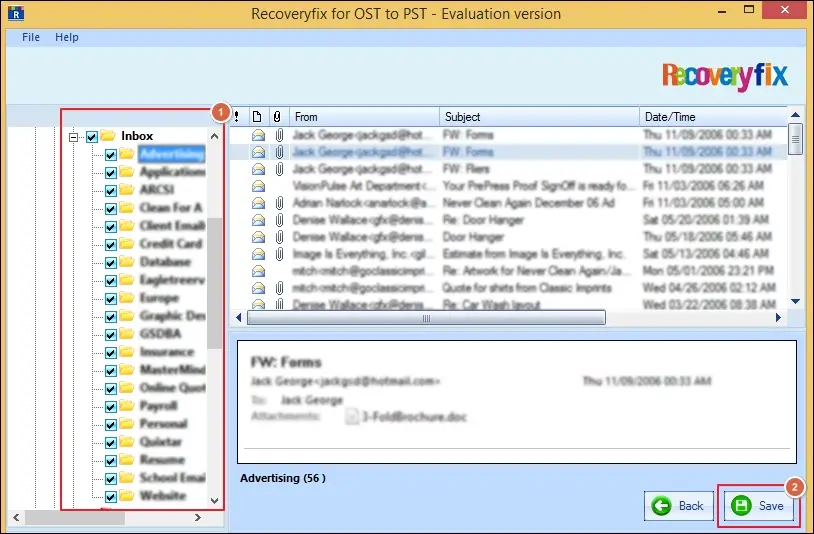
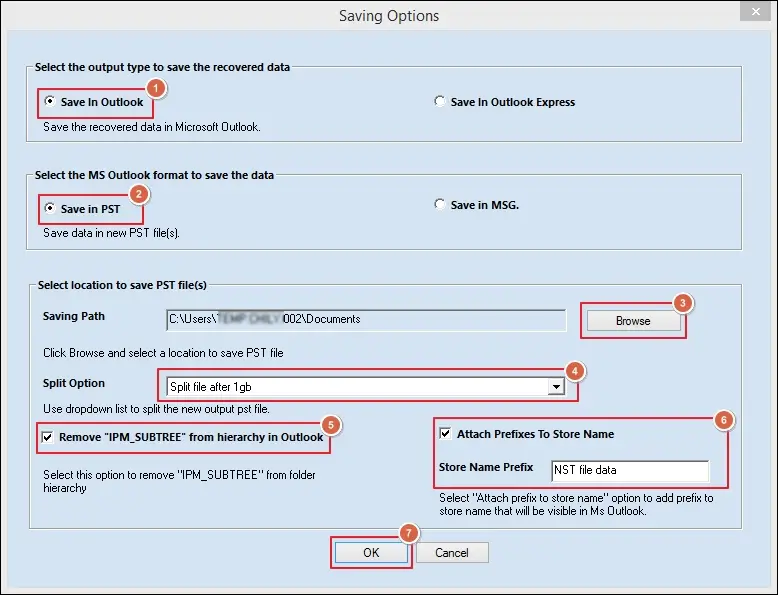
Step 4. From the Saving Options dialog box, do the following:
- Choose the Save in Outlook option as an output type.
- Click on Save in PST format option.
- Browse to provide the saving location.
- Use the dropdown list to split the resultant file.
- Check to Remove IMP SUBTREE from hierarchy in Outlook.
- Attach Prefixes to Store Name to the file for easy identification.
- Once done, click OK to proceed.
Step 5. You can select the folders from the local drive or Make New Folder from here and click OK.
Step 6. It will start converting your NST files.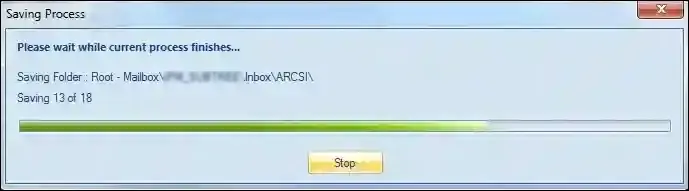
Step 7. After the process is completed, you will receive a pop-up message with the saved location. Then, click OK to end the process.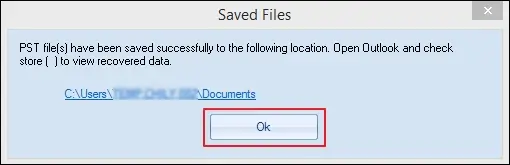
Sum up
Here, we have covered a step-by-step guide on converting NST files into PST format using an advanced solution. Although manual solutions are available for this transition, they can’t assure you data security.
You can use the steps given to convert NST files without any assistance from IT professionals. Also, the software allows you to resume the process with the help of the “Snapshot feature” from the point where you left it.
Check out the official page to get detailed information today!