Stuck in managing different PST files & looking for the practical option to manage them effectively with no data loss? Use Office 365 cloud-based services that can help you to centralize your data & avail its different benefits with enhanced data security. It creates the need to upload PST file to Office 365.
But the main concern is how to upload PST file to Office 365 with 100% accuracy. Go with this easy walkthrough to understand its needs & get the best way to import PST to Office 365. Let’s get started!!!.
Upload PST to Office 365: Why is it required?
Office 365 built-in utilities can reduce human efforts in many ways. Some of the major reasons to import PST to Office 365 are discussed below:
- Helps in consolidating the information at one place.
- Easy data management using its Compliance & eDiscovery utility.
- Enhanced security features provide users with a secure work environment.
- Its real-time collaboration helps users to access different platforms under a single plan.
- Safeguard users from data loss and cyber-attacks like situations through its advanced infrastructure.
- Provides easy accessibility to your data from anywhere & anytime with an internet connection.
Quick way to upload PST to Office 365[Expert Recommended]
Few manual workarounds can help users execute the "PST upload Office 365" process. Like, the network upload method is considered as the major one, and users need to utilize the eDiscovery tool to upload PST file into Office 365 with this method.
Because of the size constraints, higher time-consumption, and complex approach, users can't meet their 100% requirement with the manual methods. Moreover, these methods might create data loss-like situations if any steps are carried out wrongly. Hence, as per the expert's recommendation, choosing the advanced PST to Office 365 option can be ideal since it makes the process easy & cares about your data from start to end.
Recoveryfix PST to Office 365 leads in this category from the front with its range of user-oriented facilities. This all-in-one software allows users to upload PST file into Office 365 separate folders like Primary, Archive, or Public.
Explore the features that make the tool ideal among users & professionals.
- Offers “Import from CSV” feature to boost the migration process.
- Remove data redundancy & cluttering with its incremental feature.
- Upload PST file to Office 365 groups instantly within a few clicks.
- Get the PST file data in the desired mailbox by mapping it with the tool.
- Different filters like date, item type, and deleted or empty folder help in selective migration.
Let's check out the tool's functionality to understand its features and credibility more.
Step 1. Download & install the software to the local system.
Step 2. Access the software and tap on the Add option to select the desired PST file from its locations.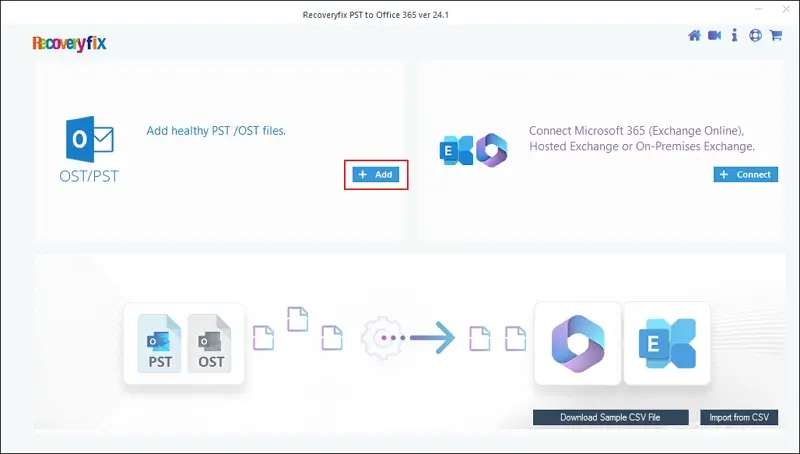
Step 3. Once the PST file is loaded in the tool, hit the Connect option to log into your Office 365 accounts.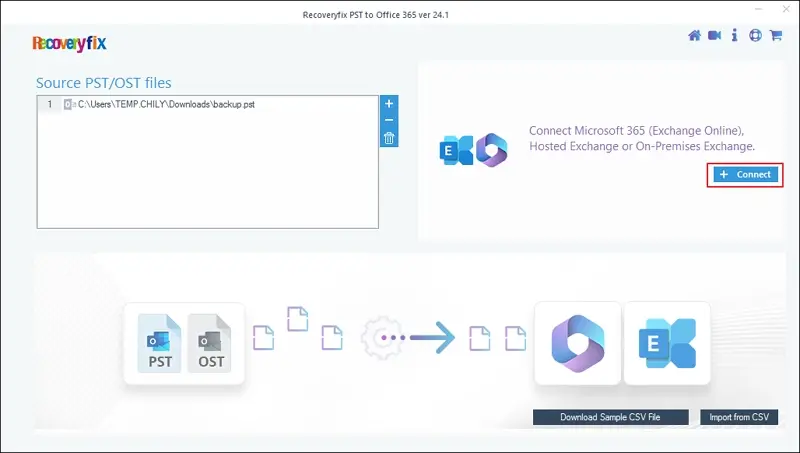
Step 4. Tap on use Modern Authentication, followed by clicking on the OK option.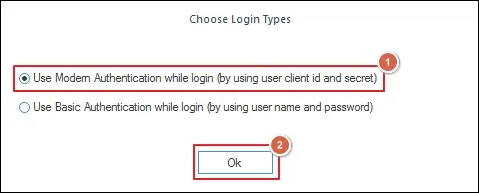
Step 5. Provide the required details like Tenant ID, Client ID, & Client Secret Value in the respective sections. Select Single Mailbox or List all Mailboxes as required & tap on the Add option.
Step 6. Map the desired PST files & destination mailboxes using suitable icons. Click on the Set Filter and Migrate option.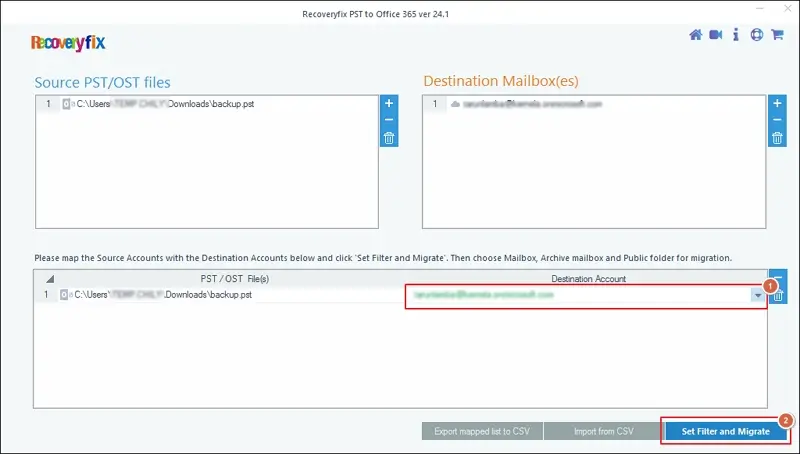
Step 7. Choose the desired folder in the destination, such as Mailbox, Archive Mailbox, or Public Folder. Then tap on the Migrate option.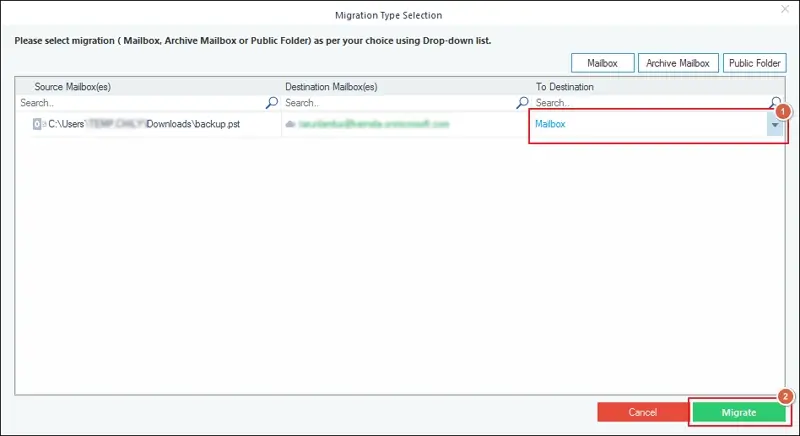
Step 8. In the next section, choose the desired filters & select the I am OK, Start Migration option.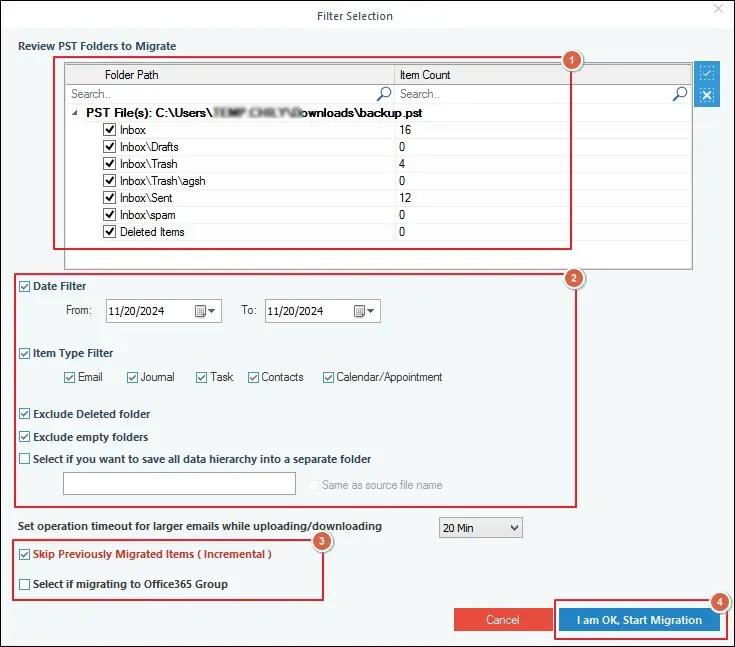
Step 9. It will begin the process. You will get a prompt message: "Process completed. Please save the report to CSV". Save the report in CSV format & click on the OK option to end the process.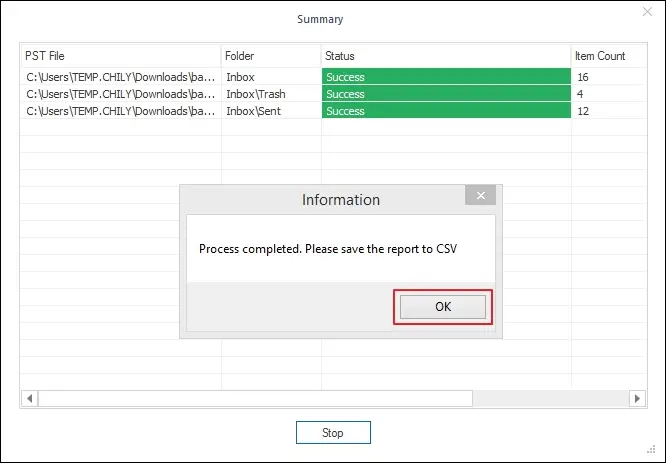
Closing Remarks!
Improper handling of multiple PST files leads to issues like missing data, delayed response time & many more. Throughout the blog, we have highlighted how you can reduce the burden of managing multiple PST files & reduce the chances of facing issues.
Besides that, we suggested the best-automated solution to upload PST file to Office 365 without Outlook in a few steps with complete accuracy. For hands-on experience, check out the software’s free trial version by which you can import PST to Office 365 with a limited number of items..
FAQs: Remove Your Doubts!
Q1- Is it possible to upload PST file into Office 365 public folder separately?
Using the professional PST to Office 365 tool features, you can import PST file to Office 365 public folder easily. Just map your PST files with the Public Folders as the destination & get the desired results.
Q2- How can I locate the PST file’s location in the local system?
You can follow the provided paths to locate your PST files: Open Outlook. Select File > Account Settings > Account Settings > Data File. Select the desired account & click on the Open File Location.
Or
C:\Users\
or
C:\Users\