Managing emails in a shared mailbox is crucial for team collaboration, but what if your data is stored locally in PST format? However, the process of importing PST files to shared mailbox is not simple as you think. Issues like permissions, file size limits, and migration errors can complicate the process.
But don’t worry! The blog will provide a step-by-step guide to transfer your PST data without losing emails or any downtime.
Why do users look to import PST to Shared Mailboxes in Office 365?
Users import PST files to shared mailboxes in Office 365 for various practical reasons, including collaboration and data accessibility. Here are some of the key reasons for this.
- Centralized email system allows organization members to access historical emails for smooth collaboration and reference without depending on individual accounts.
- Data backup & retention provides the ability to secure important emails, contacts, and attachments for compliance and future reference.
- Employee offboarding can drive organizations to import PST into shared mailboxes so team members can access past communications.
- Organizations merge multiple PST files into shared mailboxes to reduce data duplication and improve team accessibility.
- Businesses retain email records in shared mailboxes to meet legal and compliance requirements as per industry standards.
- Storing emails in a shared mailbox makes it easier to categorize, archive, and retrieve important messages when needed.
What is the best solution to import PST to Shared mailboxes in Office 365?
Manual methods to import PST into Shared Mailbox in Office 365 can be complex, time-consuming, and prone to errors. They often require technical expertise and don’t provide any data safety.
Therefore, you must rely on advanced solutions like Recoveryfix PST to Office 365 for a smooth and hassle-free experience. The Import PST to Microsoft 365 simplifies the import process and allows you to migrate bulk data securely. Along with that, it ensures secure, accurate, and instant migration without any data loss.
Step-by-Step Guide to Import PST file to Shared Mailbox in Office 365
Follow the detailed steps to perform the import PST to shared mailbox Office 365 process using this advanced solution.
Step 1. Launch the software and click on the Add option to select PST files from the local drive.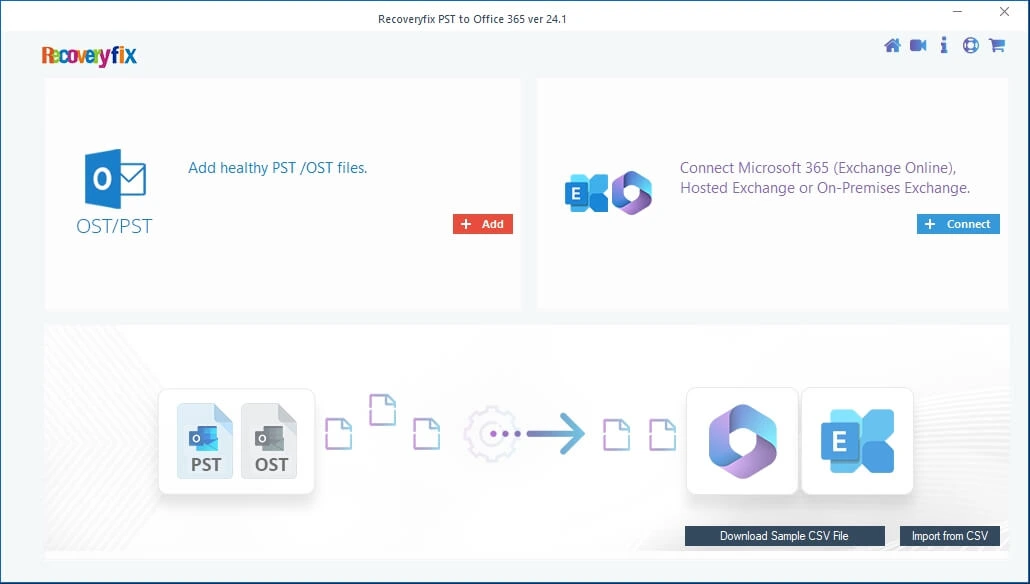
Step 2. Choose the required files and click on Open to proceed.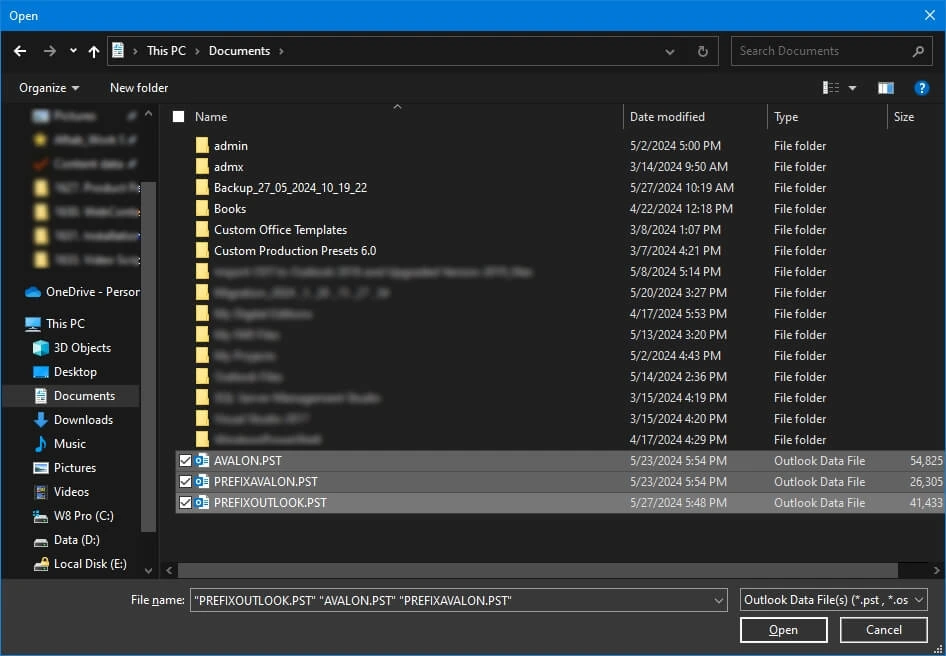
Step 3. It will add the PST files to the application. Then, tap on the Connect option to log in with your Office 365 account.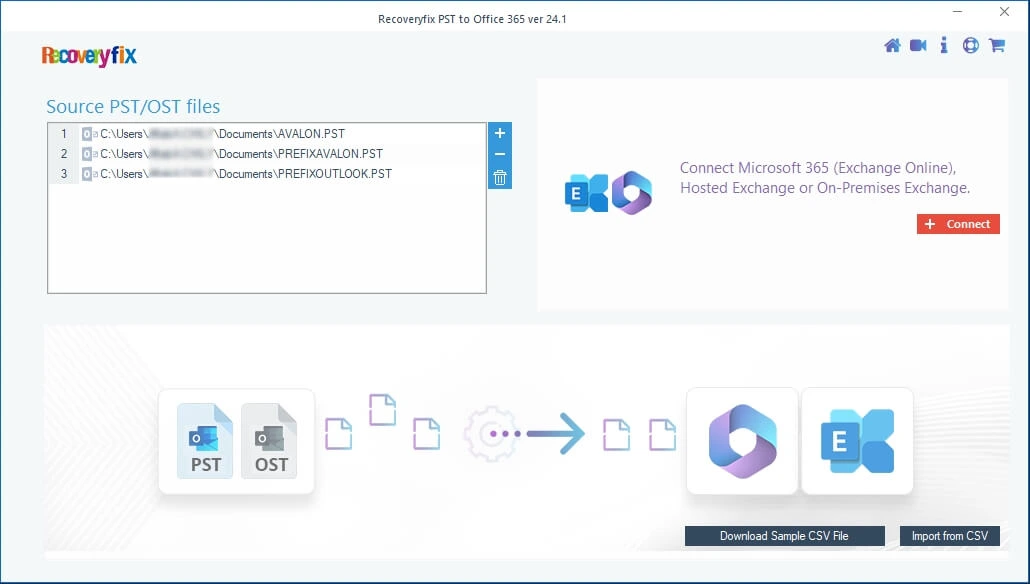
Step 4. Select Modern Authentication as login type and click OK.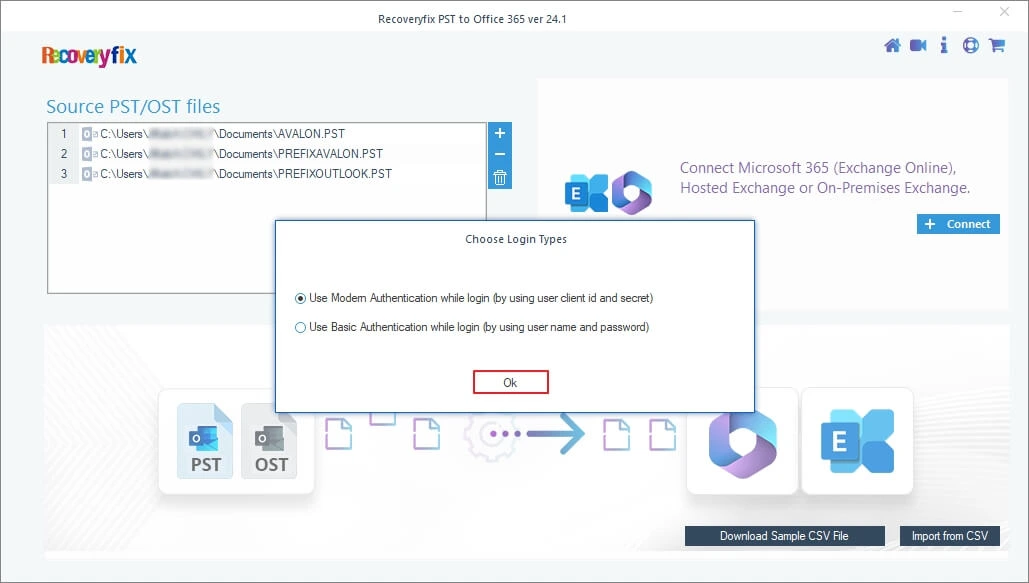
Step 5. Type the necessary details like Tenant ID, Client ID, and Client Secret Value to connect your Office 365 account. Then, choose List all mailboxes using above credentials and proceed to Get User Mailbox(es) option. Check the boxes to select your associated shared mailboxes and click Add.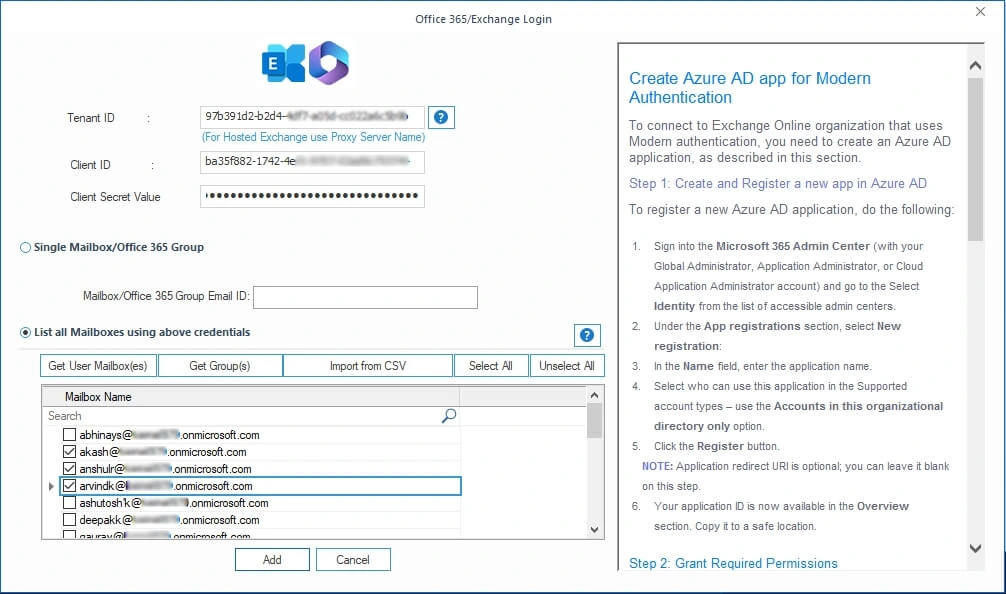
Step 6. Use the drop-down list to map PST files with Destination Account. Once done, tap on Set Filter and Migrate.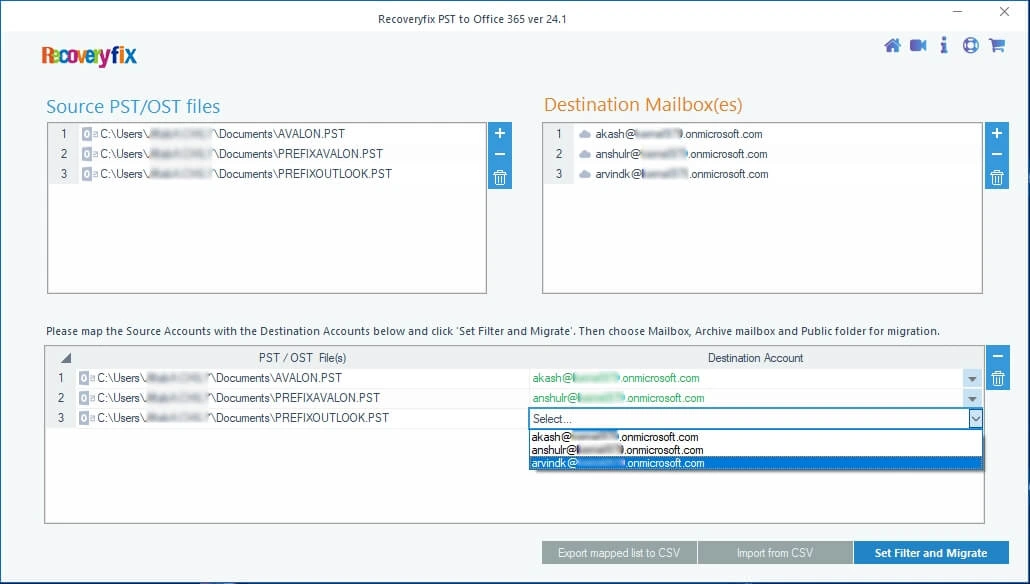
Step 7. Select the appropriate type of mailbox and proceed to the Migrate option.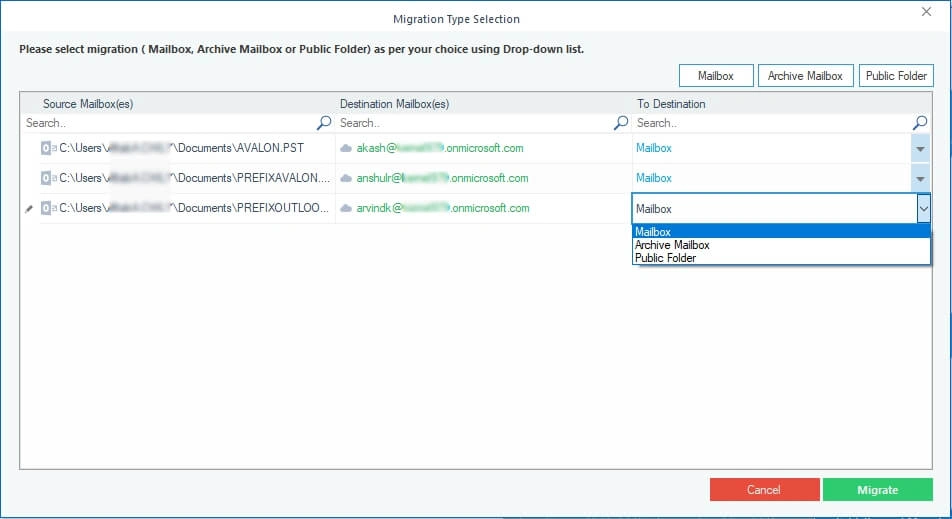
Step 8. Apply the filters to sort data and click on I am OK, Start Migration.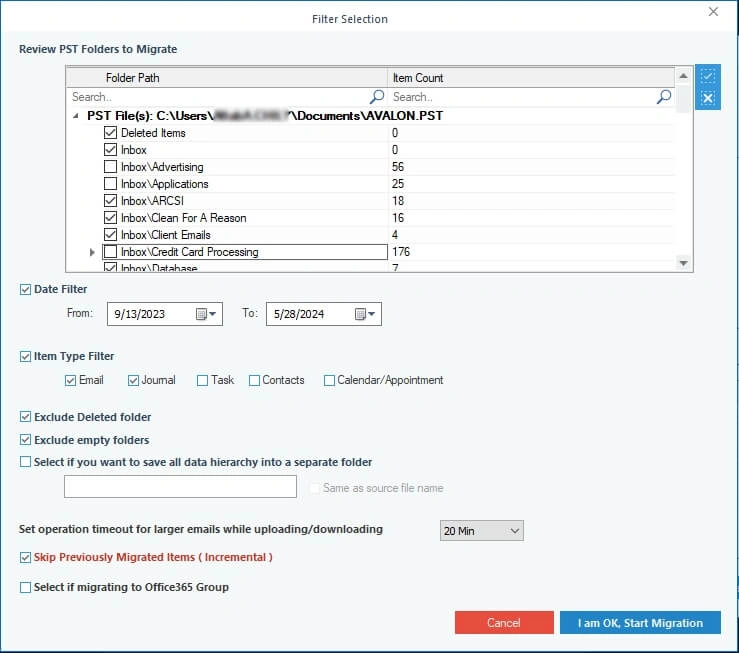
Step 9. It will begin the migration process.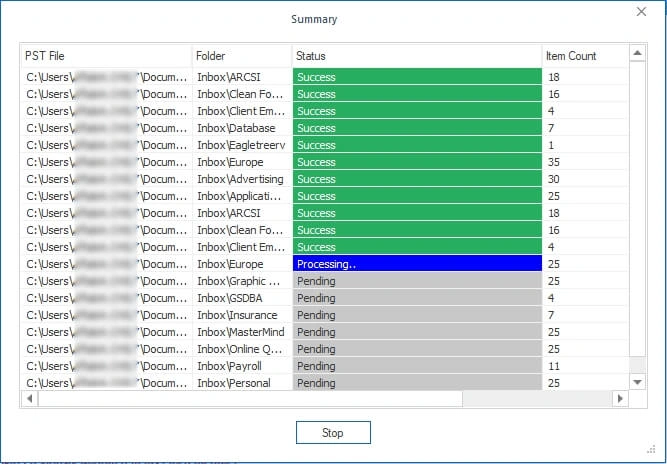
Step 10. You will get a confirmation message when the process is completed. Then, Save the report to CSV format and click OK.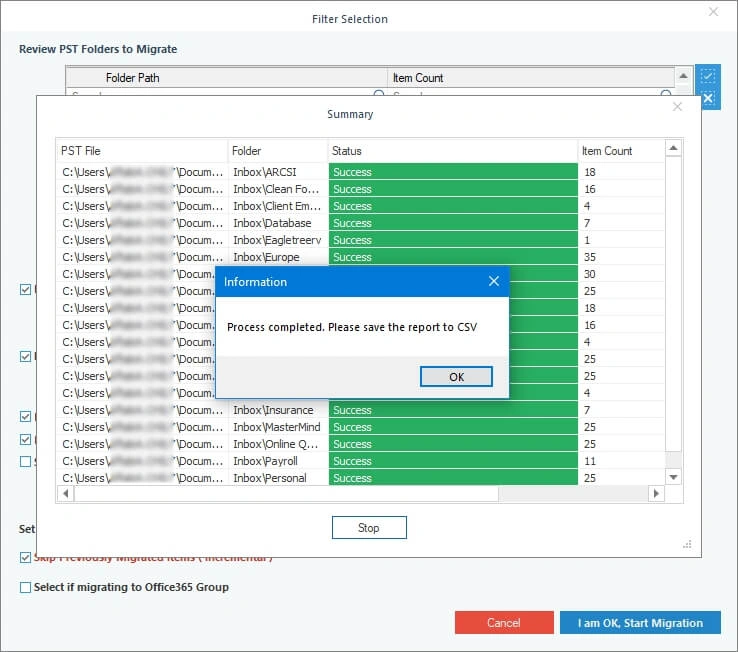
Beyond Migration: Additional Perks for Maximum Efficiency
The software also provides several advanced features besides performing the import PST file to shared mailbox Office 365 process with ease. Explore these features in the following section.
- Move OST file data to Exchange Server, including Online, On-premises, and hosted.
- Automate the process for frequent users with CSV file-base migration.
- Migrate important data directly to Office 365 Groups without extra effort.
- Map the PST file to transfer its data to your desired Microsoft 365 mailboxes.
- Remove data duplication issues with its Incremental migration features.
- Save the detailed migration reports to track down mailbox items.
End Notes
We hope you understood how to import PST to Shared Mailbox in Office 365. Although you can use manual solutions, they come with risks like data corruption and longer processing times.
Hence, we have recommended a professional tool to avoid the limitations of native approaches. Its intuitive interface simplifies the import PST files to Exchange Online process for all kinds of users.
So, save time, avoid frustration, and organize your shared mailbox with our best solution.
Quick Help & Answers
Q1. How do I import PST to shared mailbox Office 365 PowerShell?
Ans. You can use PowerShell to import PST to a shared mailbox by running the New-MailboxImportRequest command. This method requires the PST file to be stored in an accessible network location and mapped correctly before executing the import process.
Q2. How to import PST to shared mailbox Office 365 without using the Import Service?
Ans. You can use automated solutions like Recoveryfix to import your PST files to a shared mailbox without using the Import Service. The method works efficiently even for large PST files. It also provides advanced filters to migrate specific data.
Q3. How can I import PST to Office 365 using the admin center?
Ans. You can use the following steps to migrate Outlook to Office 365 using the admin center:
Go to the Compliance Center> select the Import option> upload your PST file. After mapping the data to mailboxes> Office 365 will start the import process to make emails accessible in their respective folders.
Q4. Can I import PST to Office 365 webmail directly?
Ans. No, you cannot directly import your PST files to Microsoft 365 webmail, as Outlook Web App (OWA) does not support PST imports. Instead, you can import the PST file into an Outlook desktop application first, which will sync the data with your webmail later.
Q5. How do I import PST to Outlook without losing emails or attachments?
Ans. You can use the built-in Import/Export utility of the Outlook application to import your PST files safely. Choose Import from another program or file and select PST file. Make sure that the Do not import duplicates option is checked to prevent data loss from overwriting issues.