A Shared mailbox is an excellent way to communicate with clients more efficiently. All the users who have permissions can access these mailboxes at the same time. Organizations utilize these mailboxes to read and respond immediately to received email messages based on their requirements. Generic emails like Sales, Support, and Accounts are examples of it. However, when organizations plan mergers or acquisitions of their business, they need these shared mailbox data to migrate to their current Office 365 account. Hence, the blog guides you with a detailed process to migrate shared mailbox to Office 365 with easy-to-follow steps.
Reliable method to migrate a Shared Mailbox to Office 365
Manual solutions can't be able to move shared mailbox to Office 365 directly. Therefore, the best approach is opting for automated solutions like Recoveryfix Migration for Microsoft 365. Since it helps you to migrate shared mailbox to O365 along with the assistance of several features. The list of features is as follows:
- Migrate components such as Primary Mailbox, Archive Mailbox, Public Folder, Groups, and many others to Office 365 in one go.
- It comes with modern and basic authentication, which are both login modes for your convenience.
- Provide complete control over the migration process with its advanced data filtering options.
- Transfer data between Primary Mailbox, Archive Mailbox, Public Folder, and Office 365 Groups with ease.
- Offer Incremental migration to skip already migrated data for better data organization.
Let’s go through the step-by-step process to migrate shared mailbox to Office 365 with this Office 365 migration software.
Step 1. Download the Recoveryfix Migration for Microsoft 365 software.
Step 2. Install and open the software in your system.
Step 3. Tap on Connect option to add a source tenant.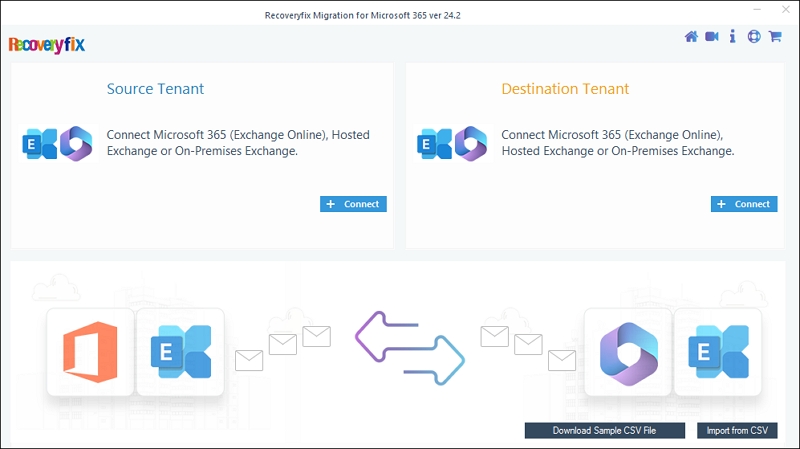
Step 4. Select Modern Authentication as login type and click OK.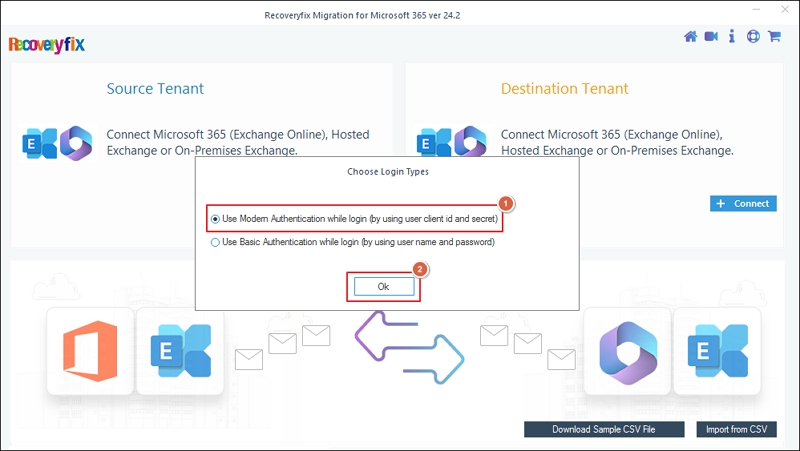
Step 5. Type your source account details, such as Tenant ID, Client ID, Client Secret Value, and mailbox Email ID, and click Add.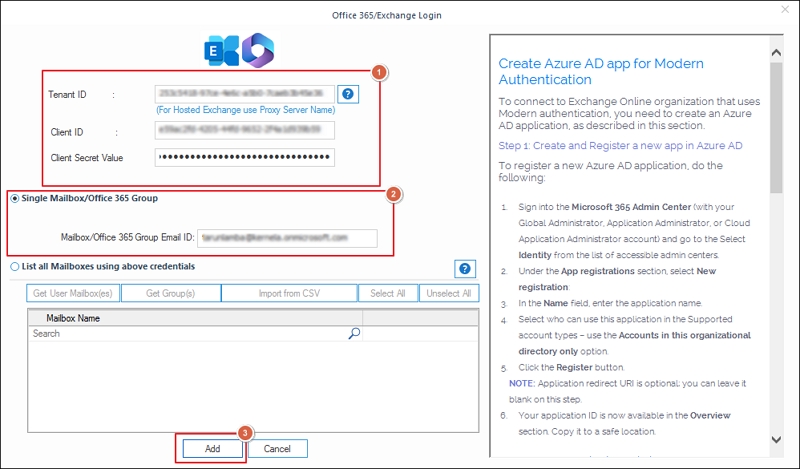
Step 6. Click on Connect option to add destination when the source is successfully added.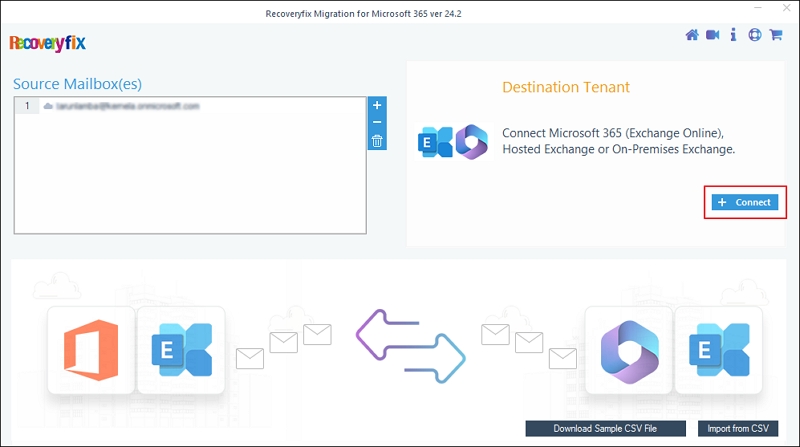
Step 7. Now, choose Modern Authentication as login type and click OK.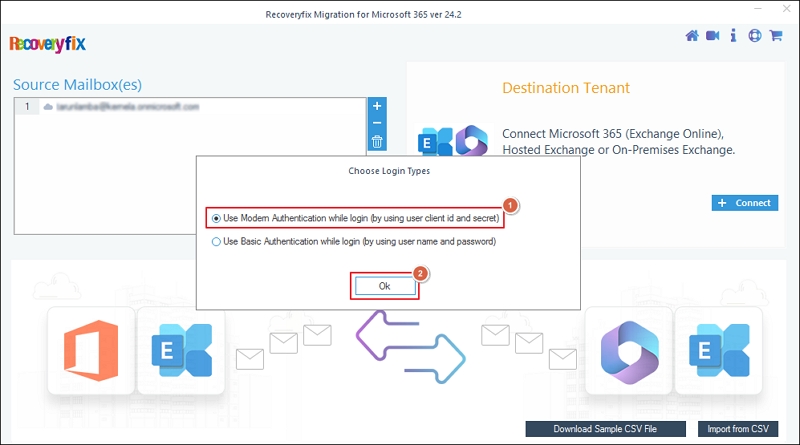
Step 8. Enter your destination account details, such as Tenant ID, Client ID, Client Secret Value, and mailbox Email ID, and proceed to Add.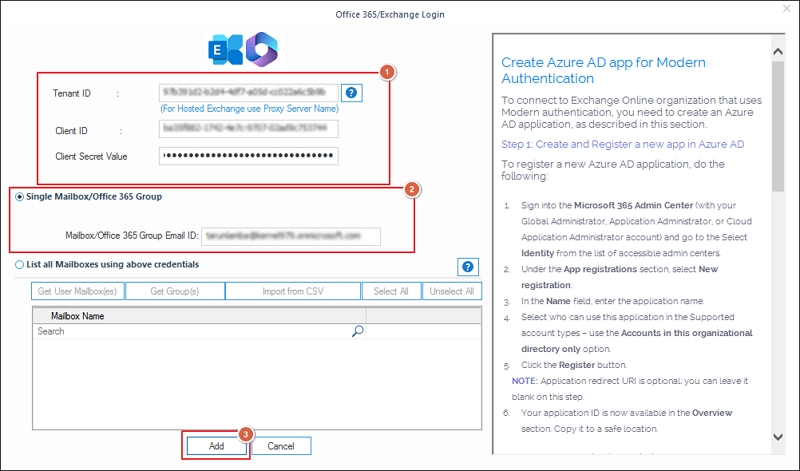
Step 9. Map your destination account using the drop-down option and click Set Filter and Migrate.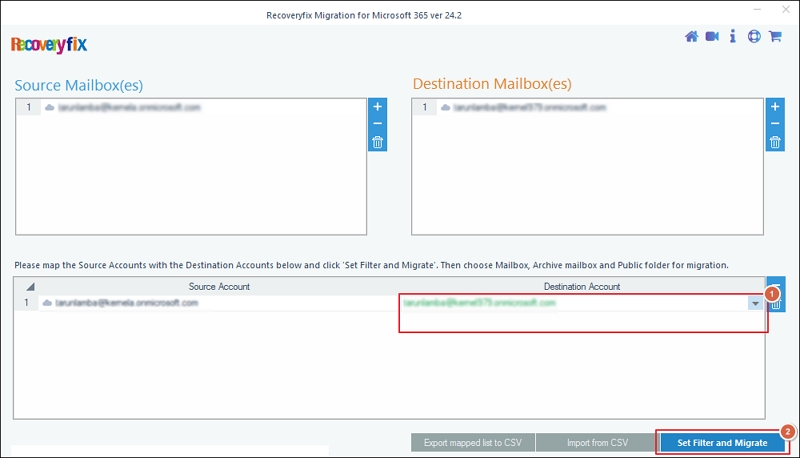
Step 10. Apply data filters like Date Filter, Item Type Filter, Exclude Deleted folder, Exclude empty folders, and Incremental migration to sort data as needed. Then, tap on I am OK, Start Migration option.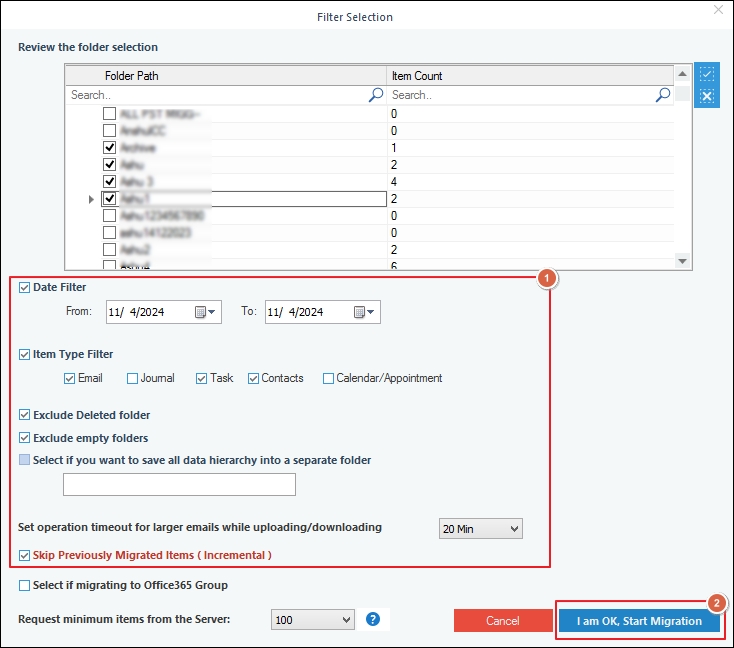
Step 11. It will begin the Shared mailbox to Office 365 migration procedure.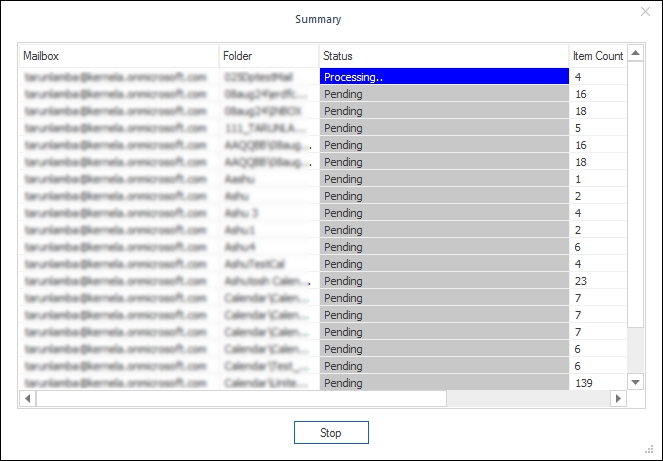
Step 12. Monitor the live migration progress on your screen and click OK to exit the process after it is completed.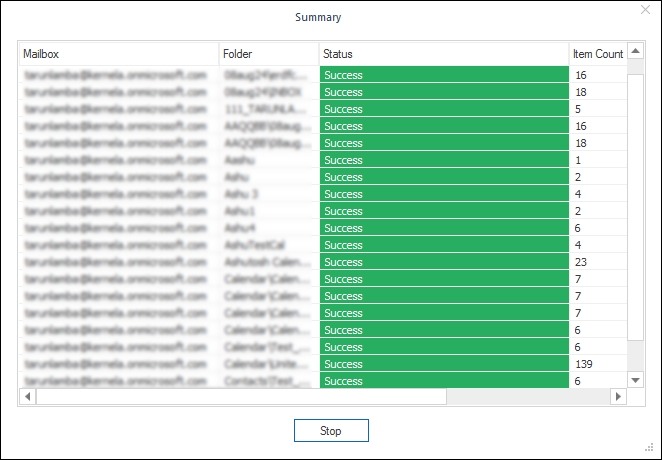
Wrap up
Since there are no manual solutions available to move shared mailbox to Office 365 directly. Therefore, the blog has covered a detailed process on how to migrate a shared mailbox to Office 365 using an automated solution. Recoveryfix Migration for Microsoft 365 software can easily convert shared mailbox to Office 365 group without any difficulty. Moreover, the software’s advanced data filtering options allow you to convert shared mailbox to Microsoft 365 group with accurate precision.