Office 365 is a cloud-powered productivity platform that offers cross-platform compatibility, including Windows and Mac systems. It allows businesses to create documents, presentations, and worksheets within a single or unified Office 365. Also, it facilitates safe storage and organization of your files in OneDrive, making them easily accessible among users from anywhere. All these advanced features make it a prominent choice among users.
To increase the productivity of business, users need to change or upgrade Microsoft 365 plans according to their requirements. That's why users need to perform Office 365 tenant to tenant migration.
Office 365 tenant to tenant migration - step by step procedure
Microsoft 365 tenant to tenant migration is one of the complex procedures. Therefore, it is highly recommended that you take assistance from a dedicated software for seamless migration. Recoveryfix Migration for Microsoft 365 is one such solution that can easily handle Microsoft tenant to tenant migration with ease. Apart from that, Microsoft 365 migration software comes with several features, including:
- Securely migrates between On-Premises Exchange, Hosted Exchange, or Exchange Online.
- Migrate data to Exchange Online components such as Primary Mailbox, Archive Mailbox, Public Folder, and many more.
- Advanced data filtering options for precise data migration from Office 365.
- Skip previously migrated data to avoid any duplicity during the migration process.
- Easily migrates mailbox data, including Primary Mailbox, Archive Mailbox, and Public Folder, to Office 365 Groups.
Now, let’s see how you can carry out Office 365 tenant to tenant migration step by step process using this software.
Step 1. Download the Recoveryfix Migration for Microsoft 365 software.
Step 2. Install and launch the software in your system.
Step 3. Click on Connect option to add a source tenant.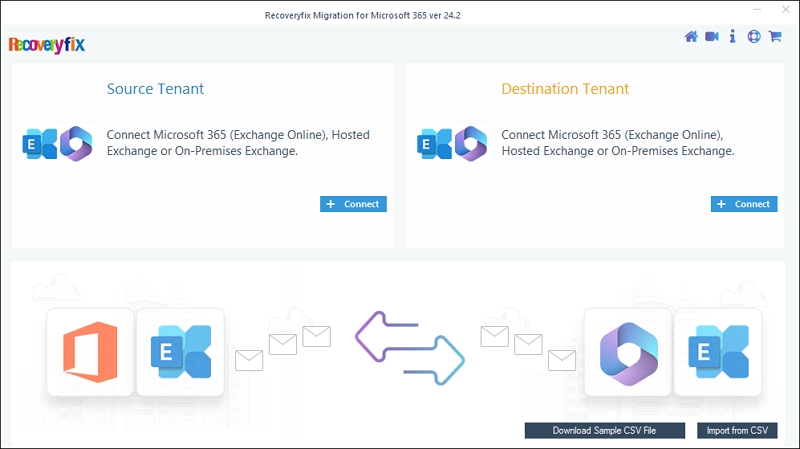
Step 4. Choose Modern Authentication as login type and click OK.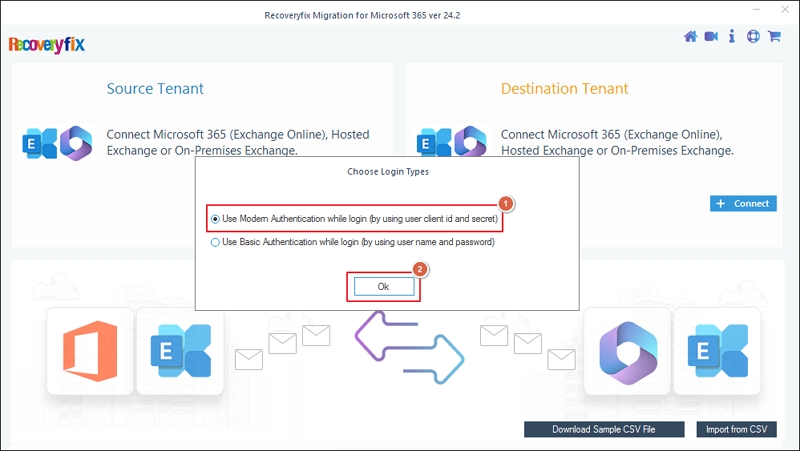
Step 5. Enter your source account details, such as Tenant ID, Client ID, Client Secret Value, and mailbox Email ID, and proceed to Add.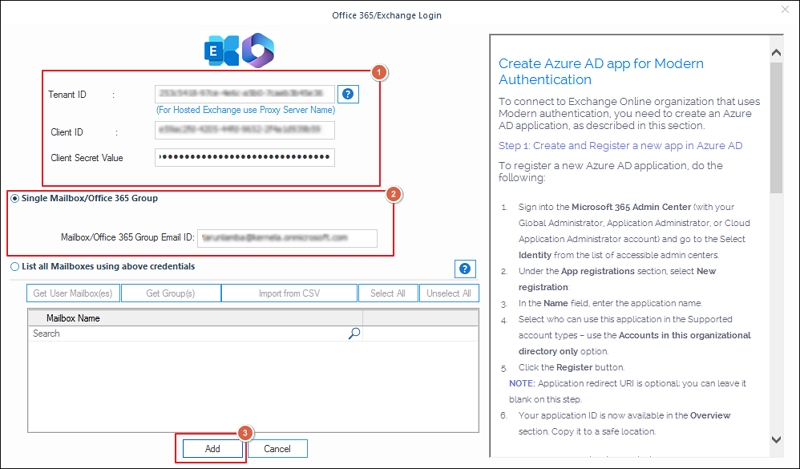
Step 6. Once the source is added, click on Connect option to add destination tenant.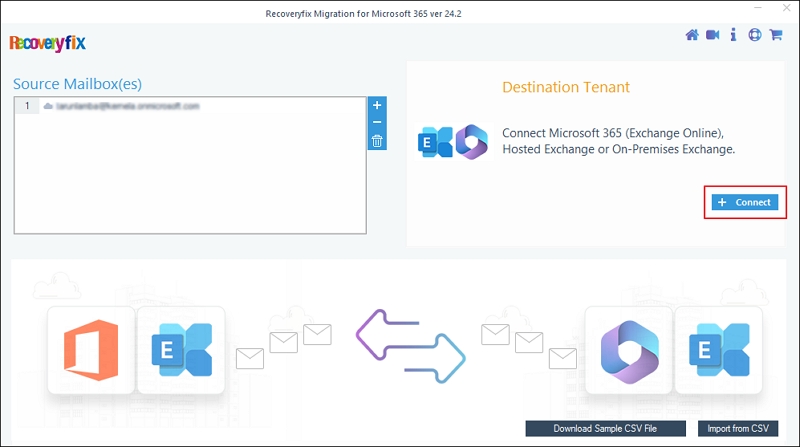
Step 7. Again, select Modern Authentication as login type and click OK.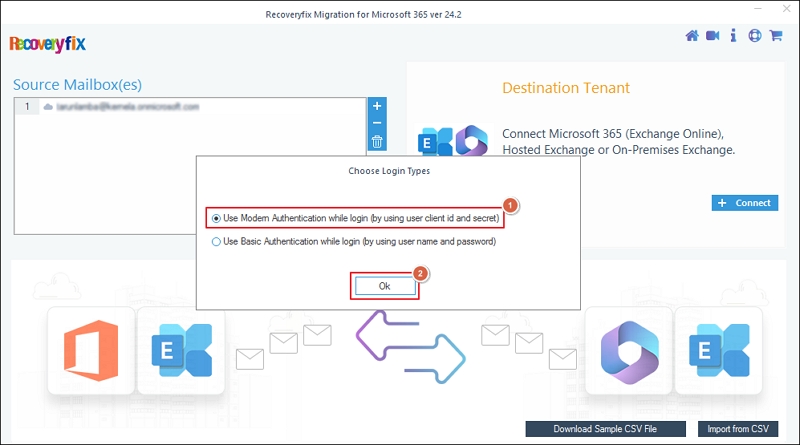
Step 8. Type your destination account details, such as Tenant ID, Client ID, Client Secret Value, and mailbox Email ID, and proceed to Add.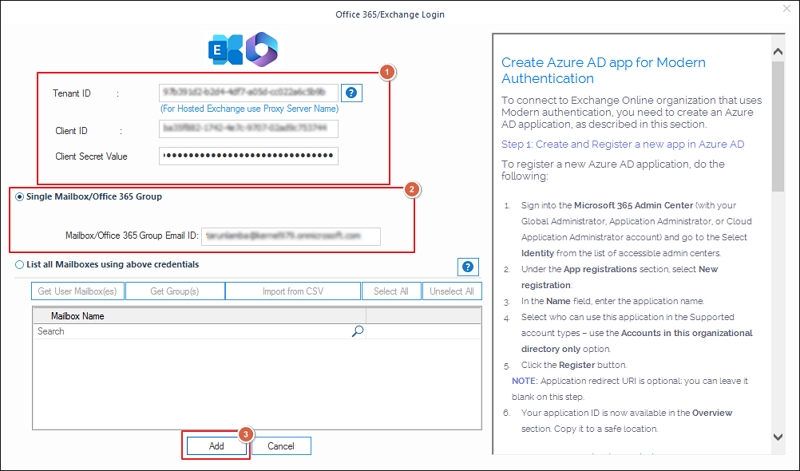
Step 9. Map your destination account using the drop-down option and click Set Filter and Migrate.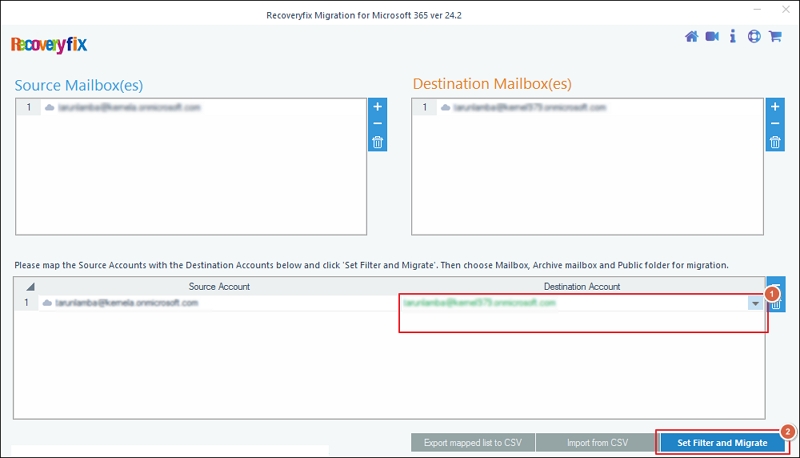
Step 10. Apply filters like Date Filter, Item Type Filter, Exclude Deleted folder, Exclude empty folders, and Incremental migration to sort data as needed. Then, click on I am OK, Start Migration option.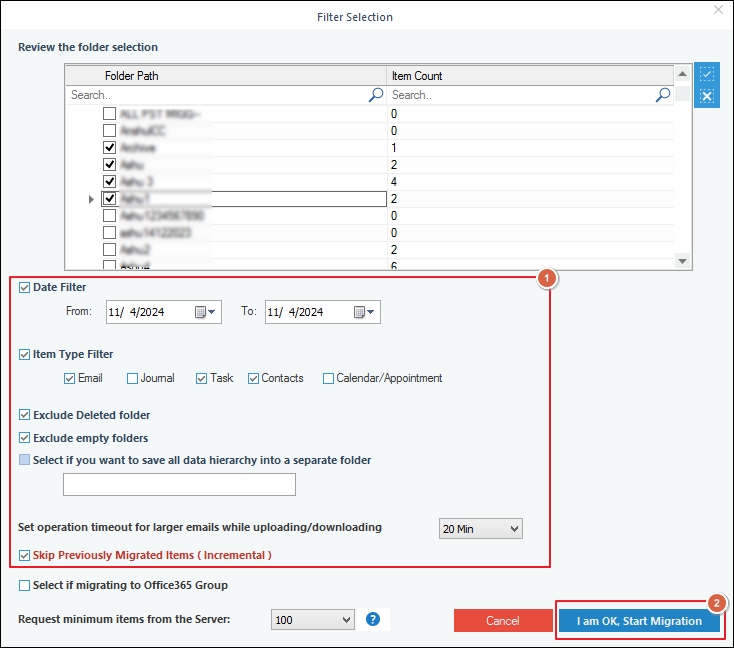
Step 11. This will initiate the migration process.
Step 12. You can monitor the live progress on your screen and click OK to exit the process after it is completed.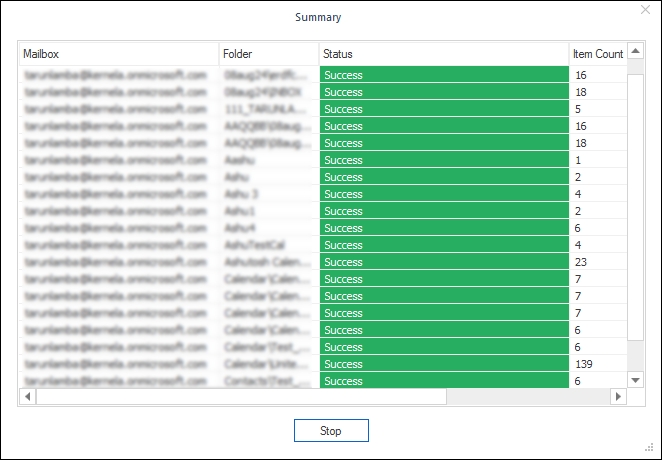
Conclusion
We have covered a detailed procedure for performing O365 tenant to tenant migration using an automated solution. Although manual solutions may exist, but you need to have a proper Microsoft 365 migration checklist to perform it. Also, it requires advanced technical expertise which makes the execution a hectic job. Hence, the recommended Recoveryfix Migration for Microsoft 365 solution will be the best approach to avoid these complexities. It not only performs smooth migration but also maintains the data hierarchy intact throughout the process.